Monthly Archives: November 2021
Drawing Larger than Life: Week 4 Toned ground or different medium
November 27, 2021
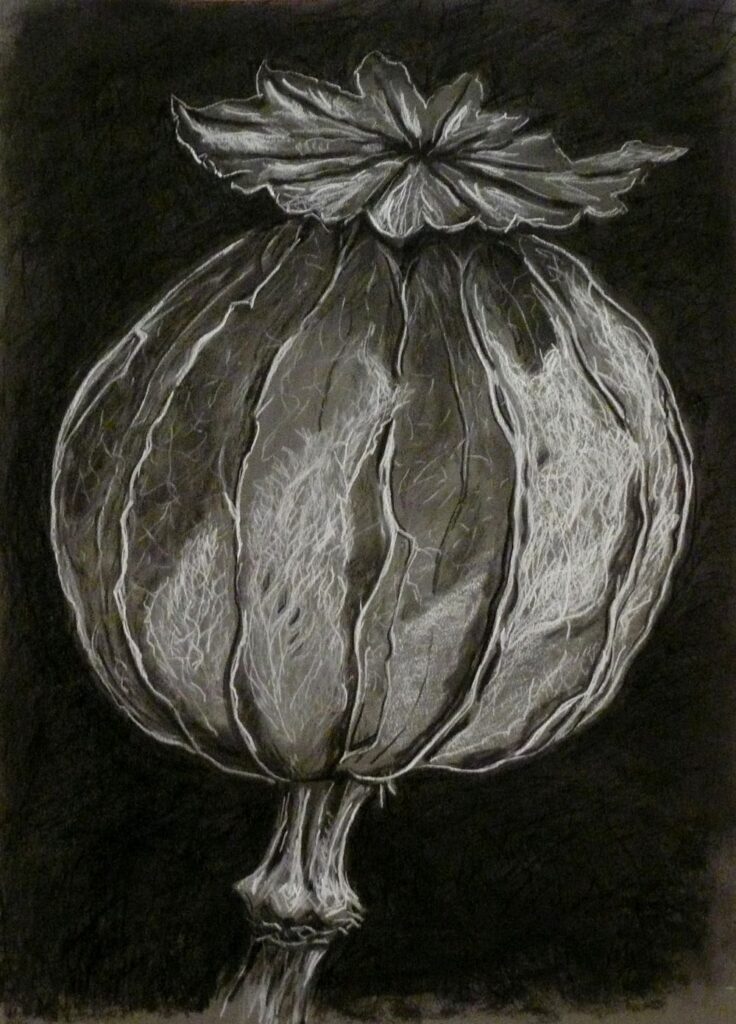
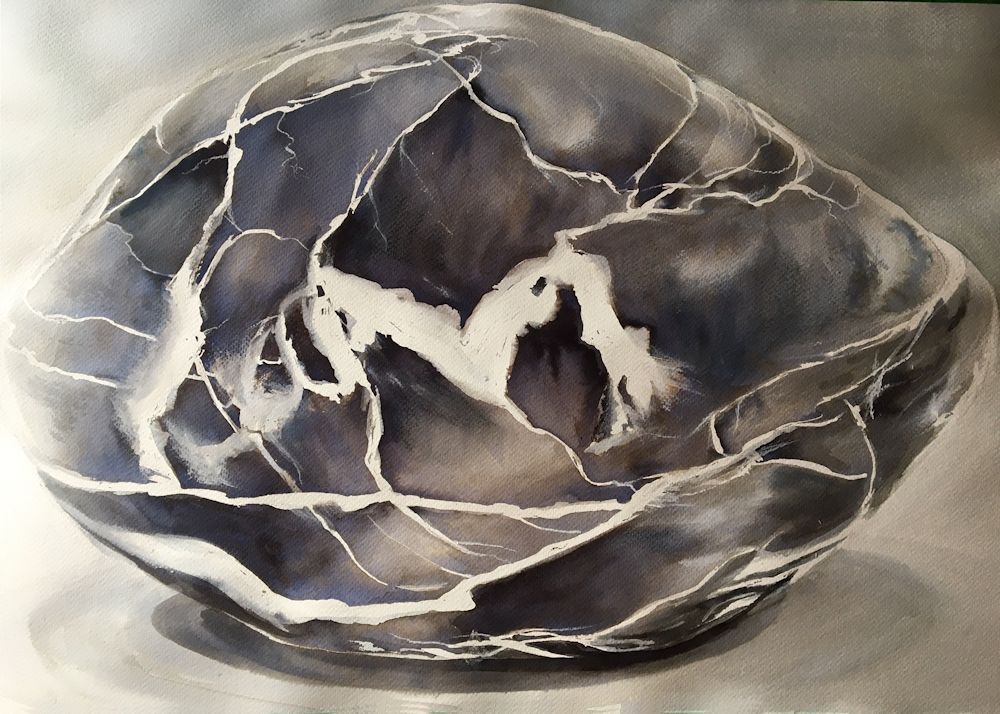
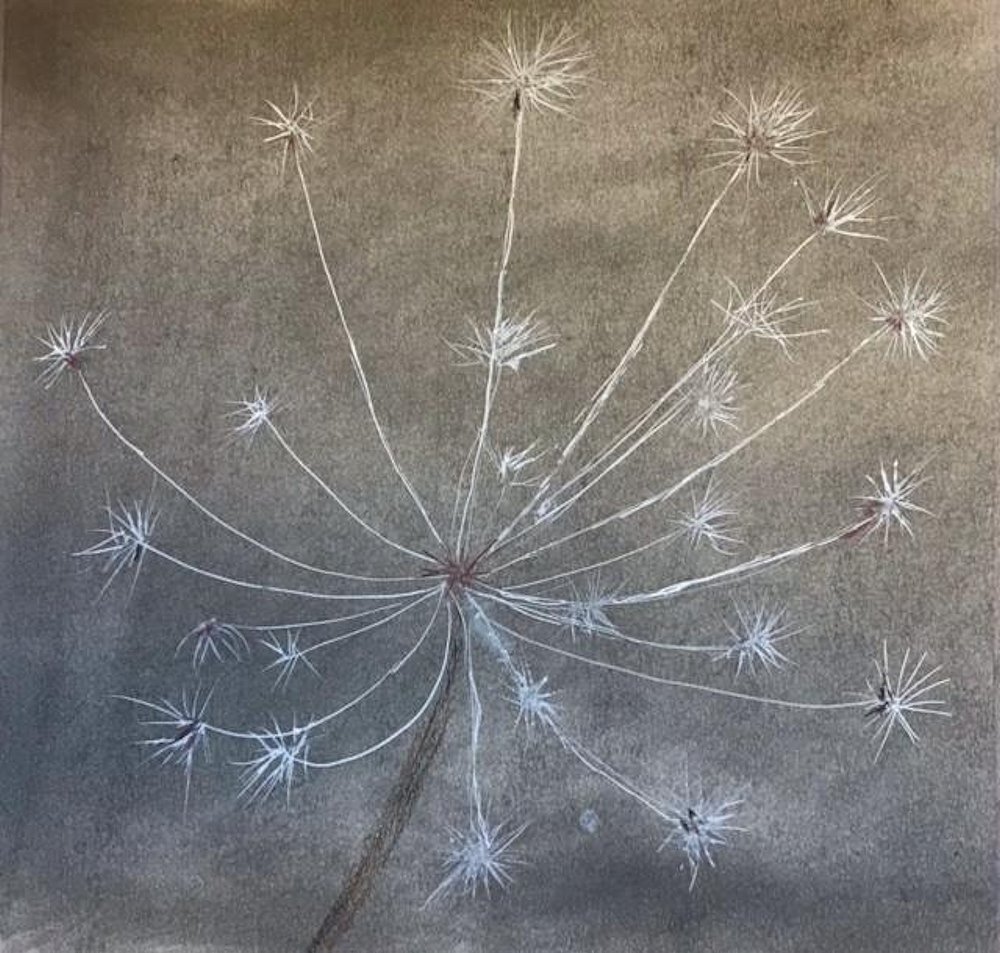
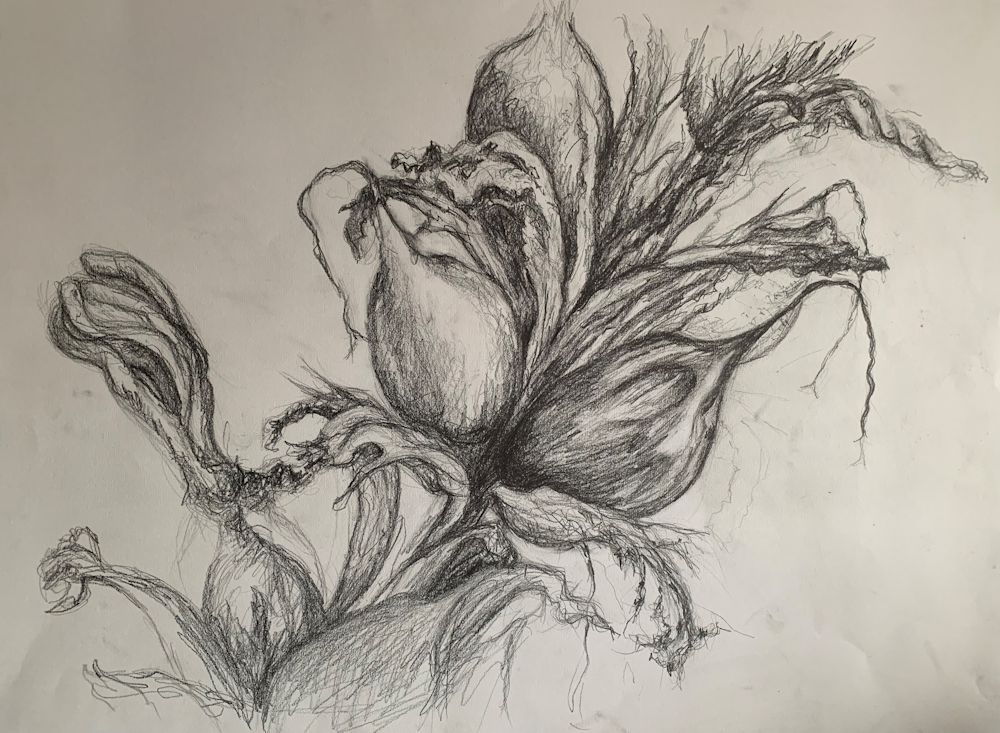
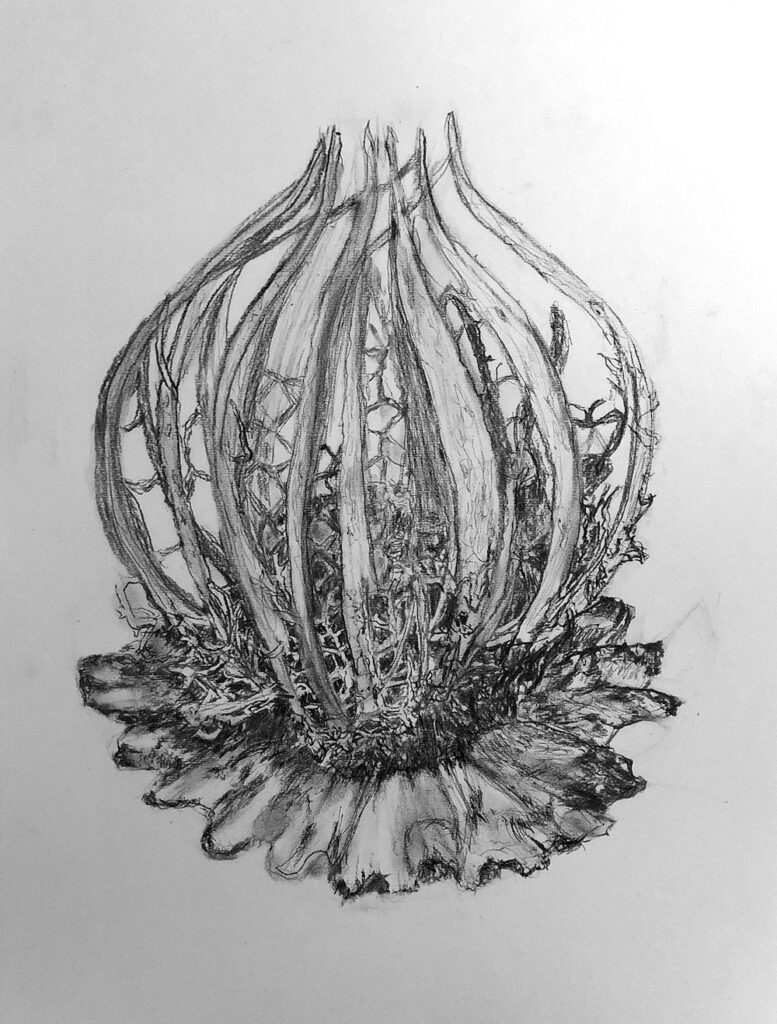
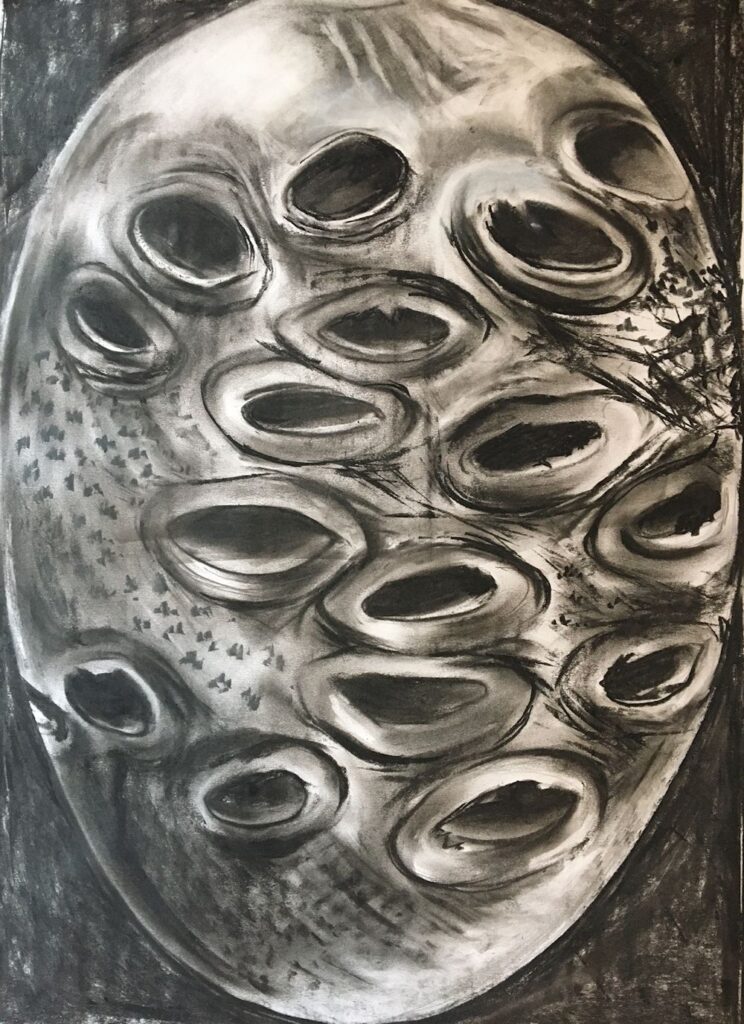
Dry and decaying: drawn on A2 medium grey paper in charcoal and white conte crayon
This week I ‘m encouraging everyone to use a coloured or grey A2 paper or to pick up a different drawing medium to that used so far. There are plenty to choose from; charcoal, ink, pastel or conte crayon etc. Coloured, grey or even black paper can help you think in different ways about tone; using the paper as a mid tone for example or working on black paper where the artist supplies the mid and pale tones.
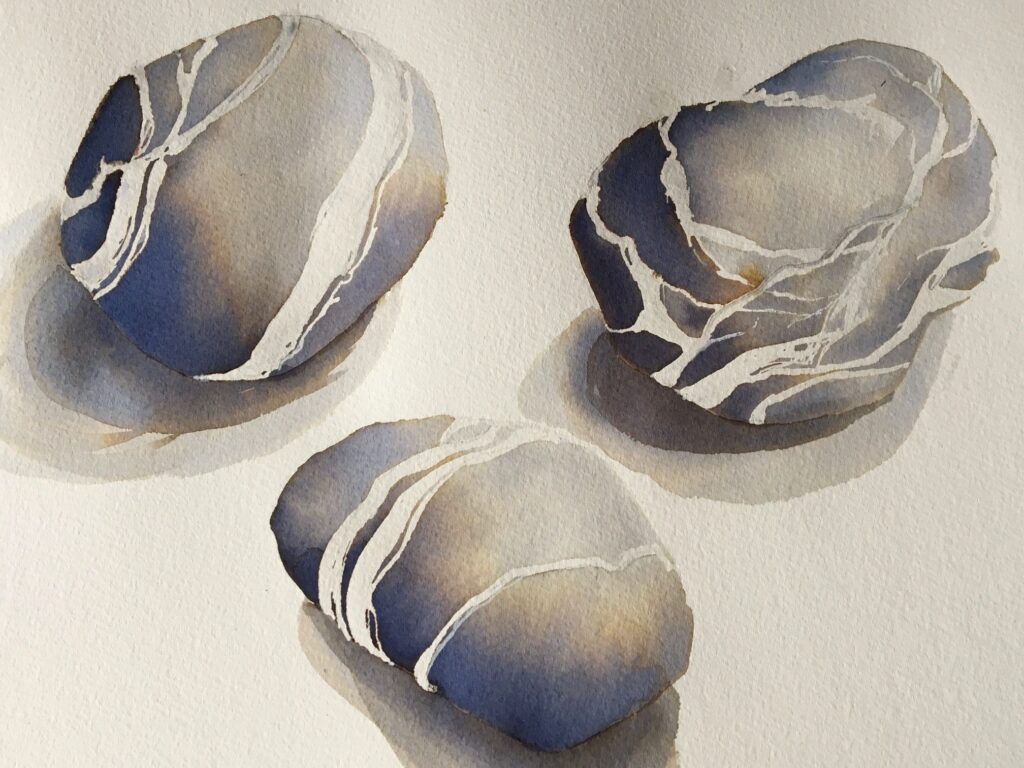
The following images were all drawn on white paper using a variety of media.
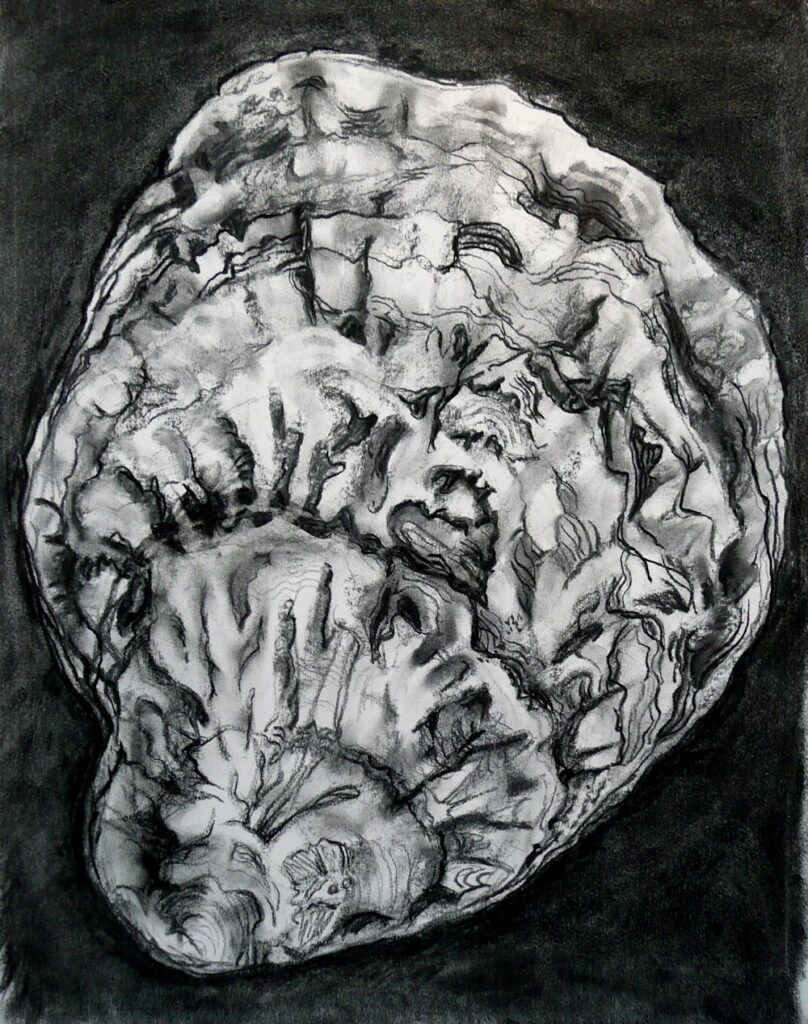
Charcoal

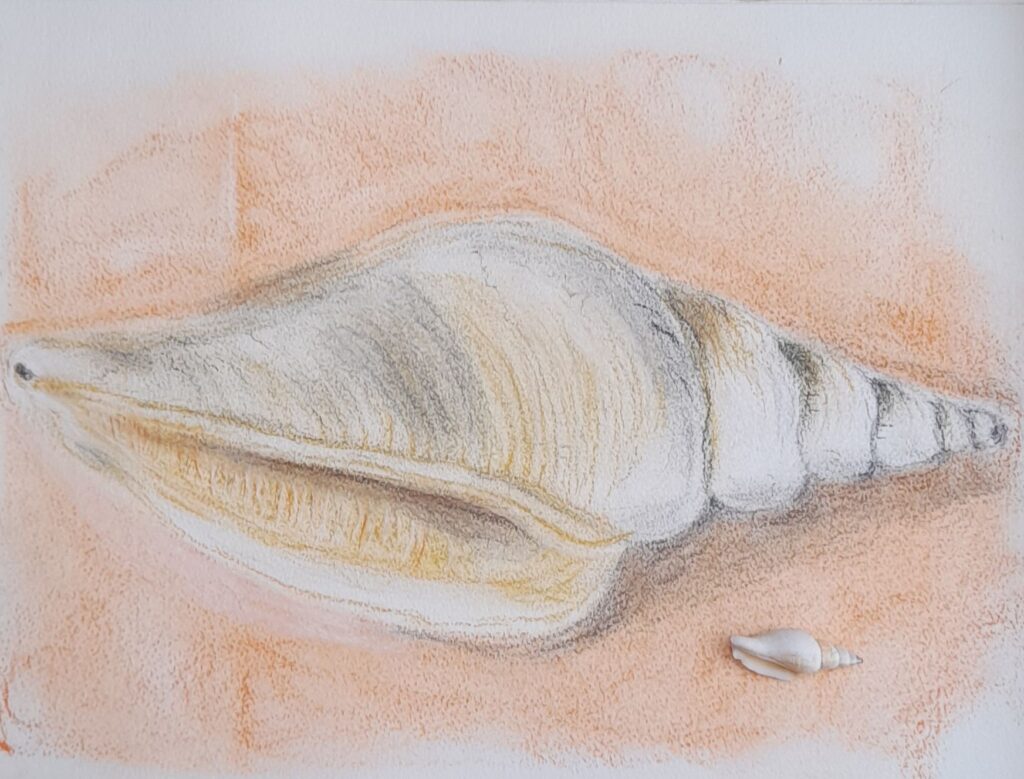
Graphite and tinted graphite blocks and pastel pencil
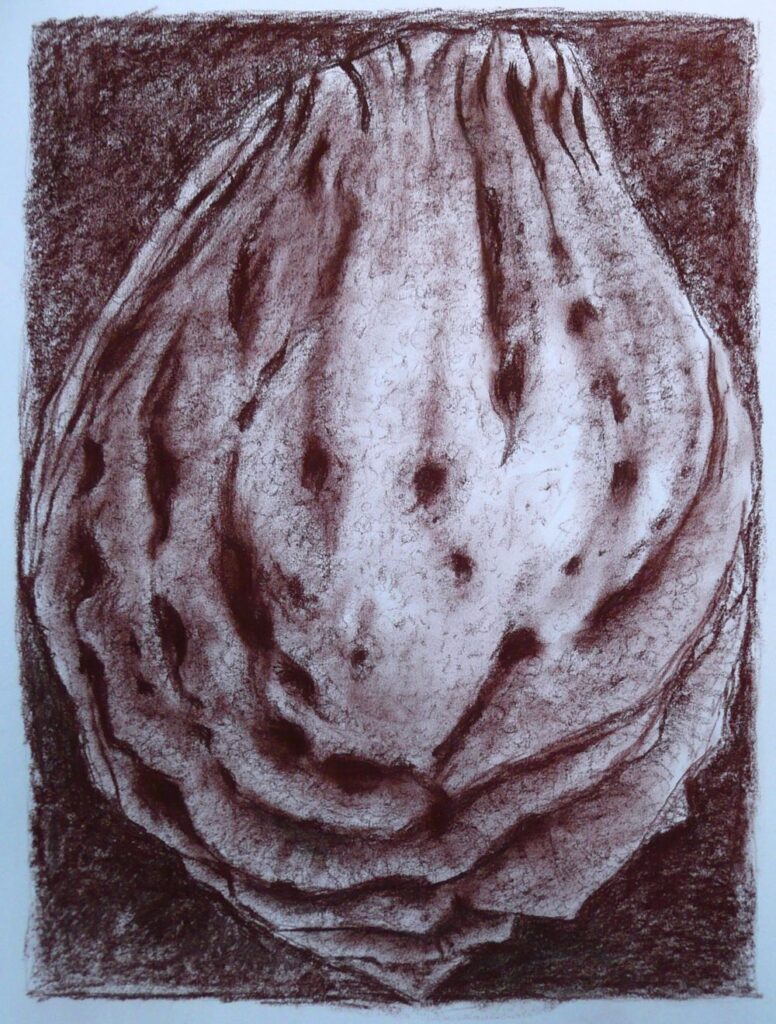
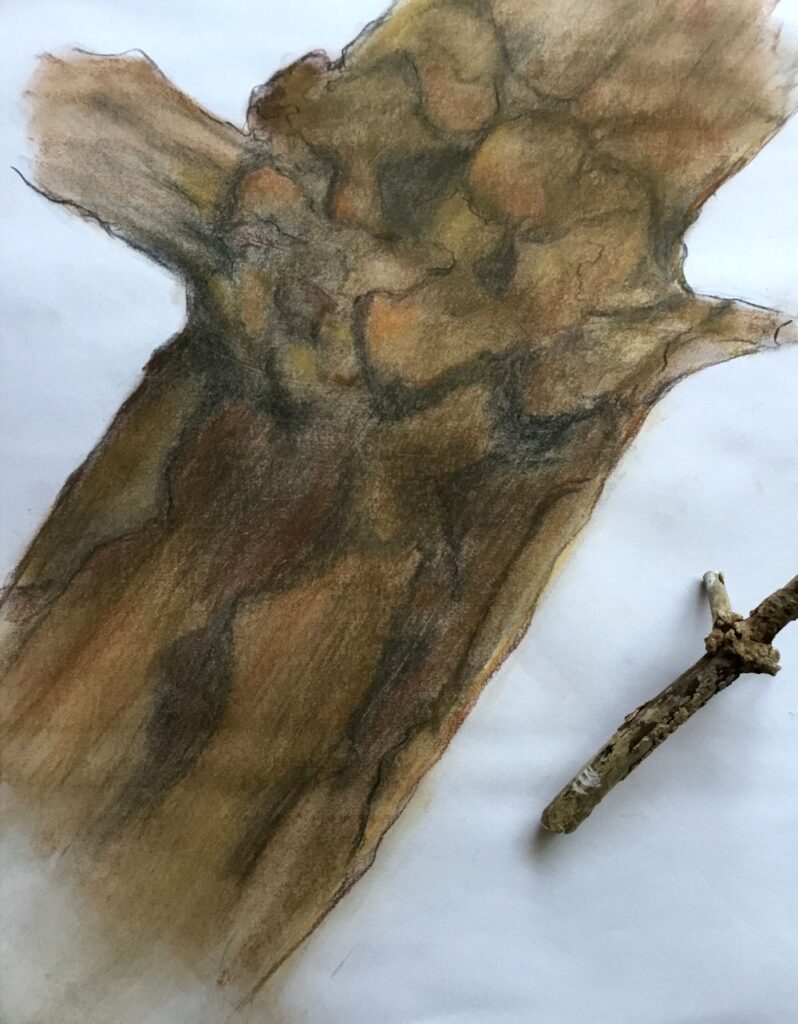
Brown conte crayon
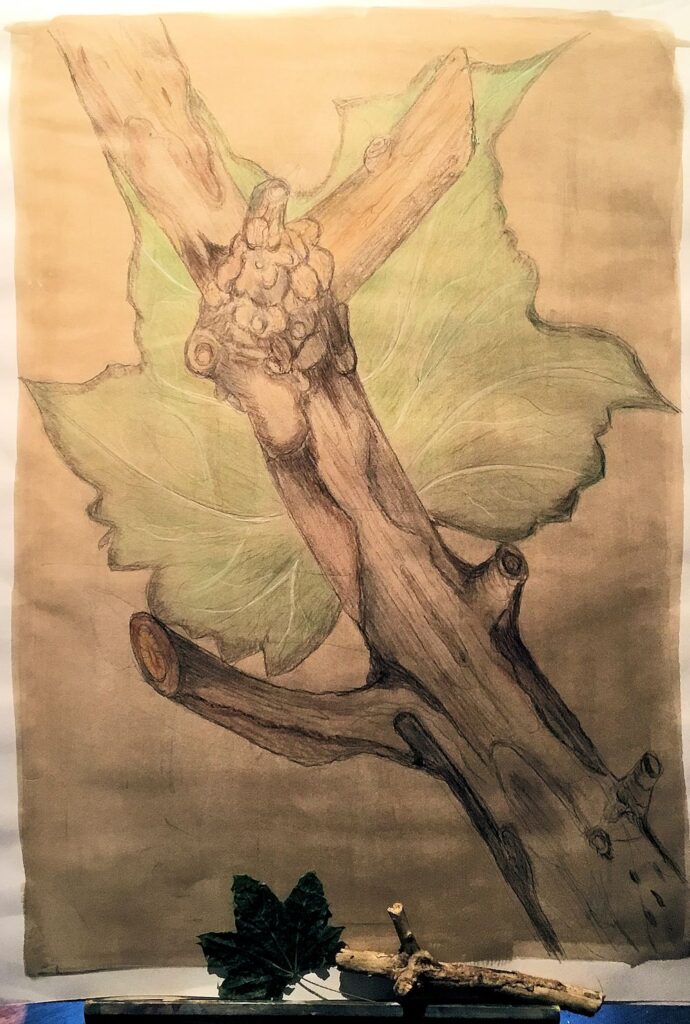
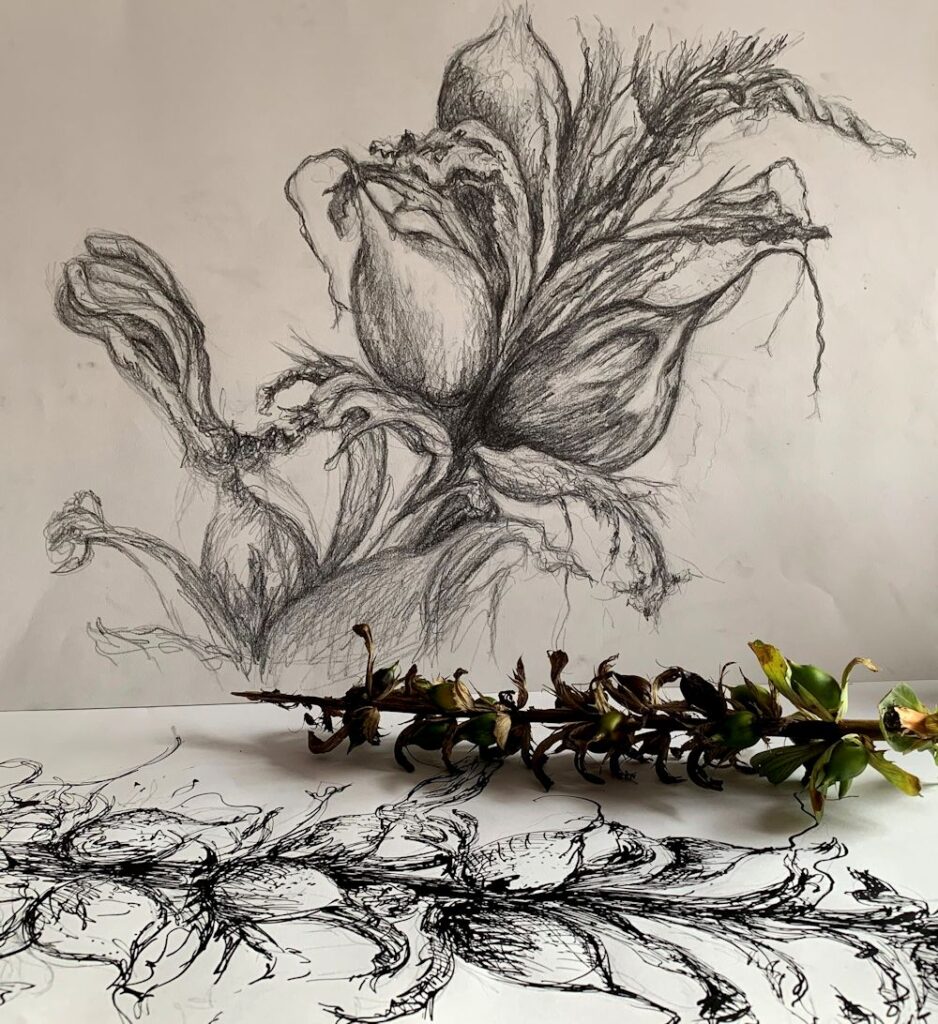
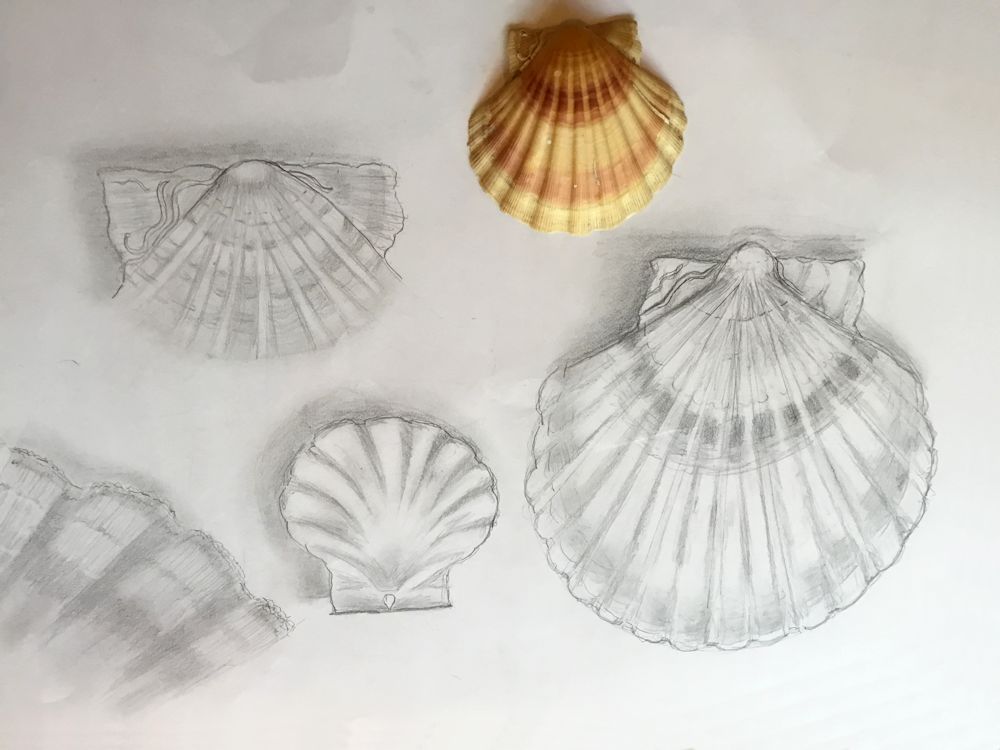
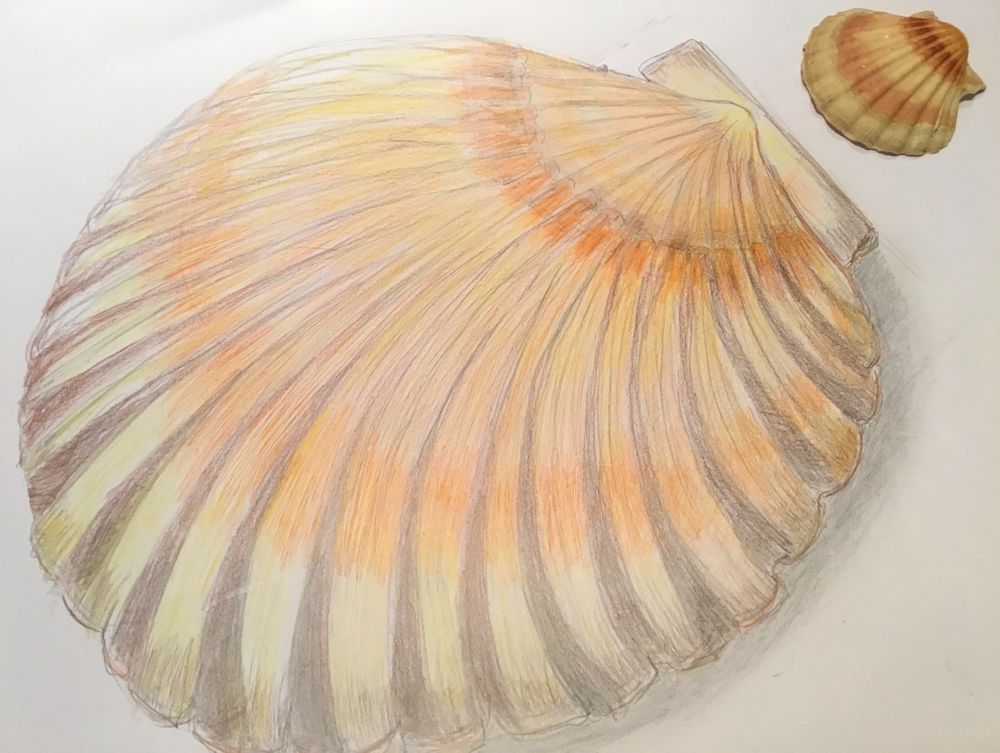
The subject is the same as last week, any small natural form that has to be greatly enlarged to fill an A2 or even A1 sized paper.
Your Drawings;

On green paper by Sarah

Blue-black Quink, bleach and pastel by Heather
by Ann
Quink, masking fluid and a touch of white pastel
Quink, masking fluid and white pastel
By Sandra
by Maricarmen
Drawing Larger than Life Week 3: More Challenging Sculptural Forms
November 18, 2021
This weeks challenge will be to draw a more challenging form. The drawings should show the three dimensional form of your chosen object and also communicate surface structures and patterns with mark making.
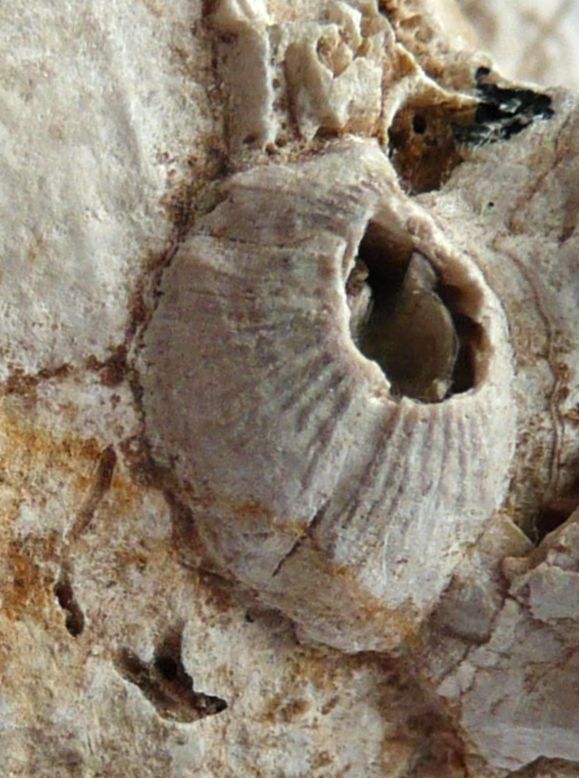
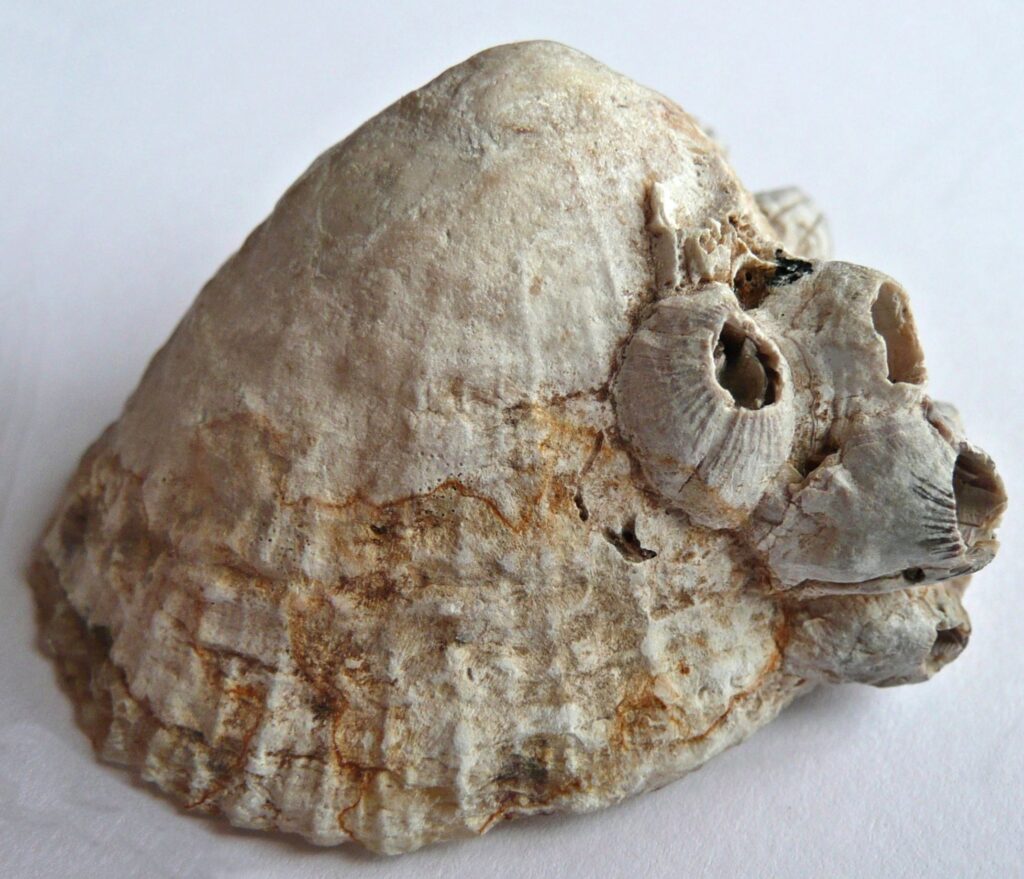
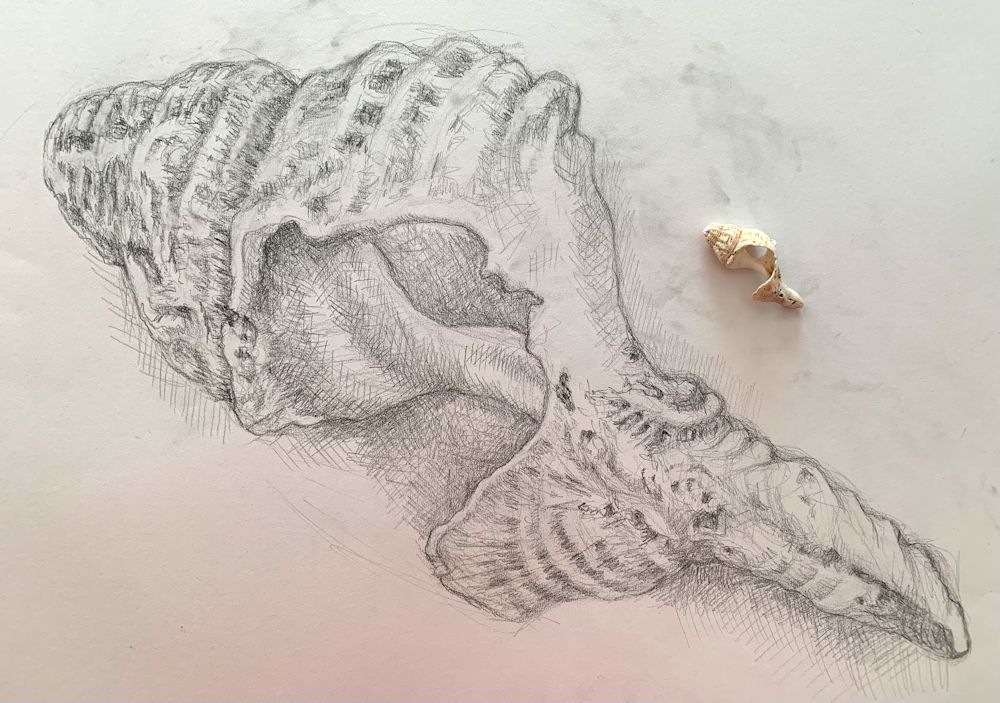
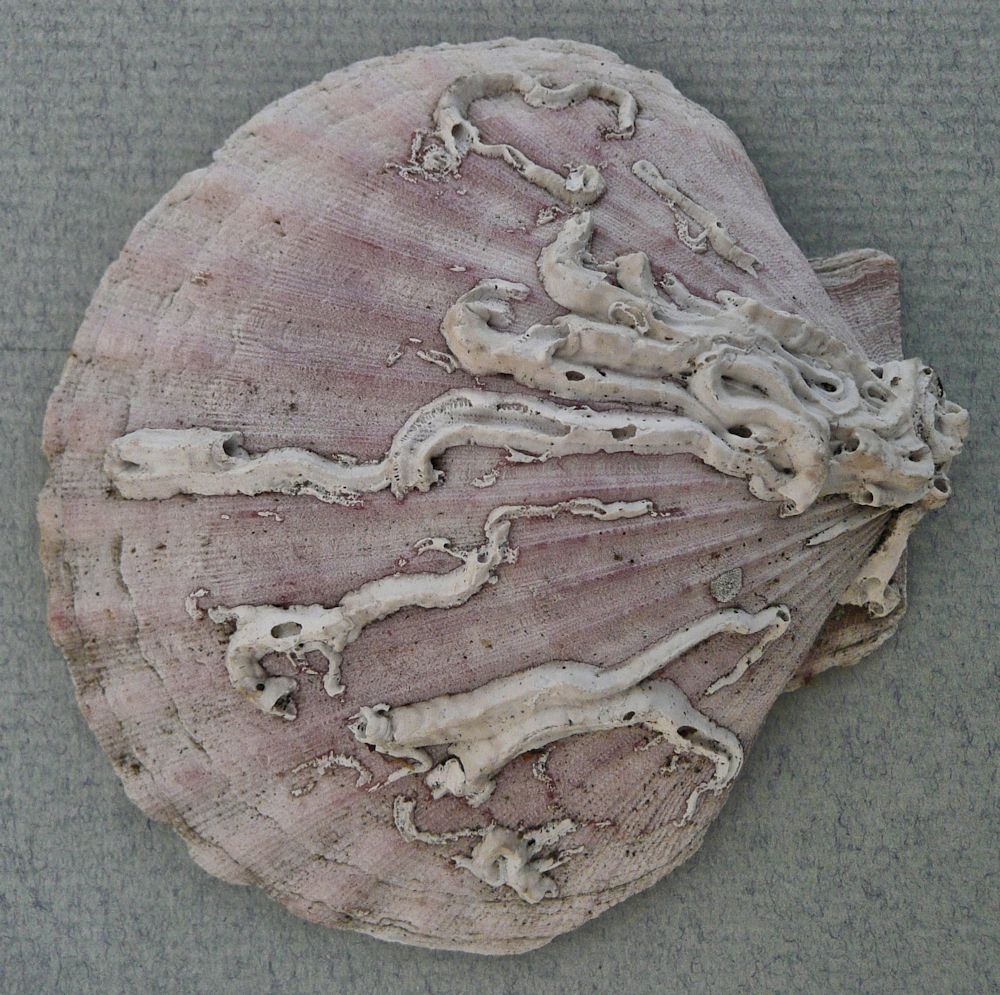
Barnacles on a simple sea shell like a limpet as in the photos above and below would be an interesting choice as you can home in on just one barnacle or the whole limpet shell with it’s whole population of barnacles.
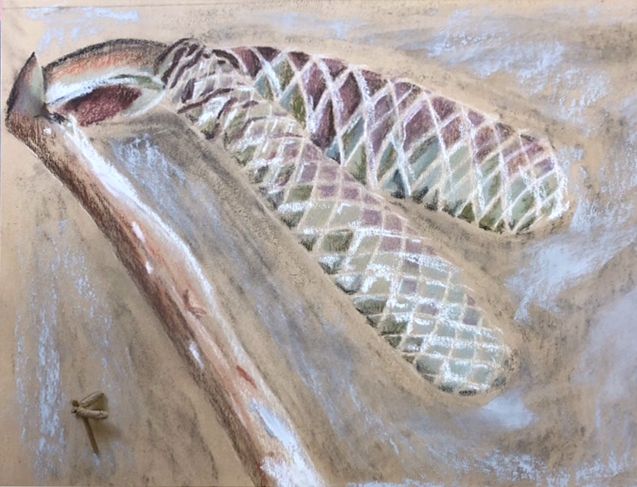
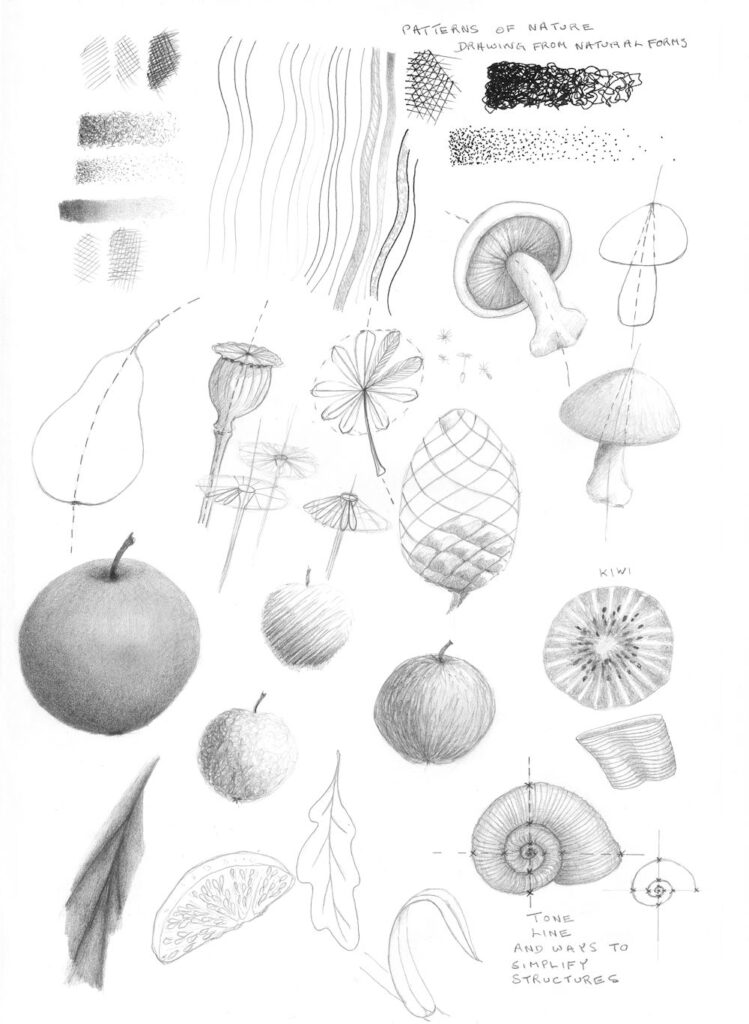
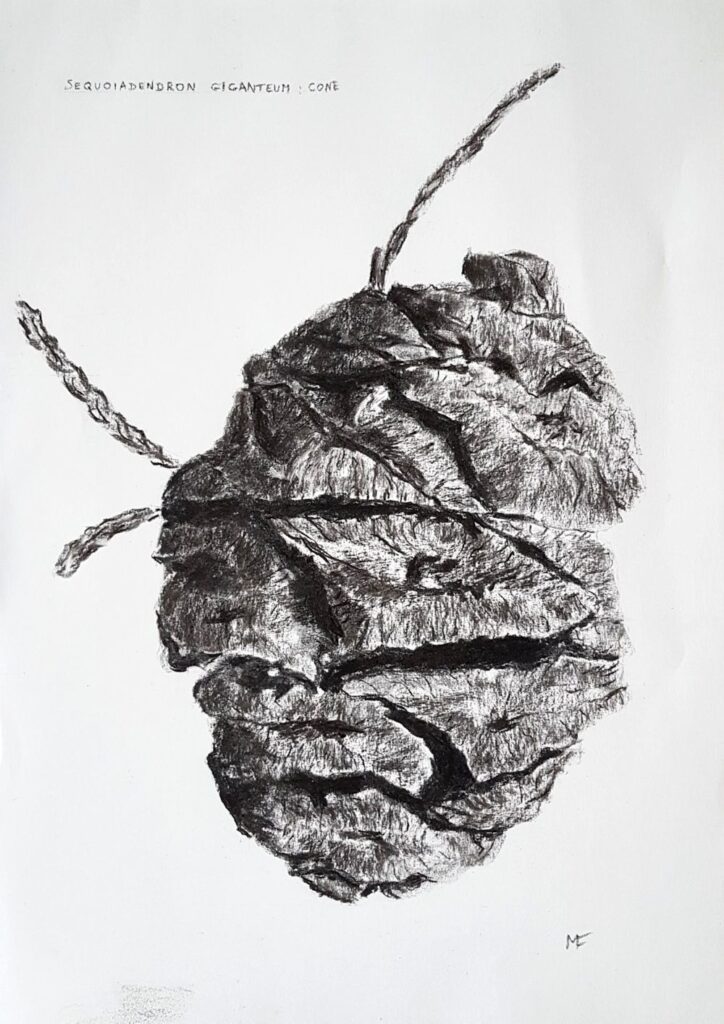
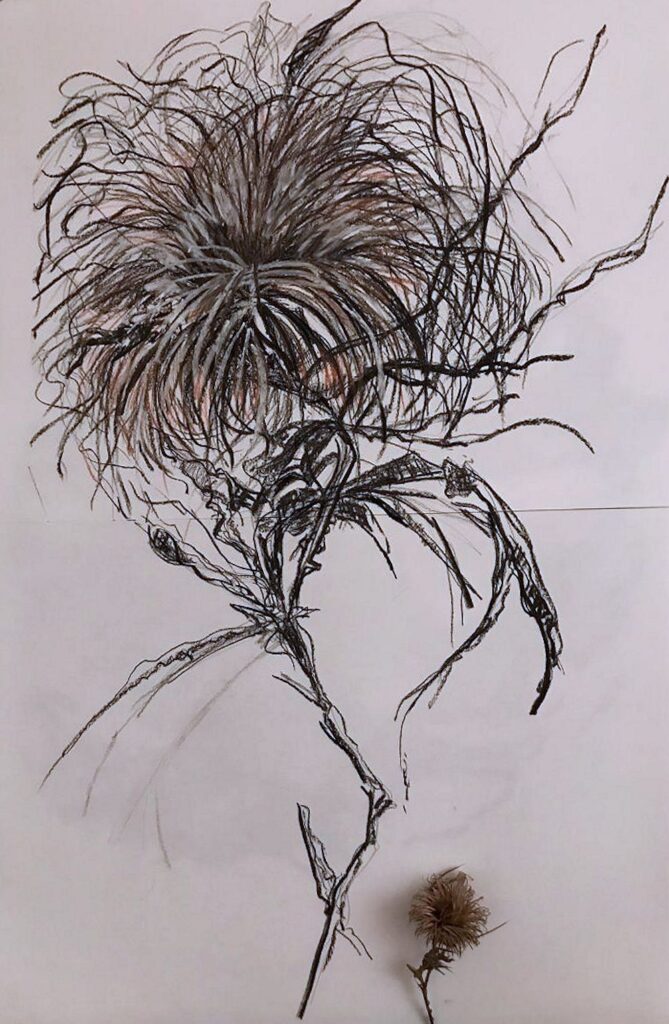
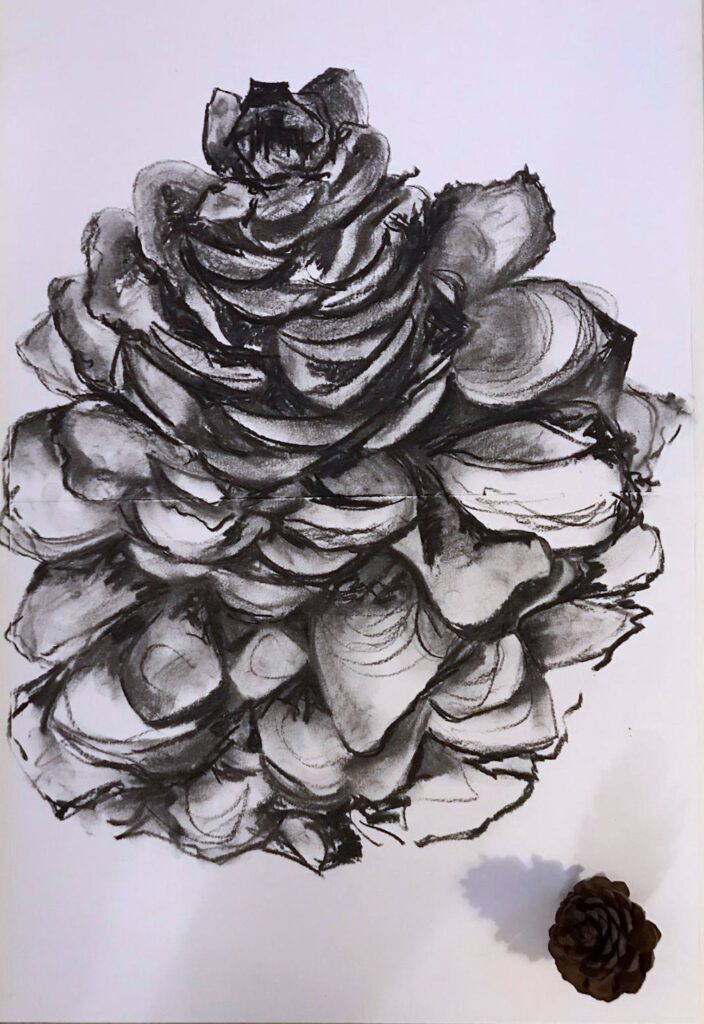
Another choice might be a small pine cone or a detail of a large one. I have included my crib sheet to help with drawing various natural forms at the end of this post. They are all drawn at a tiny scale and your challenge as last week is to fill a sheet at least A2 in size with your tiny object.
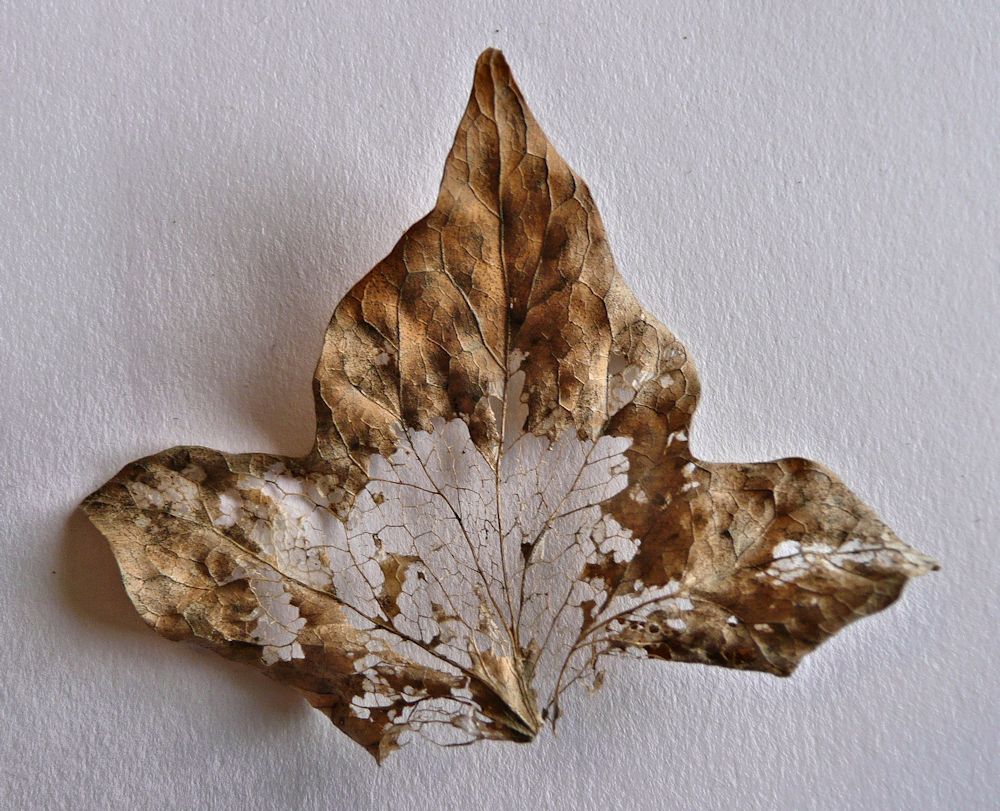
Another idea would be a skeletonised seed head or twig where the structures usually hidden below the surface are revealed.
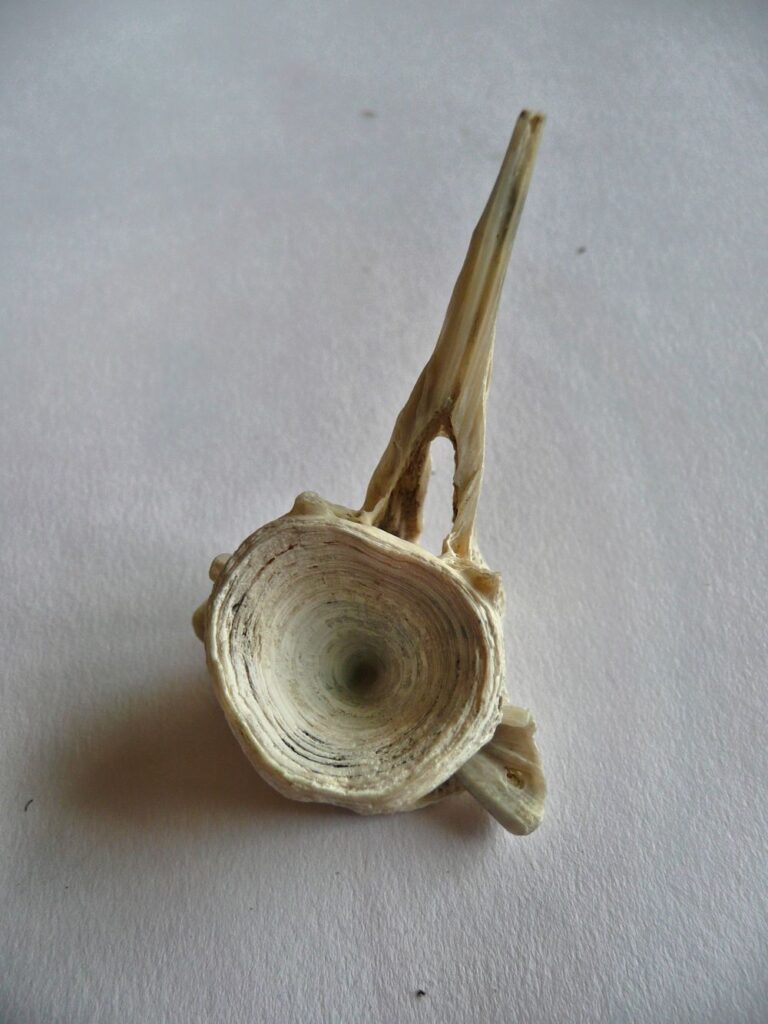
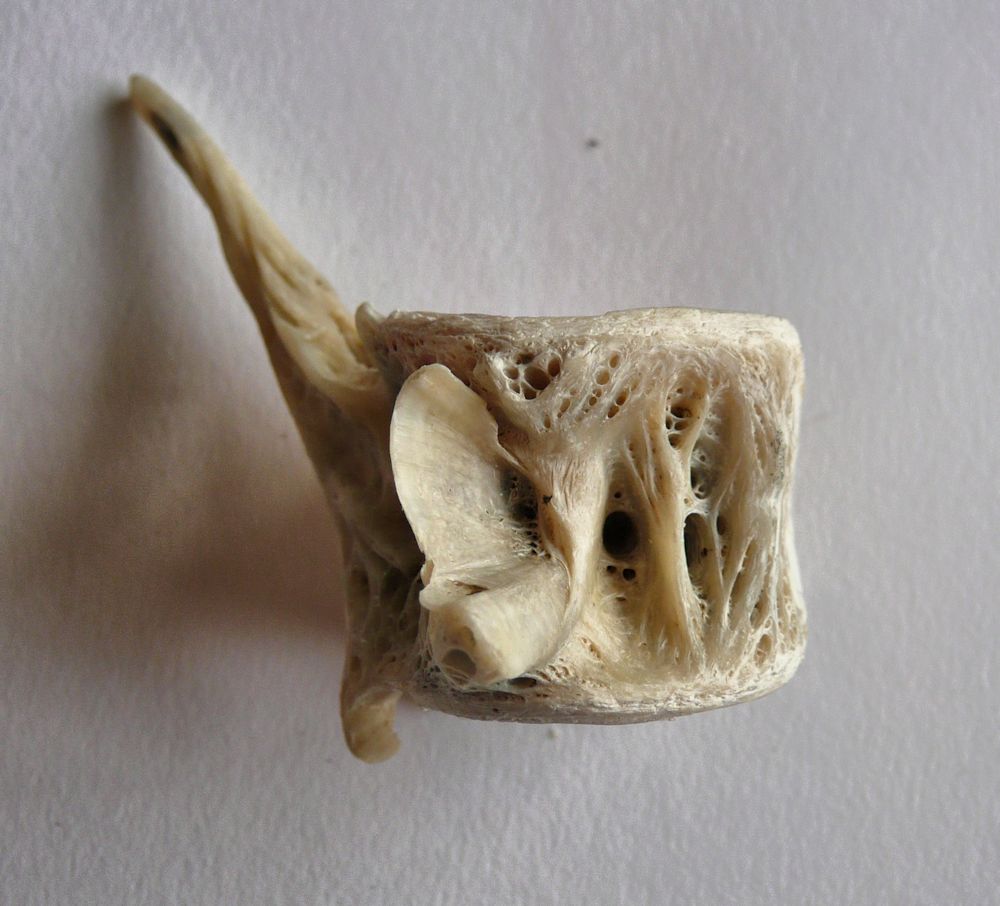
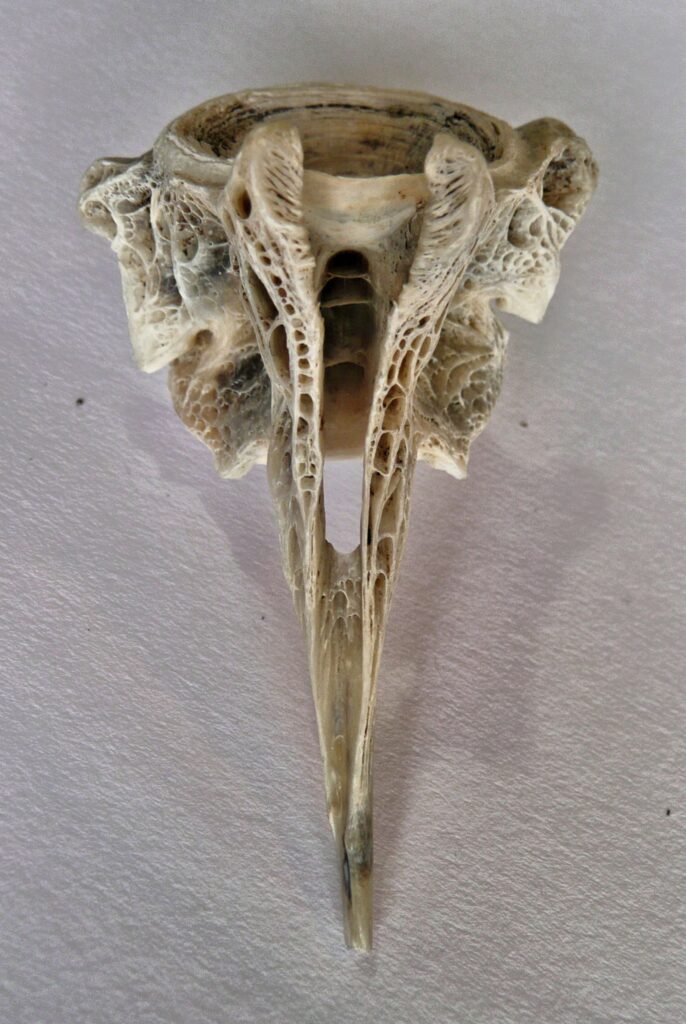
Lastly, bones can also make very interesting subjects and the series of photos below show the same vertebra from a species of fish with dorsal spines seen from different angles. Information on the fish would be much appreciated! The viewpoint of the object you choose to draw will be very important this week. You may even like to do a series of drawings of the same object over the next two weeks.
I’m sure you can make up some of your own.
There is one error at least! The axis of a pear is usually pretty straight even if the stalk bends!
Your Drawings;
All on A2 paper
Grey pastel ground,white acrylic ink, gel pen and brown pencil
by Sandra
Black Quink ink and bleach
by Sandra
Graphite pencil by Jan
Graphite stick 9 and 6B pencil by Jan
Reference for scale, together with graphite and ink drawings
by Jan
Charcoal and pastel by Ann
Charcoal by malcolm
Charcoal and graphite by Maryon
Charcoal by Heather
by Sarah
by Sarah
Watercolour by Maricarmen
Charcoal by Virginia
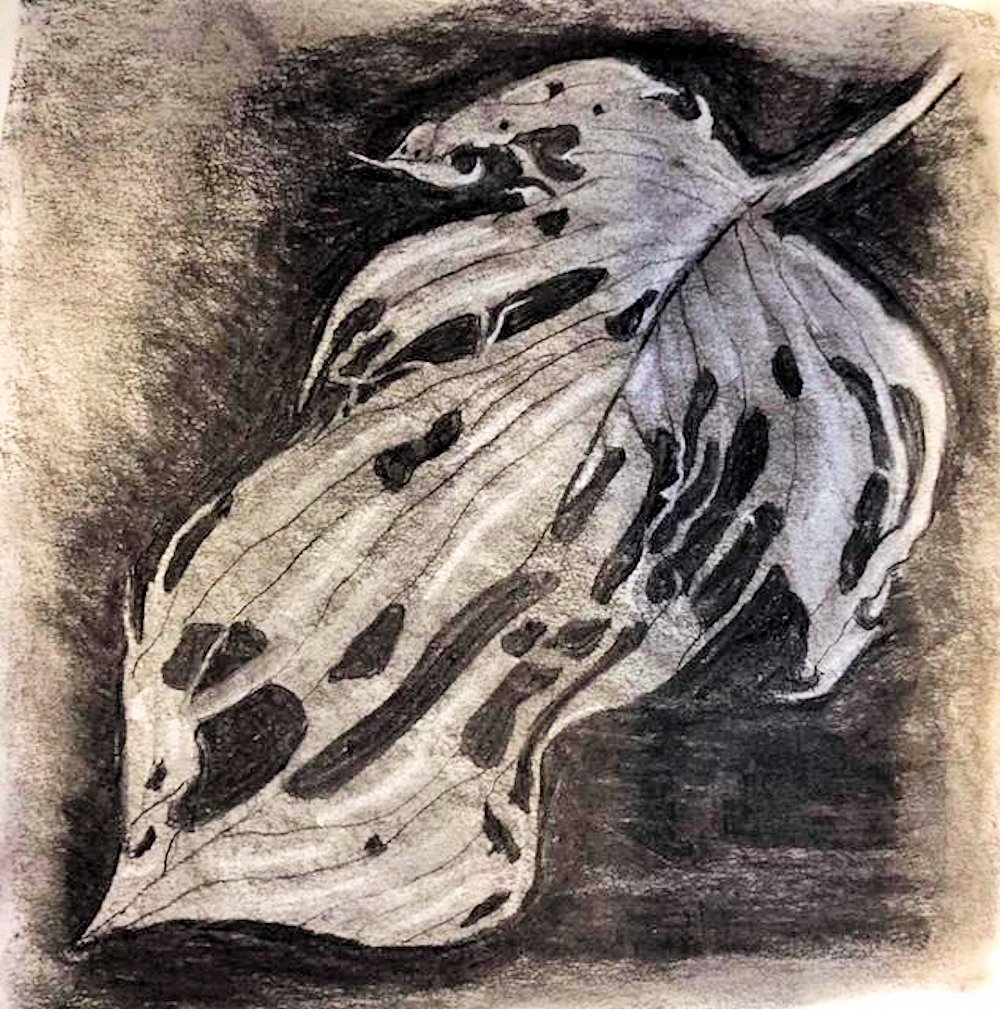
Drawing larger than Life Week 2: Flatter forms and Mark Making
November 10, 2021
Photo
Last week we looked at small but sculptural forms and how to make them look three dimensional. This week we’ll look at flatter or low relief forms with a view to depicting their character by mark making and line.
Look for an axis or a point from which a pattern of lines or curves radiate outwards and indicate this on your paper. Look for, in the case of a leaf as above, the point from which the veins radiate and draw them with regard for the angles between them.
To ensure your drawing is large enough make sure that at its widest and highest points these touch the sides of the imaginary rectangle enclosing the whole form. Best to do as last week and draw this rectangle feintly on your paper. Most natural forms are not completely symmetrical, nor will the point from which, as in the Ivy leaf above, will the point from which the veins radiate be necessarily the lowest point of your drawing even if the stalk is missing.
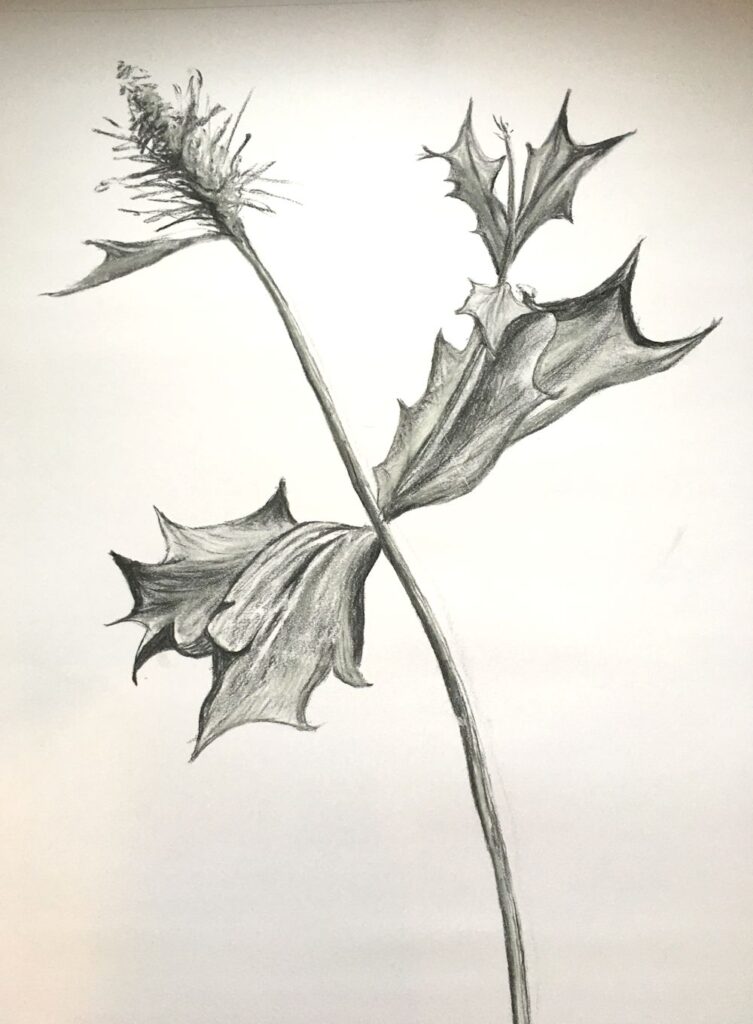
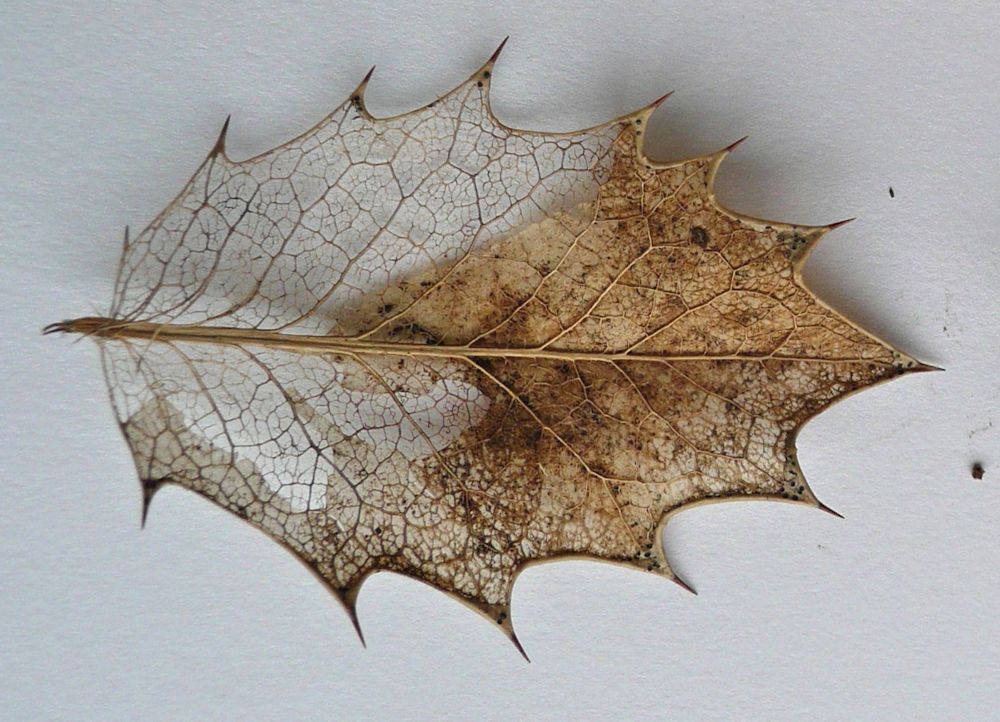
Leaves of course take many shapes, and the arrangement of veins may be along a central axis as in the holly leaf at the end of this post. Once you have drawn the main shapes of you object and added some tone where needed, you can then come to grips with the fun part, hopefully loads of interesting mark making. As ever practice various marks on some spare paper, on the bare paper and over areas of tone. Sometimes it can give a soft effect to tone the paper by light hatching over marks.
Try making dull marks with a blunt or rounded stick or pencil. Also try making well defined marks with a very sharp pencil or by either sharpening a stick of your medium to give a sharp edge. Keep a small piece of sandpaper handy for this. How much you suggest surface textures and patterns and how much you copy faithfully from the object is very much your choice and will depend on whether you wish to create an impression of the object’s character or go for ultimate realism.
Here are a few more photos of the sort of reference suitable for this week’s challenge.

Note its weathered surface and how different it appears to its lower surface. You may like to try drawing both surfaces of similar objects.

Your Drawings: All on A2 paper

Charcoal by Sarah
by Ann
by Ann

by Maricarmen

in carpenters’ pencils and graphite stick
by Maryon

Graphite, charcoal and sienna pencil by Jan

Graphite by Jan

by Virginia
Charcoal by Sandra
Drawing Larger than Life: Week 1, Natural Forms Sculptural
November 4, 2021
This is the first of four posts about drawing objects larger than life. As a former biologist I have always been amazed at the variety of structures and textures to be found in the natural world and had the opportunity to study their fine detail. However it is just as important with small things to start drawing their general shape and form in the same way as you might begin a drawing of a much larger object. I have chosen four examples see photographs below, which would lend themselves to being drawn much larger than life size. This week they are forms that have a very sculptural feel to them and the aim will be to depict their three dimensional form.
It may be helpful to reference the drawings of walnut halves by the sculptor Peter Randall Page link to his website below;
https://www.peterrandall-page.com/drawings/walnut-i-xii-2/
Many of his drawings are over 1 metre in size.
We are so used to scaling down to draw from the landscape or whole human form that it is quite a challenge to draw something tiny between about 2 and 10 cm on its longest side on a large sheet of paper. Ideally I would like you to work on an A2 sheet but absolutely no smaller than A3.
Once an object has been chosen, spend some time examining it from several angles. Think about its overall dimensions and when you have decided on a view to draw mark out a rectangle on the paper that its sides will just touch. This will help you place the object on the page and also indicate the size at which you will be drawing.
You may like to hold the object in your hand but if working at an easel I generally prefer to attach the object to a piece of paper and work with it on or beside my drawing paper. Try to ensure this is at a comfortable place for you to observe and then draw and minimise any change of direction of your gaze every time you look back from your drawing to the object and back again. You should, especially in the early stages of the drawing spend mire time looking than drawing. Masking tape or Blu-tak is usually sufficient to anchor a small object unless it is very heavy like a fossil or stone.

Choose drawing media according to the size of the paper support and the kinds of mark you wish to make. For instance you may like to start drawing very broadly with a graphite stick or chunky charcoal for the overall shape and tone and then go in with a smaller form of the medium, graphite pencil or thinner charcoal or charcoal pencil for more detailed work. If you have any you could also experiment with coloured graphite and/or coloured charcoal sticks and pencils. Another good choice would be conte crayon that you can use on its side like a pastel or make strokes with the end. Conte crayon is harder than most pastels but is chalky and can be moved a little on the support. All these media can also be brushed with water but as always, it is advisable to experiment first on a separate paper before using on the final drawing.

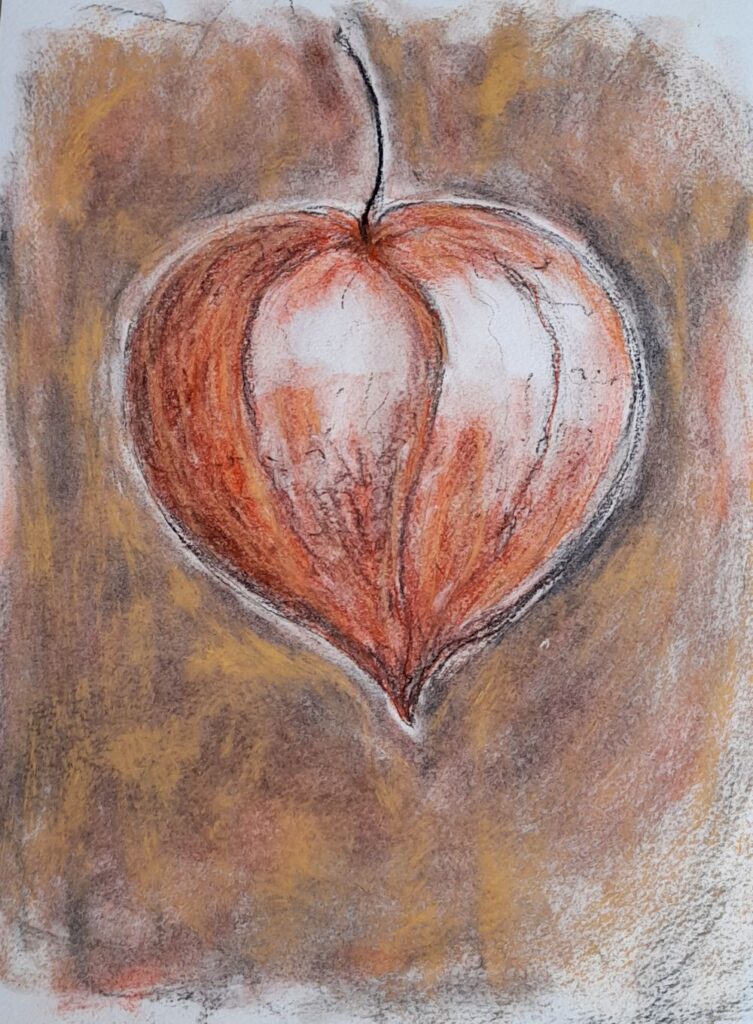
Some forms will have a definite axis as in the Physalis above. In this case the axis of stalk to tip is curved and proves a useful anchor for your drawing. The nectarine also has an axis but it is much more asymmetrical. However all the pits and furrows relate to this axis.
Once you have established the general shape and form of the object you can start to home in on some of its detail. In the nectarine stone this may be the contours of the pits and furrows on its surface. With the Physalis lantern, after establishing the main shape and tones between the main veins, this will probably be indicating the smaller veins with more linear marks and looking at some of the smaller changes in tone within each section.

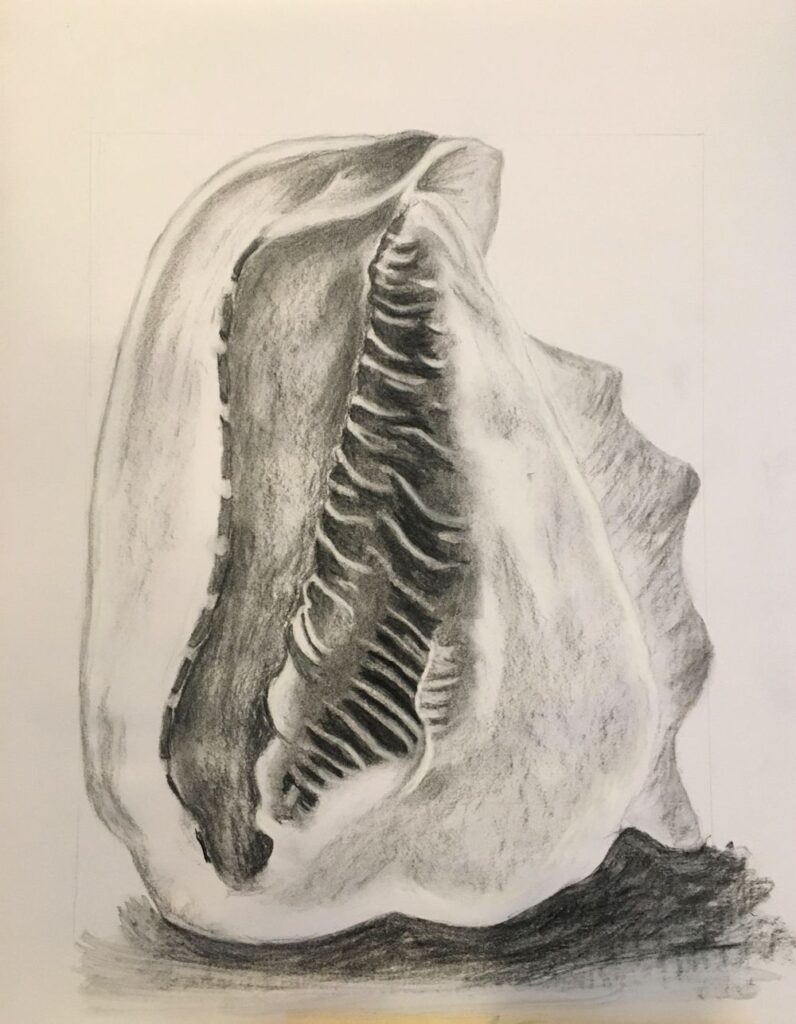
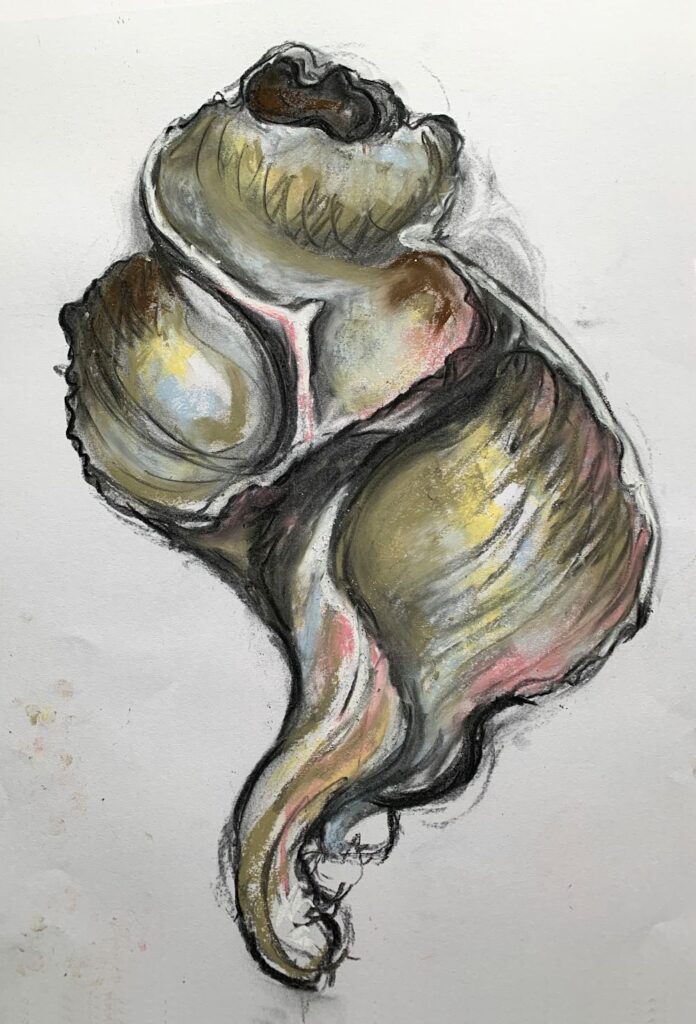
With other objects like the shell with barnacles below, try sketching in the main shape and then look for the curved ridges on this little oyster’s weathered shell. Many of these are hidden by the barnacles that populate its surface. These ridges represent growth spurts and centre on the narrower end of the shell where it is covered by the pot shaped barnacles. Where there are few clues to the underlying structure just map out the main areas and work tonally. In the case of the shell below imagine or even draw in lightly the surface the barnacles are sitting on before drawing them. Note the other textures and structures on the surface and decide whether or not they are relevant to the drawing. The amount of detail as in every drawing is the artist’s decision.
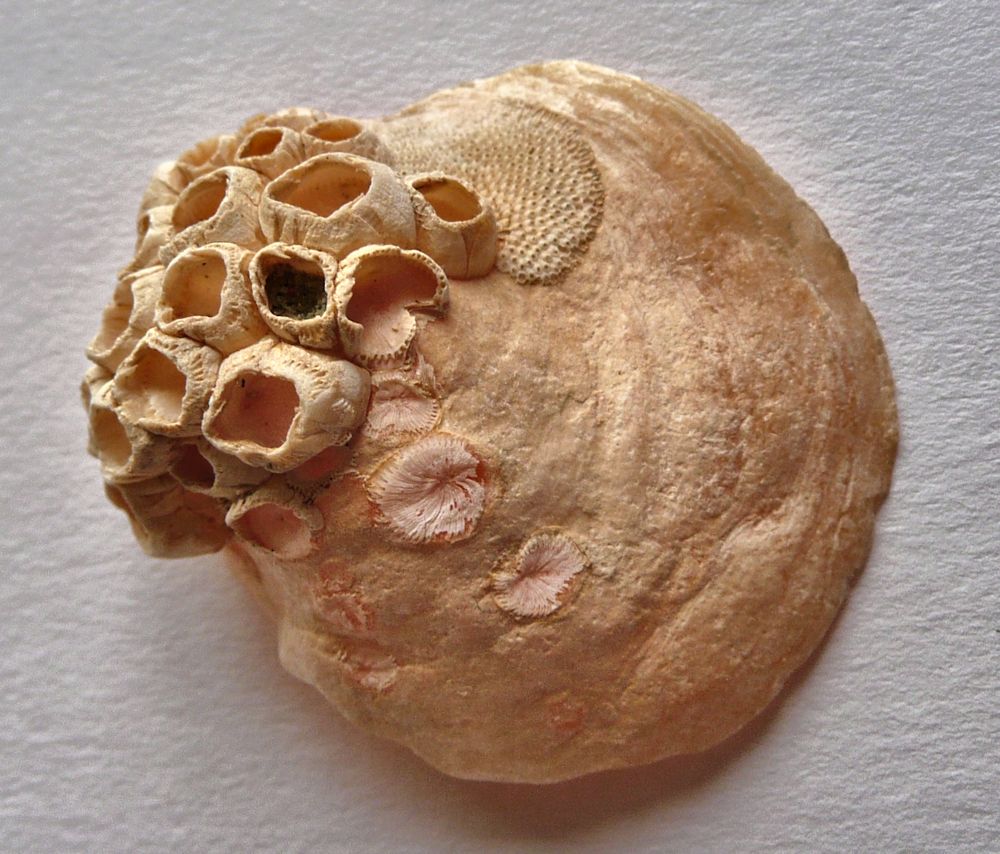


Size about 5cm across
Your Drawings: All drawings on A2 paper unless caption reads differently

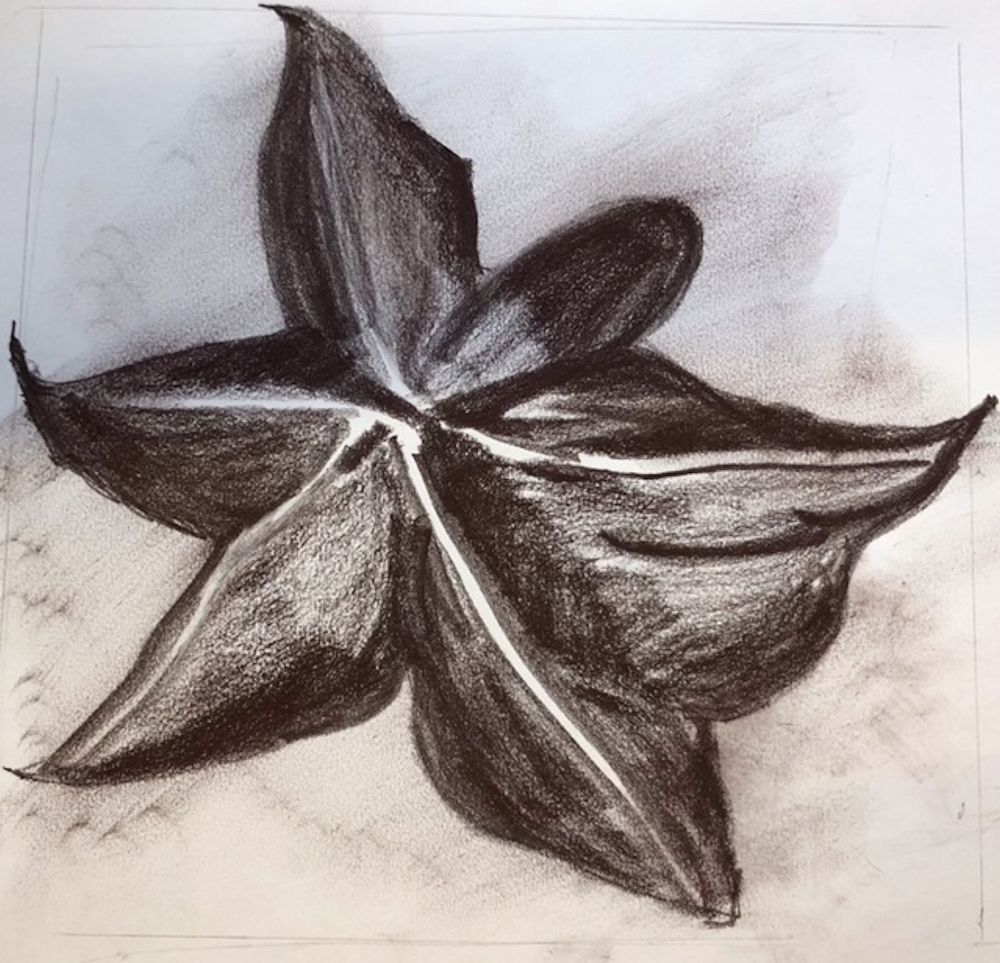
4cm long flower-head with bracts
Charcoal and pastel pencil by Malcolm

Charcoal and pastel by Sarah

Coloured crayon and charcoal pencil by Sarah

Coloured crayon and charcoal pencil by Sarah
by Heather

by Sandra
by Sandra
Turned on a lathe to a smooth egg shaped form
Charcoal on A1 paper by Maryon

by Ann

Charcoal by Virginia
Graphite by Virginia

Pastel, pastel and conte pencil and charcoal by Virginia
by Maricarmen
by Maricarmen
Charcoal and pastel by Jan
Charcoal and pastel by Jan