Drawing Larger than Life: Week 1, Natural Forms Sculptural
November 4, 2021
This is the first of four posts about drawing objects larger than life. As a former biologist I have always been amazed at the variety of structures and textures to be found in the natural world and had the opportunity to study their fine detail. However it is just as important with small things to start drawing their general shape and form in the same way as you might begin a drawing of a much larger object. I have chosen four examples see photographs below, which would lend themselves to being drawn much larger than life size. This week they are forms that have a very sculptural feel to them and the aim will be to depict their three dimensional form.
It may be helpful to reference the drawings of walnut halves by the sculptor Peter Randall Page link to his website below;
https://www.peterrandall-page.com/drawings/walnut-i-xii-2/
Many of his drawings are over 1 metre in size.
We are so used to scaling down to draw from the landscape or whole human form that it is quite a challenge to draw something tiny between about 2 and 10 cm on its longest side on a large sheet of paper. Ideally I would like you to work on an A2 sheet but absolutely no smaller than A3.
Once an object has been chosen, spend some time examining it from several angles. Think about its overall dimensions and when you have decided on a view to draw mark out a rectangle on the paper that its sides will just touch. This will help you place the object on the page and also indicate the size at which you will be drawing.
You may like to hold the object in your hand but if working at an easel I generally prefer to attach the object to a piece of paper and work with it on or beside my drawing paper. Try to ensure this is at a comfortable place for you to observe and then draw and minimise any change of direction of your gaze every time you look back from your drawing to the object and back again. You should, especially in the early stages of the drawing spend mire time looking than drawing. Masking tape or Blu-tak is usually sufficient to anchor a small object unless it is very heavy like a fossil or stone.

Choose drawing media according to the size of the paper support and the kinds of mark you wish to make. For instance you may like to start drawing very broadly with a graphite stick or chunky charcoal for the overall shape and tone and then go in with a smaller form of the medium, graphite pencil or thinner charcoal or charcoal pencil for more detailed work. If you have any you could also experiment with coloured graphite and/or coloured charcoal sticks and pencils. Another good choice would be conte crayon that you can use on its side like a pastel or make strokes with the end. Conte crayon is harder than most pastels but is chalky and can be moved a little on the support. All these media can also be brushed with water but as always, it is advisable to experiment first on a separate paper before using on the final drawing.

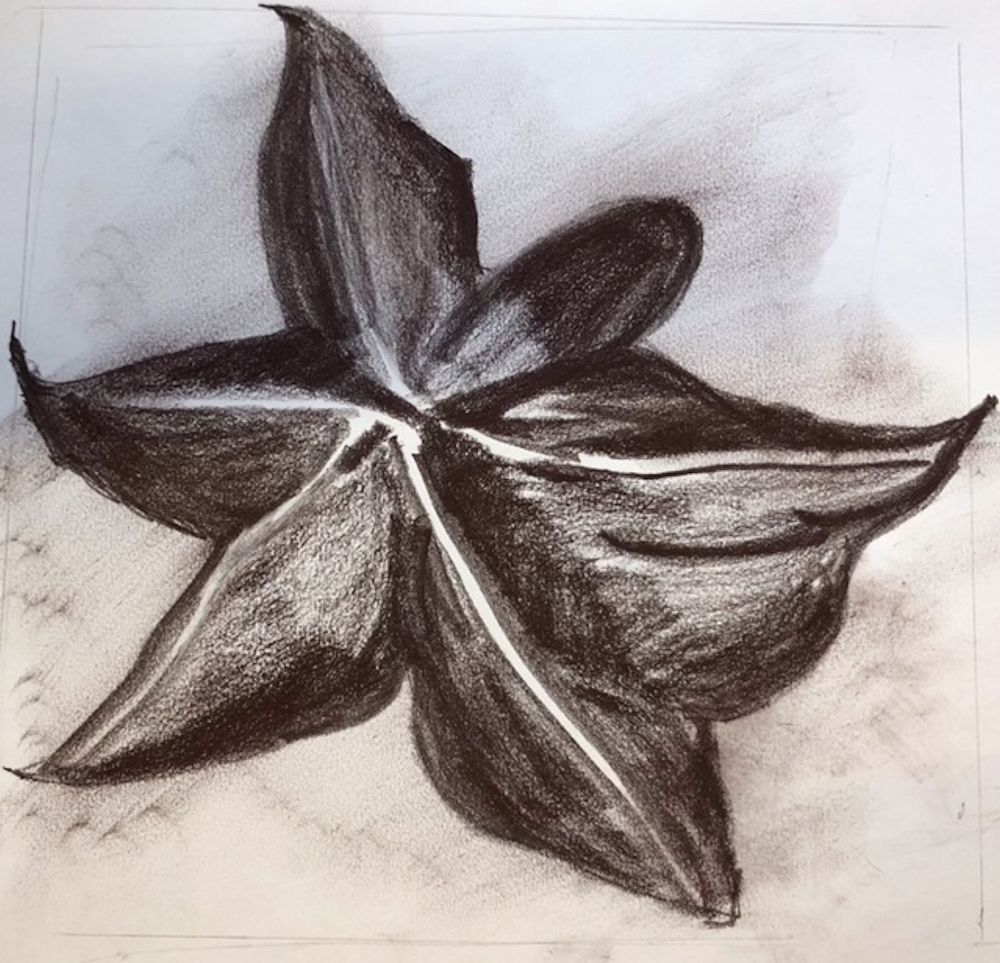
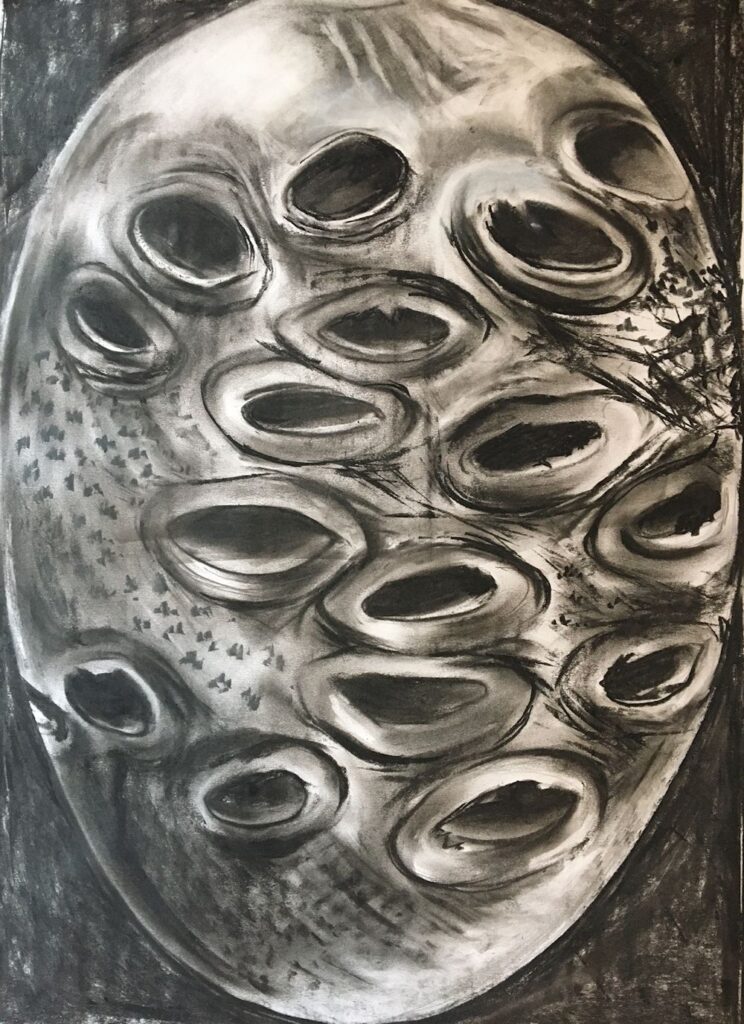
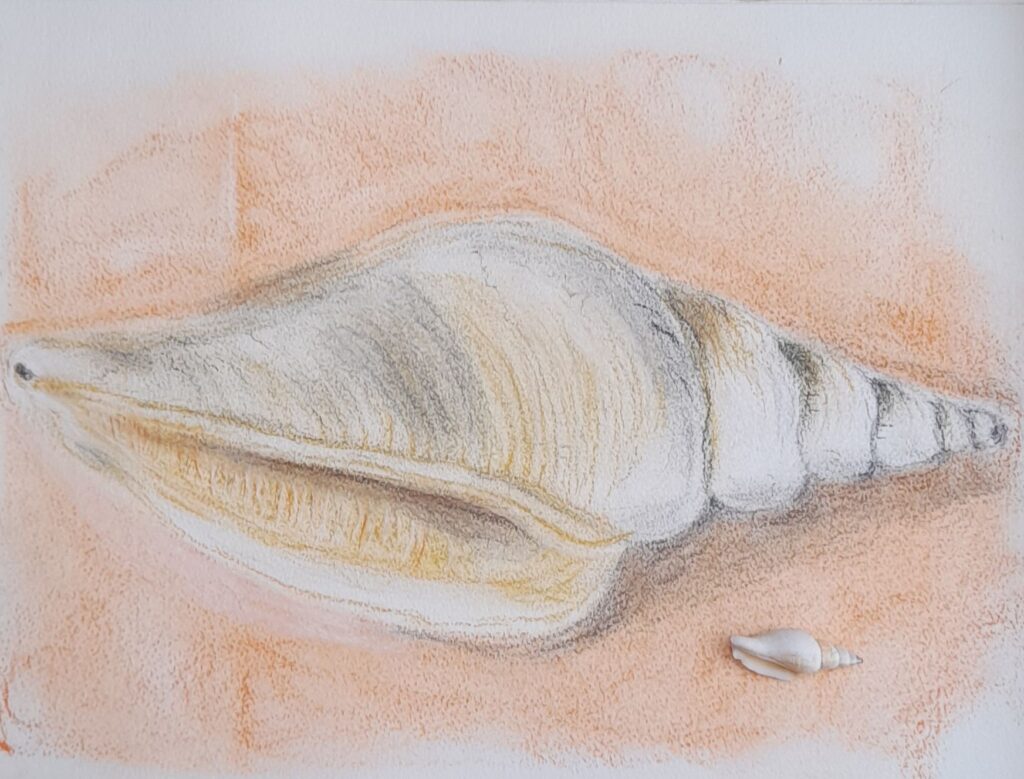
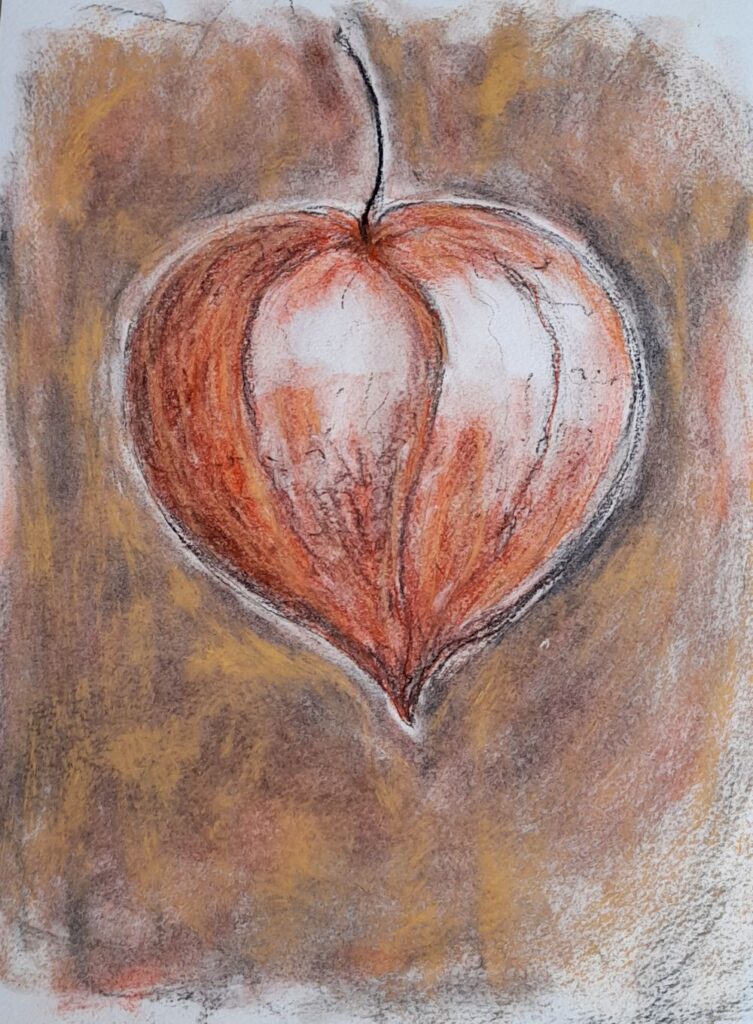
Some forms will have a definite axis as in the Physalis above. In this case the axis of stalk to tip is curved and proves a useful anchor for your drawing. The nectarine also has an axis but it is much more asymmetrical. However all the pits and furrows relate to this axis.
Once you have established the general shape and form of the object you can start to home in on some of its detail. In the nectarine stone this may be the contours of the pits and furrows on its surface. With the Physalis lantern, after establishing the main shape and tones between the main veins, this will probably be indicating the smaller veins with more linear marks and looking at some of the smaller changes in tone within each section.

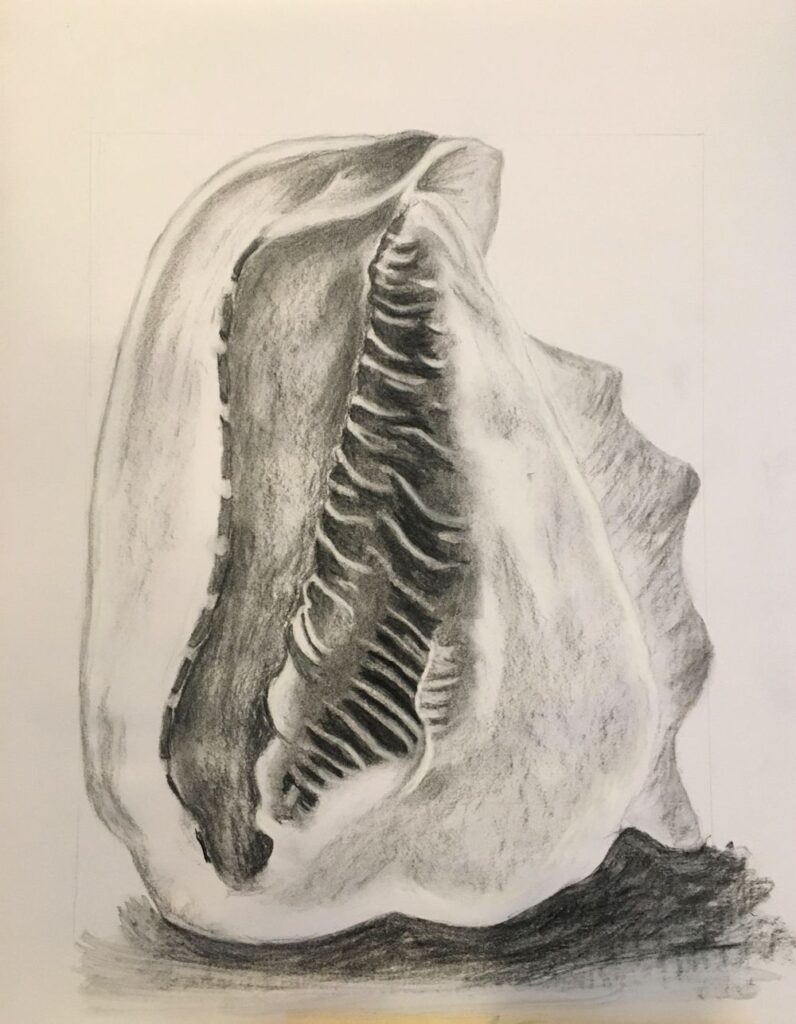
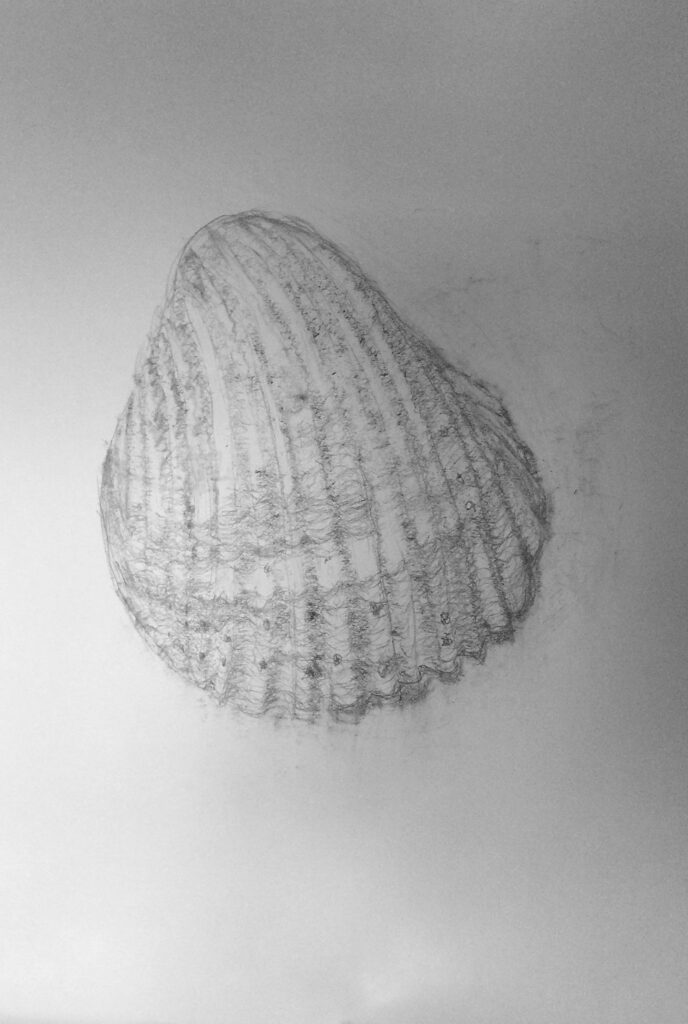
With other objects like the shell with barnacles below, try sketching in the main shape and then look for the curved ridges on this little oyster’s weathered shell. Many of these are hidden by the barnacles that populate its surface. These ridges represent growth spurts and centre on the narrower end of the shell where it is covered by the pot shaped barnacles. Where there are few clues to the underlying structure just map out the main areas and work tonally. In the case of the shell below imagine or even draw in lightly the surface the barnacles are sitting on before drawing them. Note the other textures and structures on the surface and decide whether or not they are relevant to the drawing. The amount of detail as in every drawing is the artist’s decision.
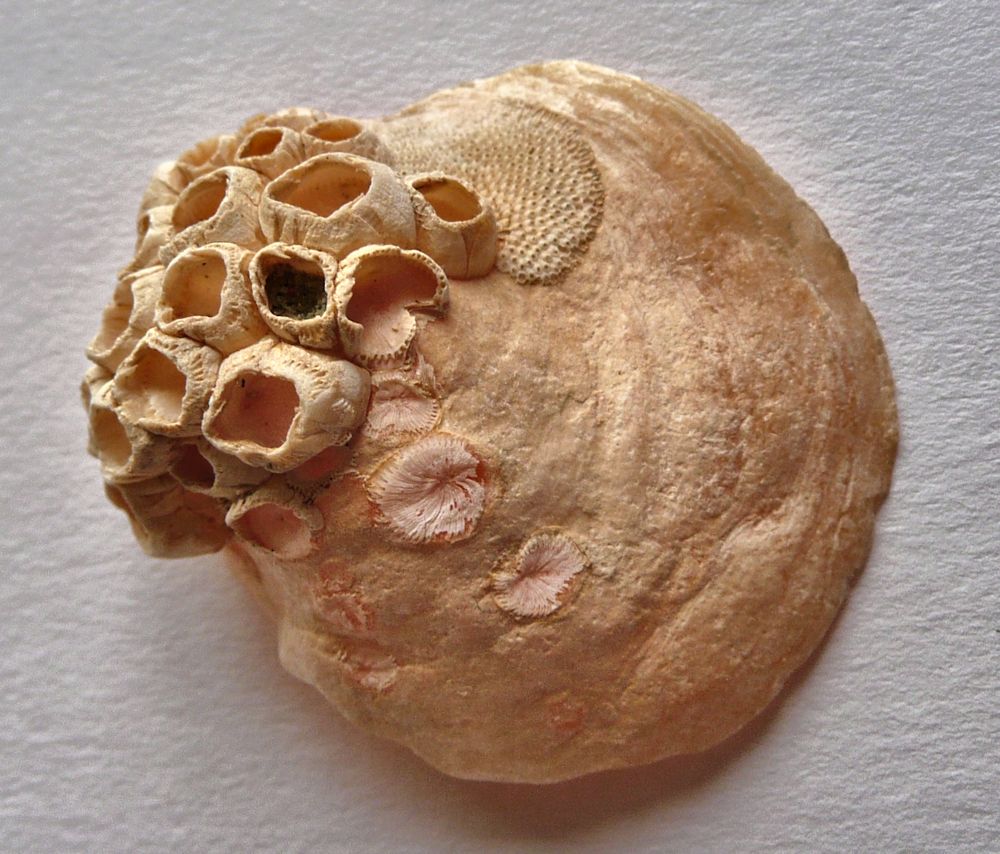


Size about 5cm across
Your Drawings: All drawings on A2 paper unless caption reads differently

4cm long flower-head with bracts
Charcoal and pastel pencil by Malcolm

Charcoal and pastel by Sarah

Coloured crayon and charcoal pencil by Sarah

Coloured crayon and charcoal pencil by Sarah
by Heather

by Sandra
by Sandra
Turned on a lathe to a smooth egg shaped form
Charcoal on A1 paper by Maryon

by Ann

Charcoal by Virginia
Graphite by Virginia

Pastel, pastel and conte pencil and charcoal by Virginia
by Maricarmen
by Maricarmen
Charcoal and pastel by Jan
Charcoal and pastel by Jan