Monthly Archives: November 2022
Birds in the Garden: Week 4
November 23, 2022

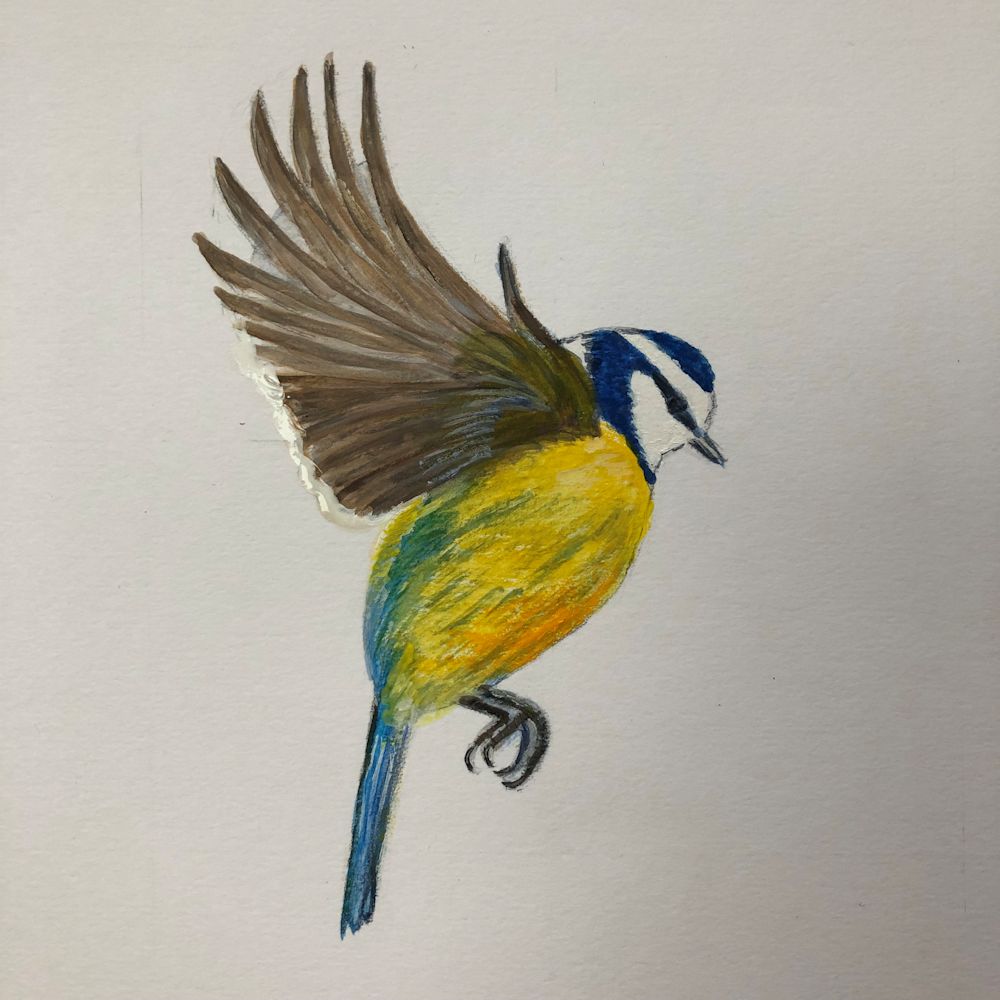
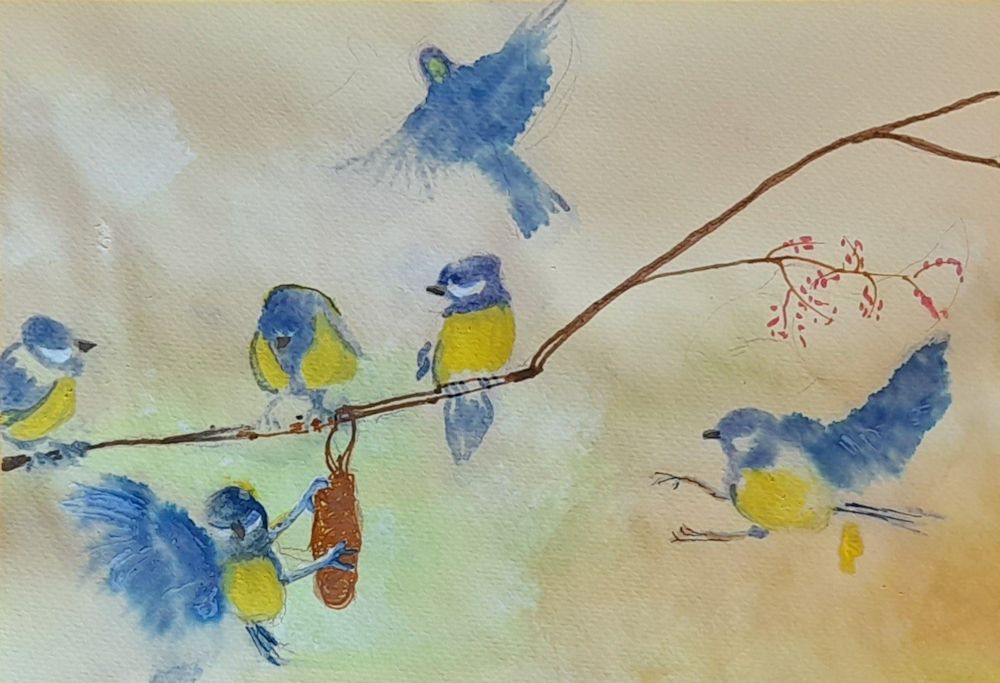
Watercolour Sketch by Jo
Sketch of the blue tits above from this week’s session is almost finished; its back needs a bit more attention. I’ve included it to show how the vegetation of twigs and bushes can be shown with little strokes and leaves almost printed with the brush.
This last week you are invited to paint a colourful finch or the grey and brown house sparrow.
After choosing your bird try out some sketches of its body shape in different attitudes before planning the final composition. You may choose to make a detailed study of one bird or of one or more birds showing the sort of habitat they dwell in and what they are perching on etc. Research in bird books for details of markings etc. and you may find a clarity not always evident in photographic reference. Try not to copy either sort of reference slavishly but let both kinds of reference inform your painting. The best way is to observe from life whenever you can and with a little practice it is surprising how much you can draw from a moving subject. Birds often repeat movements and you can start a variety of little drawings on a page that are initially no more than a few marks, which you can build on till they become bird shapes with a lot of vitality.
Do also look at the following Pinterest boards;
Finches at:
https://www.pinterest.co.uk/jhall1282/birds-in-art-and-photos/finches/
Sparrows at:
https://www.pinterest.co.uk/jhall1282/birds-in-art-and-photos/sparrow-photos/
We’ll talk about the colour mixes for the Finches and Sparrows at the session and fix a short review session for the following week.
Your paintings:

Acrylic by Mali

Watercolour by Heather

Watercolour by Heather

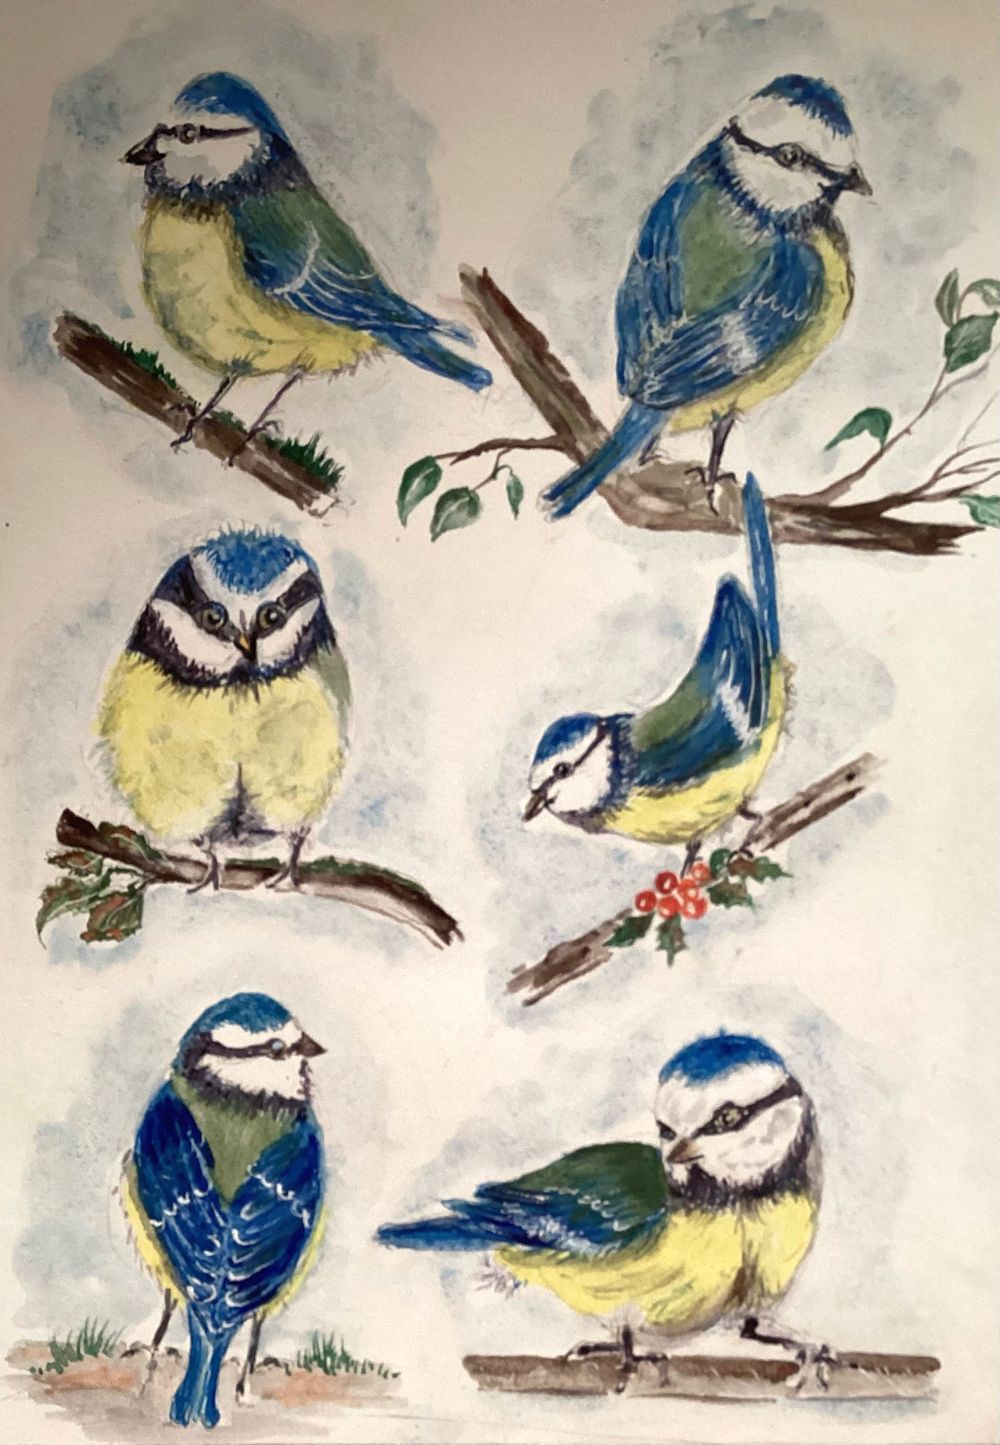
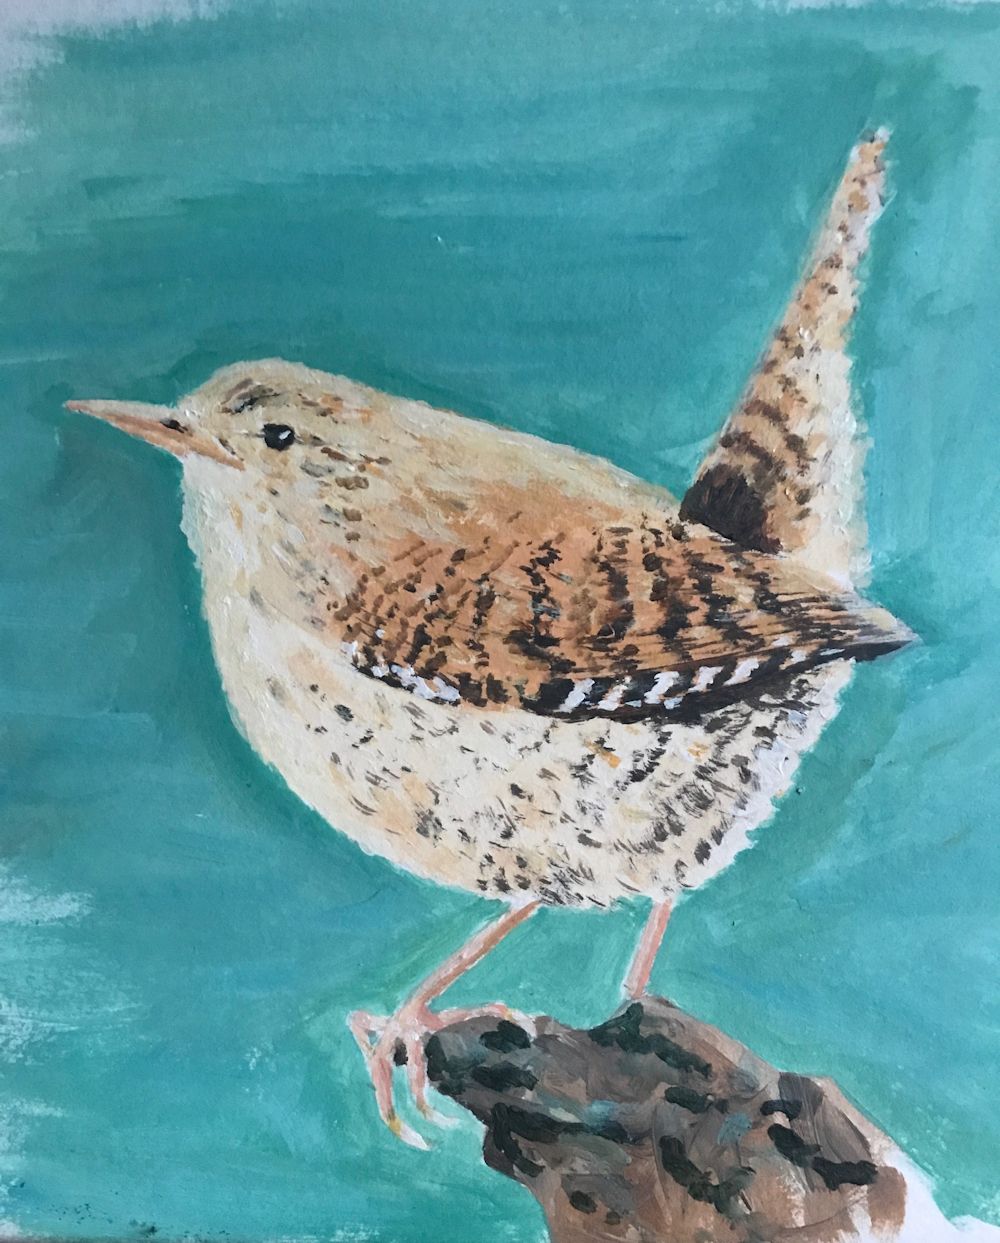
Watercolour by Ann

Watercolour by Ann

Watercolour by Ann

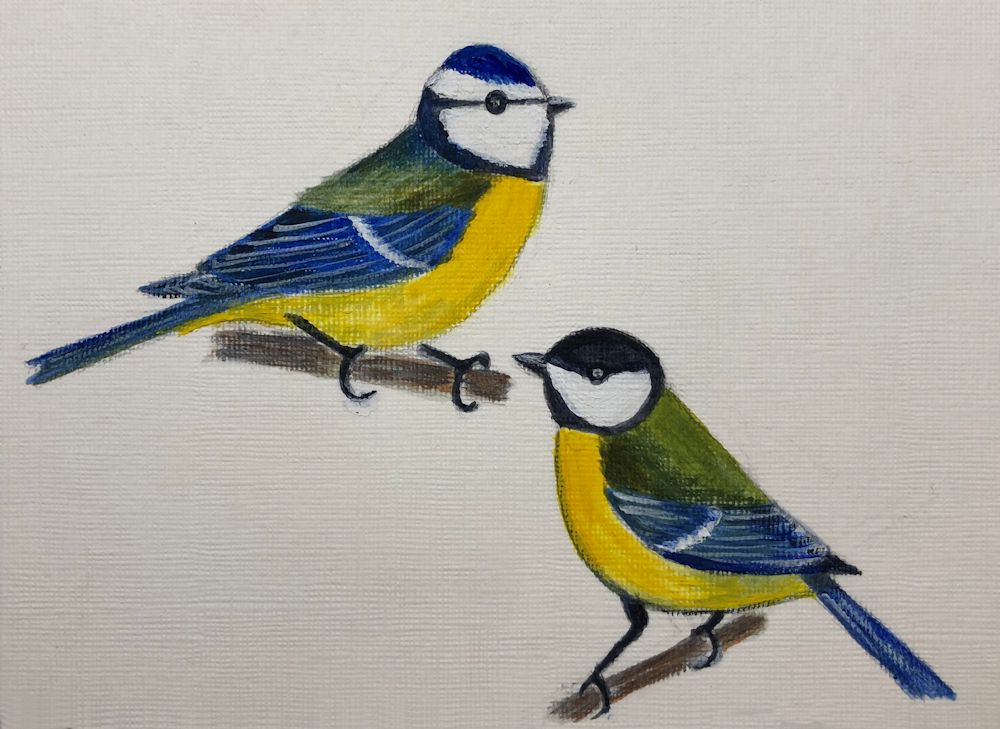
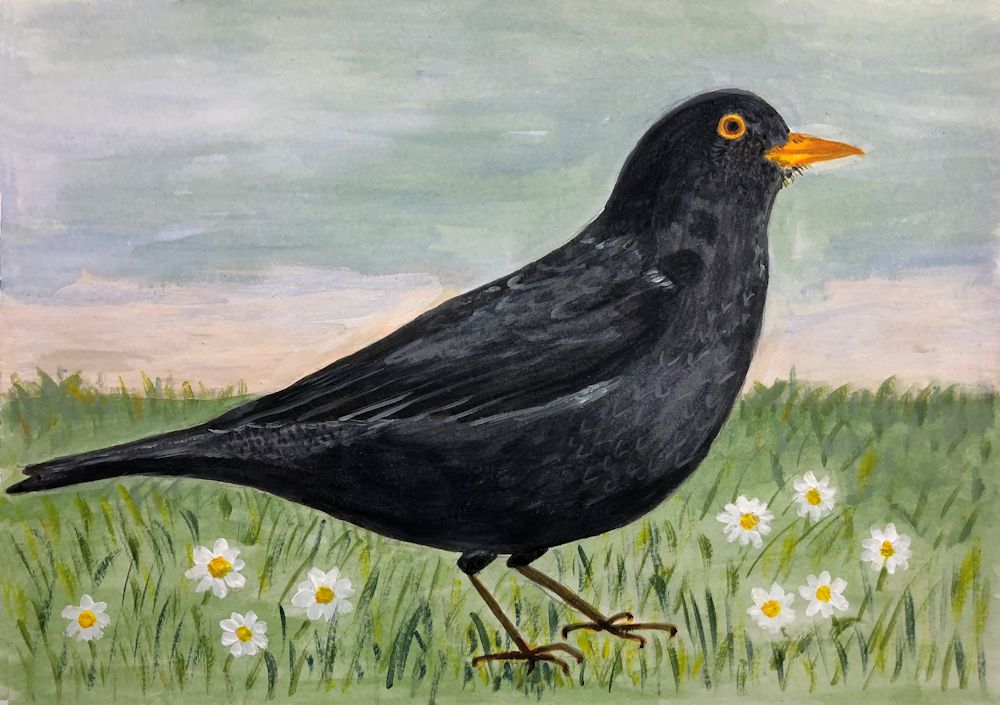
Acrylic by Kate

by Pam

by Pam

by Pam
Birds in the Garden: Week 3
November 16, 2022
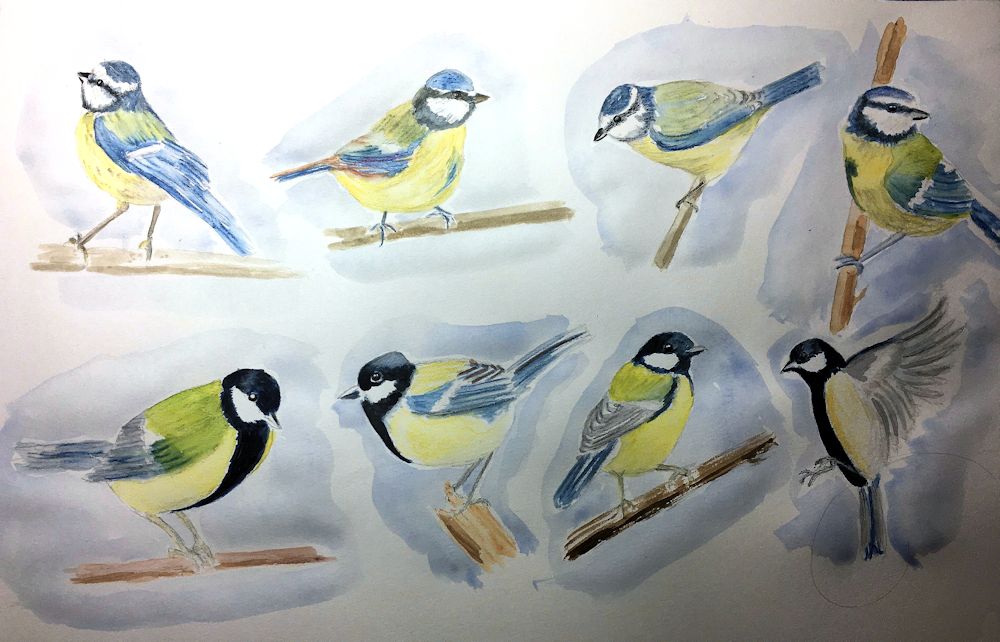
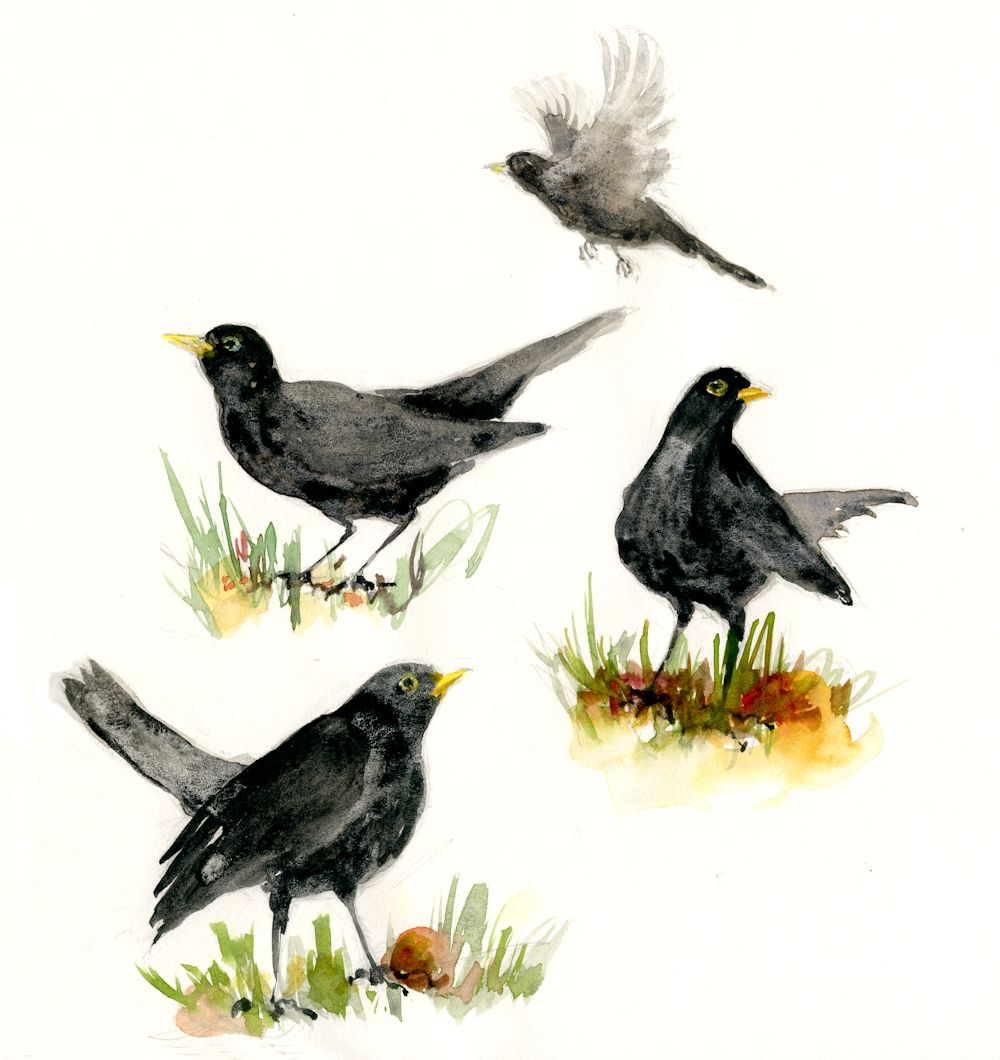
Quick sketches with pencil and watercolour by Jo
First a recap on this week’s painting session
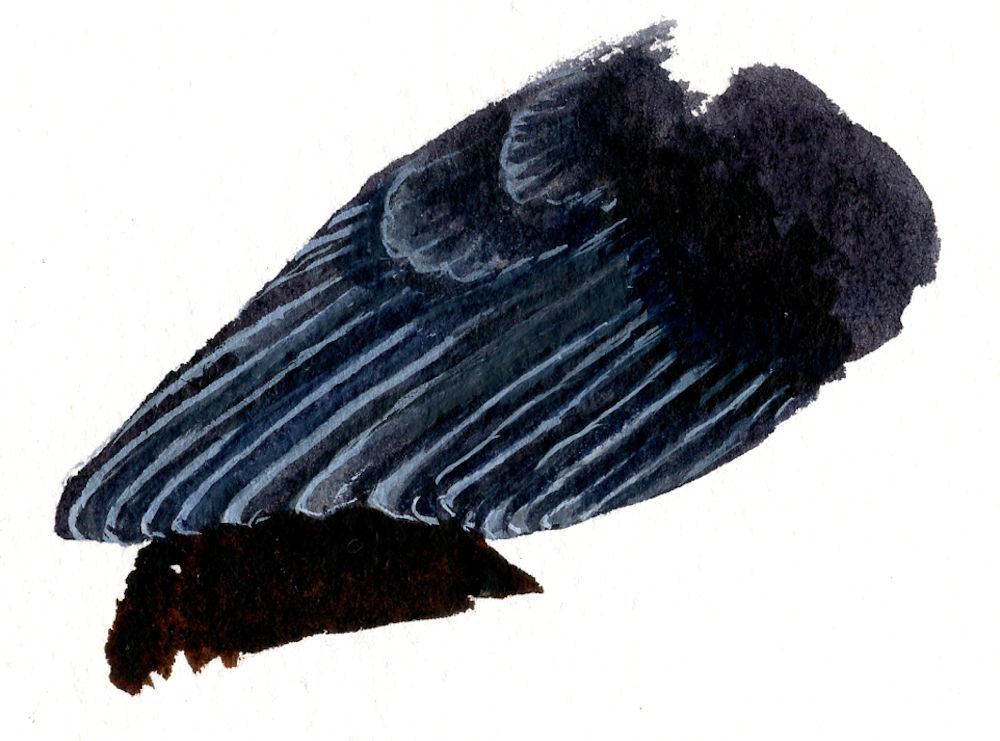
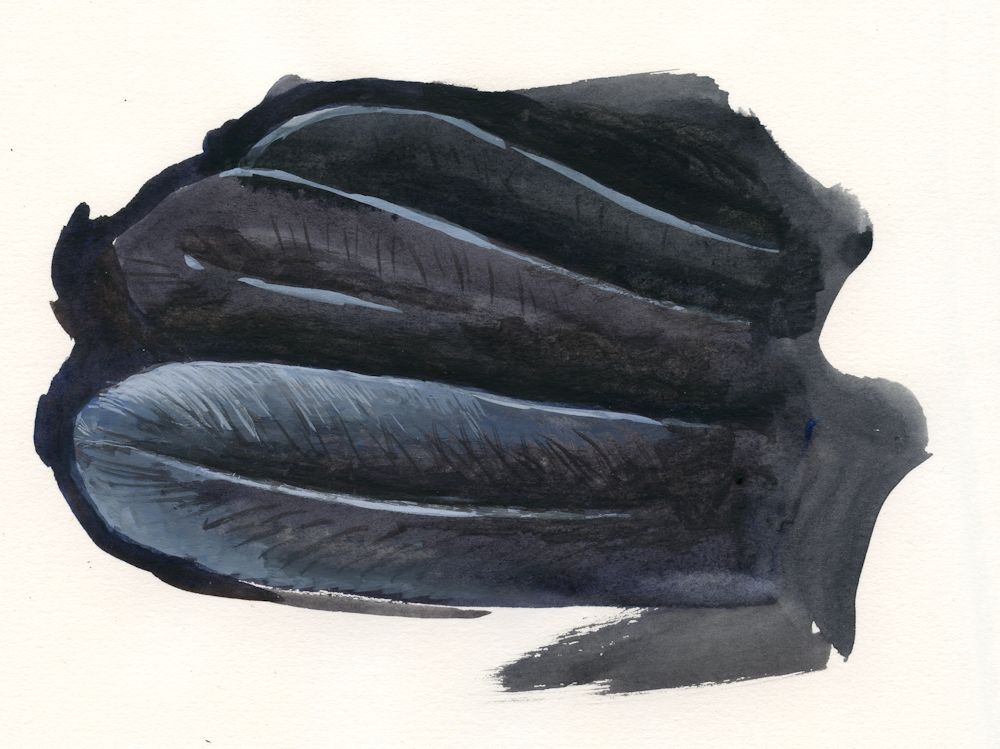
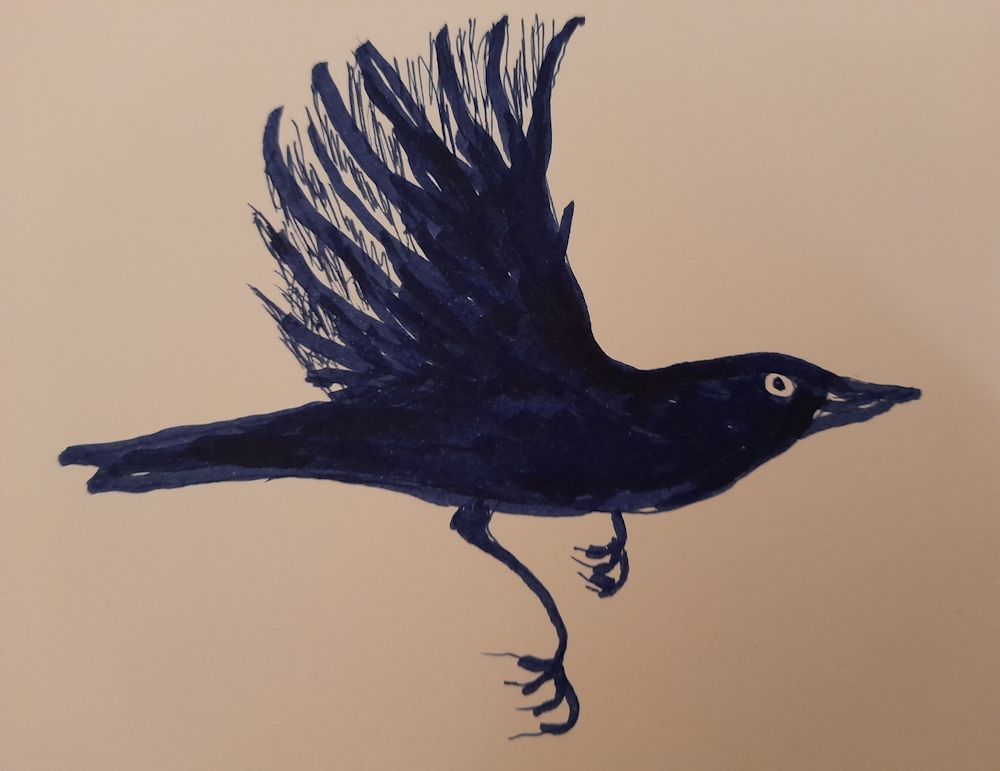
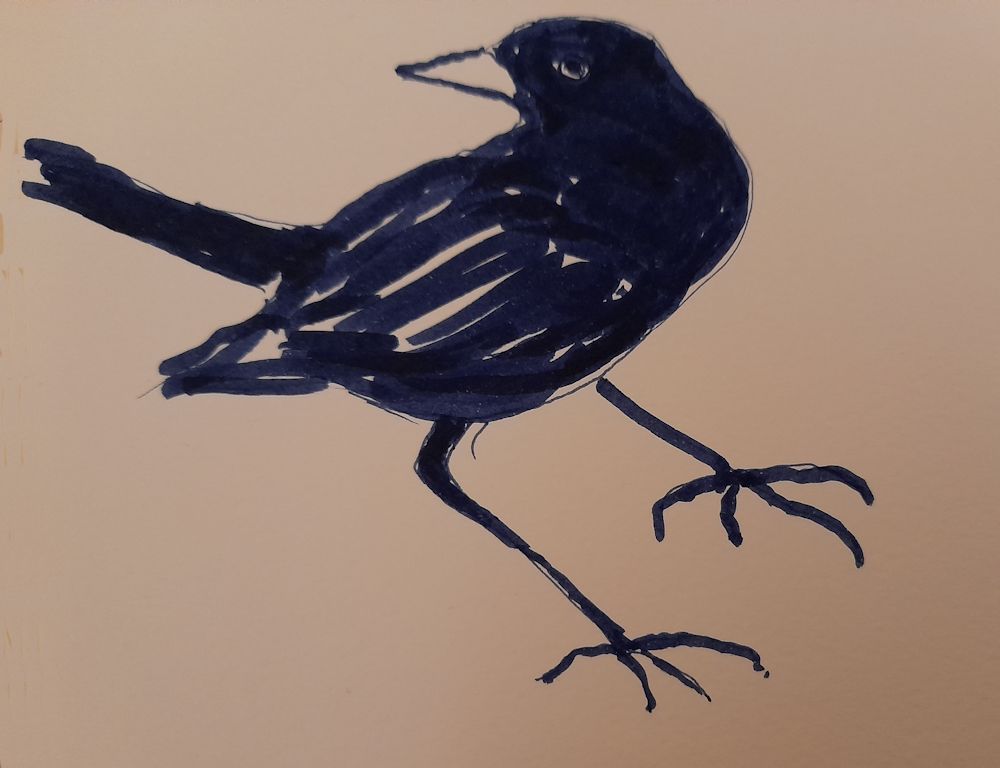
Two ways of delineating feathers on a dark bird:
Study by Jo
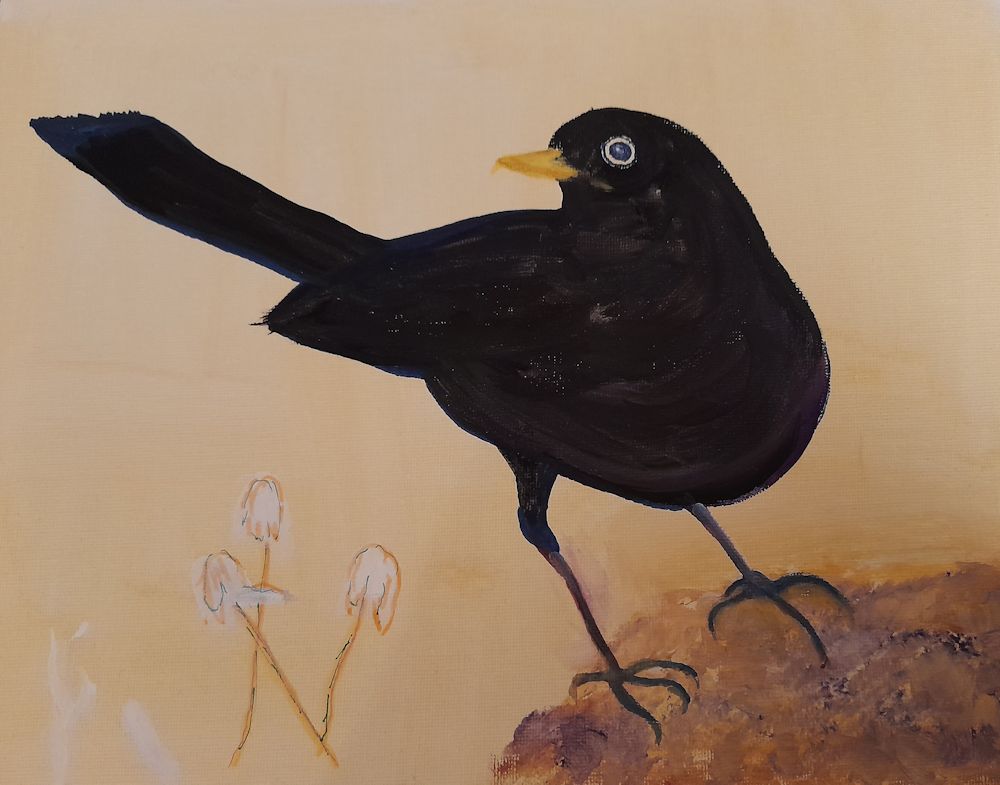
The blackbird above was painted in watercolour, painting the flight feathers paler than the rest of the wing. With a fine brush the individual feather edges were painted in. When dry the wing was too light so a further wash of a dark grey mix was added and the feathers reinstated just a little.
Another way to paint the details of feathers on a dark bird is to paint everything in the dark tone that it appears and to add any necessary detail with mixes of white gouache and watercolour:
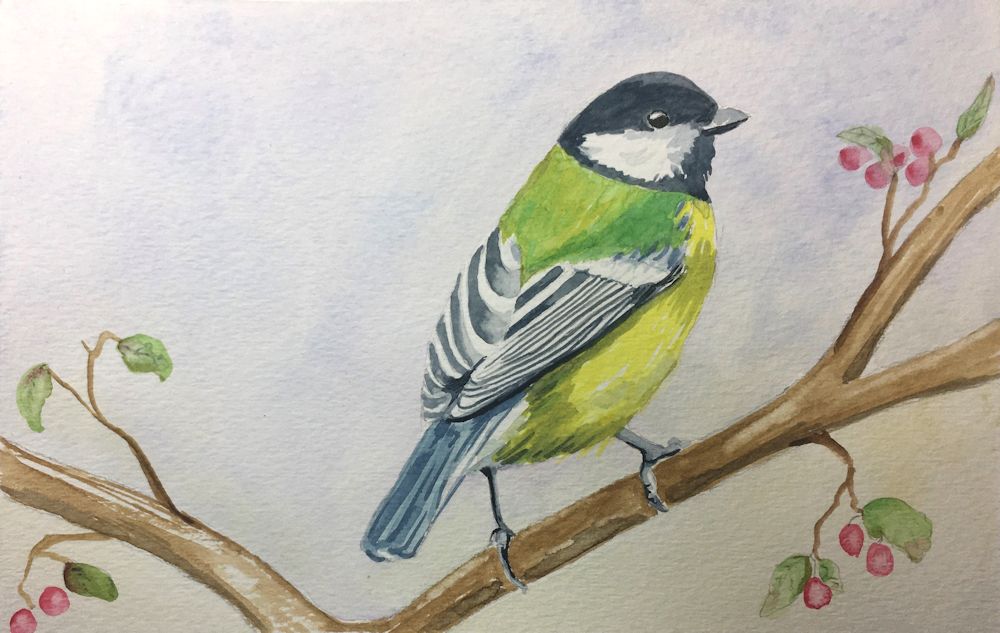
This week we’ll be looking at the colourful Blue Tits and the slightly heavier looking Great Tit with its black cap. Do look at any tit family references you have and the Pinterest board at
https://www.pinterest.co.uk/jhall1282/birds-in-art-and-photos/tits-photos/
and come to grips with making a few rapid sketches either before or at the beginning of the session. As before take in what the main body and head shapes look like when the bird is perching, on the ground or turning its head. Also look at the legs and claws.
We can use these sketches to apply trial mixes of the colours needed for a more considered painting. Blue tits are often seen, two or three at a time so you may like to consider making a composition with more than one bird. If so, do plan this in your sketchbook first before making the drawing on watercolour paper. Perhaps also start to think about the background for the birds and make a tonal sketch.
The drawing on watercolour paper or in preparation for working in acrylic, should be detailed enough to show the main feathers of the wings and indicate the position of the markings, as well as placing the beak, eye, legs and claws. Draw just enough of the background to aid the composition and plan to create most of the background with paint always aiming to make the birds the focal point.
Make sure the pencil marks are not too dark and lighten them if they are. If working in watercolour, reinforce the main lines with a pale blue/grey painted line using a small brush and then put a light blue grey wash over all the slightly shadowed areas of the birds. (If working in acrylic just establish the main shapes of colour and tone and gradually build into this with the smaller shapes and marks.)
Then mix up your washes and try them on your rapid sketches. For the blue tits you will need a blue, a yellow, a green for the back and various grey/black mixes which can be added last. You will also have to be careful if working in watercolour to leave the paper untouched by paint for the white areas.
Then start to paint your bird; probably eye and beak first, then suggest the legs before painting the paler areas of colour followed by any blue and green and finally the darker areas remembering to reserve the white areas.
Try to add colour as washes where the feathers are tiny as on the breast, head and back. It is often better to suggest the texture a little in places later if neccessary, rather than paint a lot of feather like strokes in the beginning. The wing feathers need a different consideration as when the wing is folded against the body some feather edges appear as stripes of light and dark. The light is very often not white so a wash of the right pale colour needs to be painted first and allowed to dry before painting stripes of the darker colour over the top. Your initial drawing should indicate where this needs to be done.
There are no rules as to the stage when you start painting the background. If the birds are in trees or bushes it will be integral to the drawing and if on the ground, you will have to indicate whether it is grass or path etc. or your birds may be seen partly with a backdrop of trees and partly of sky. We will discuss backgrounds during the session, especially about whether these should be just suggested or more definite and what will suit your purpose best.
Your paintings:
Watercolour by Heather
Watercolour sketches by Heather
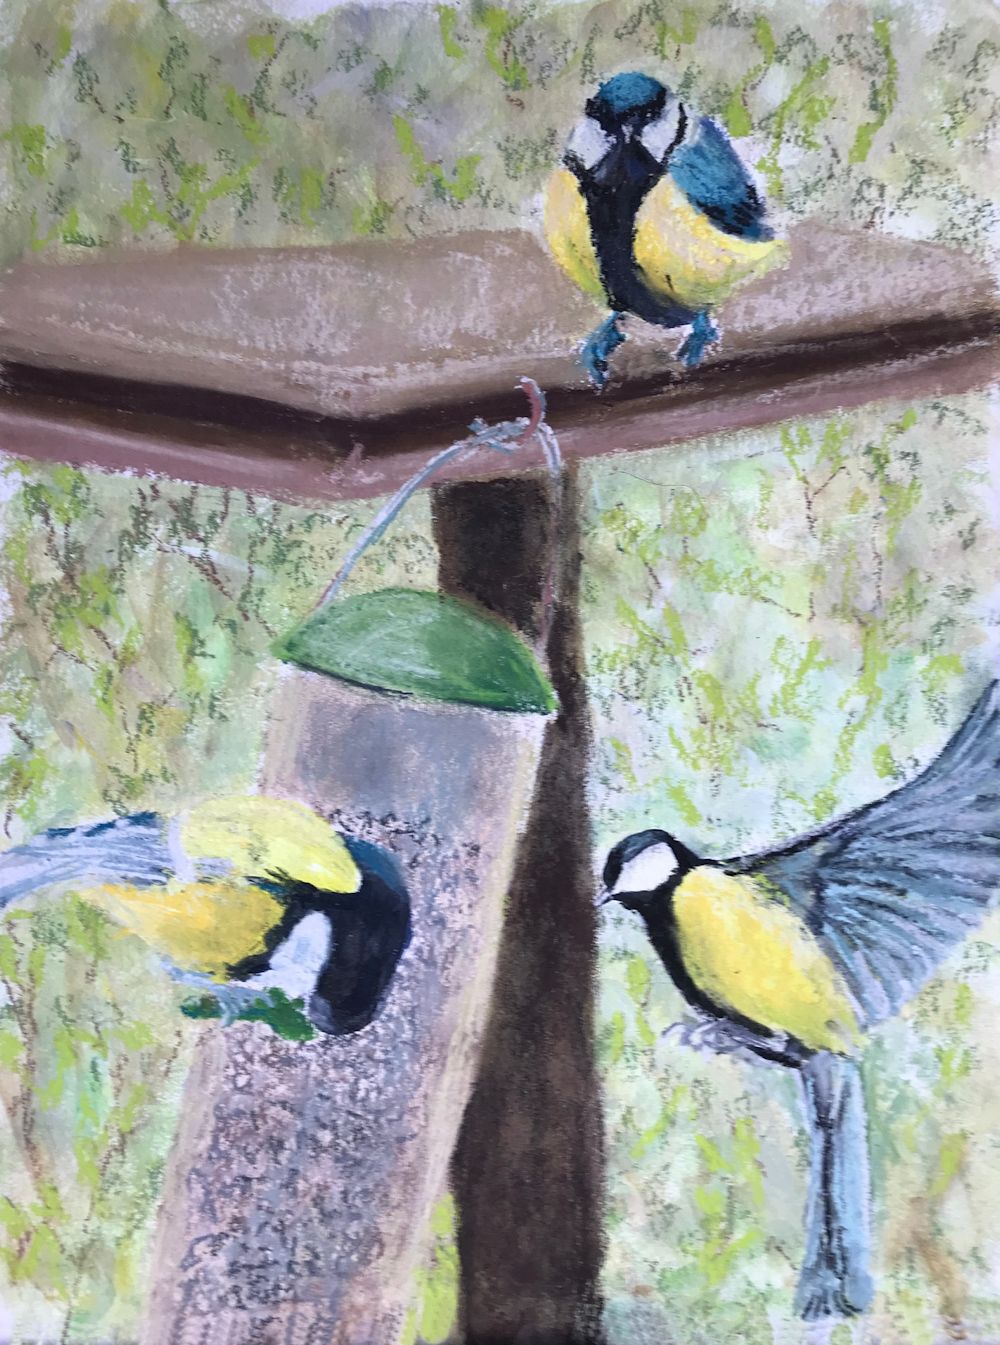
Mixed media by Mali
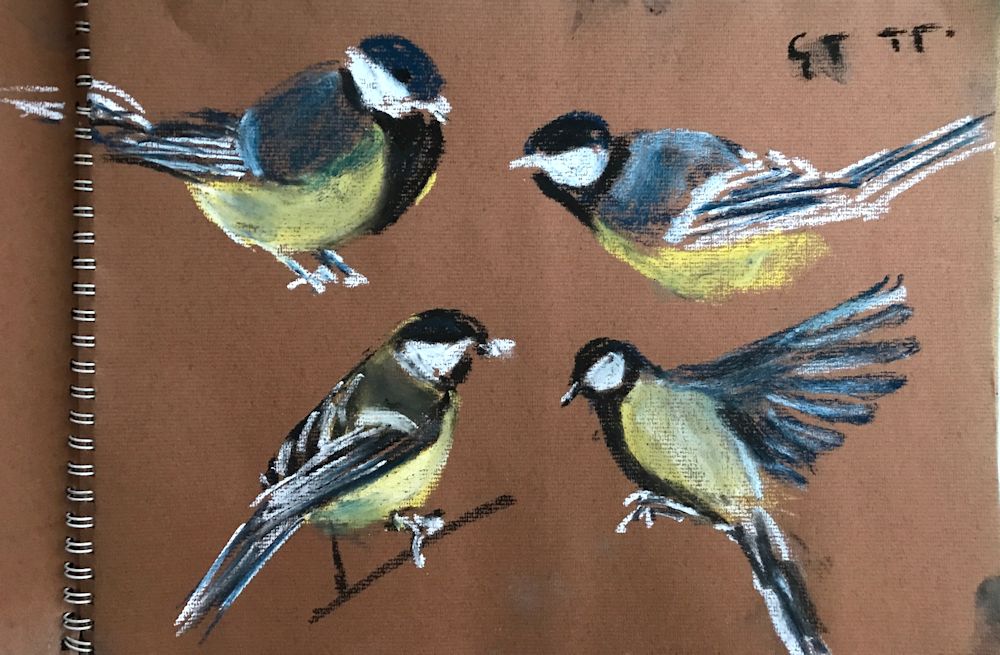
Pastel sketches by Mali
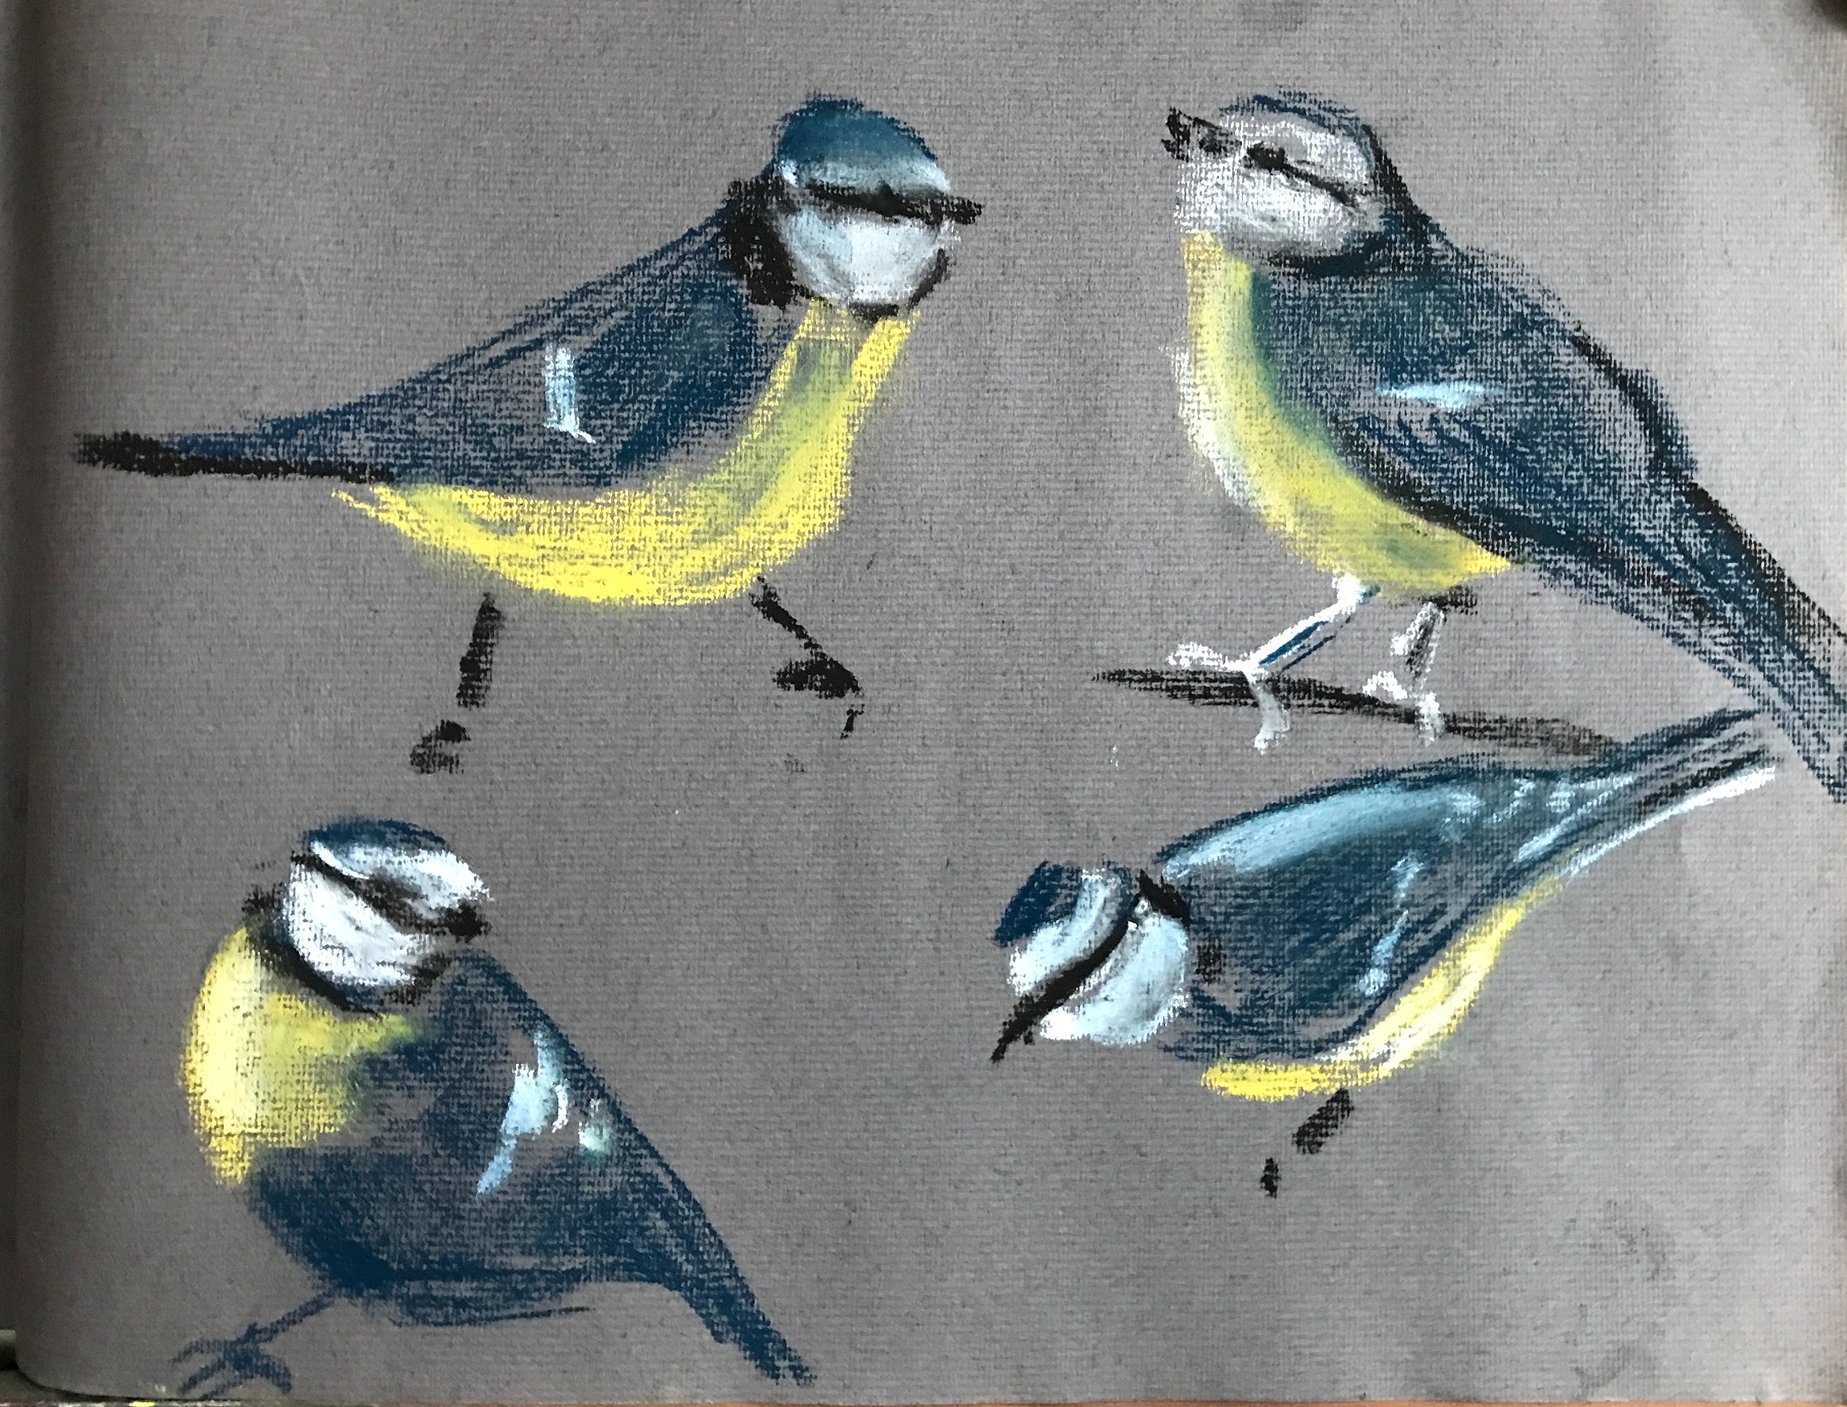
Pastel sketches by Mali
Acrylic by Pam
Acrylic by Pam
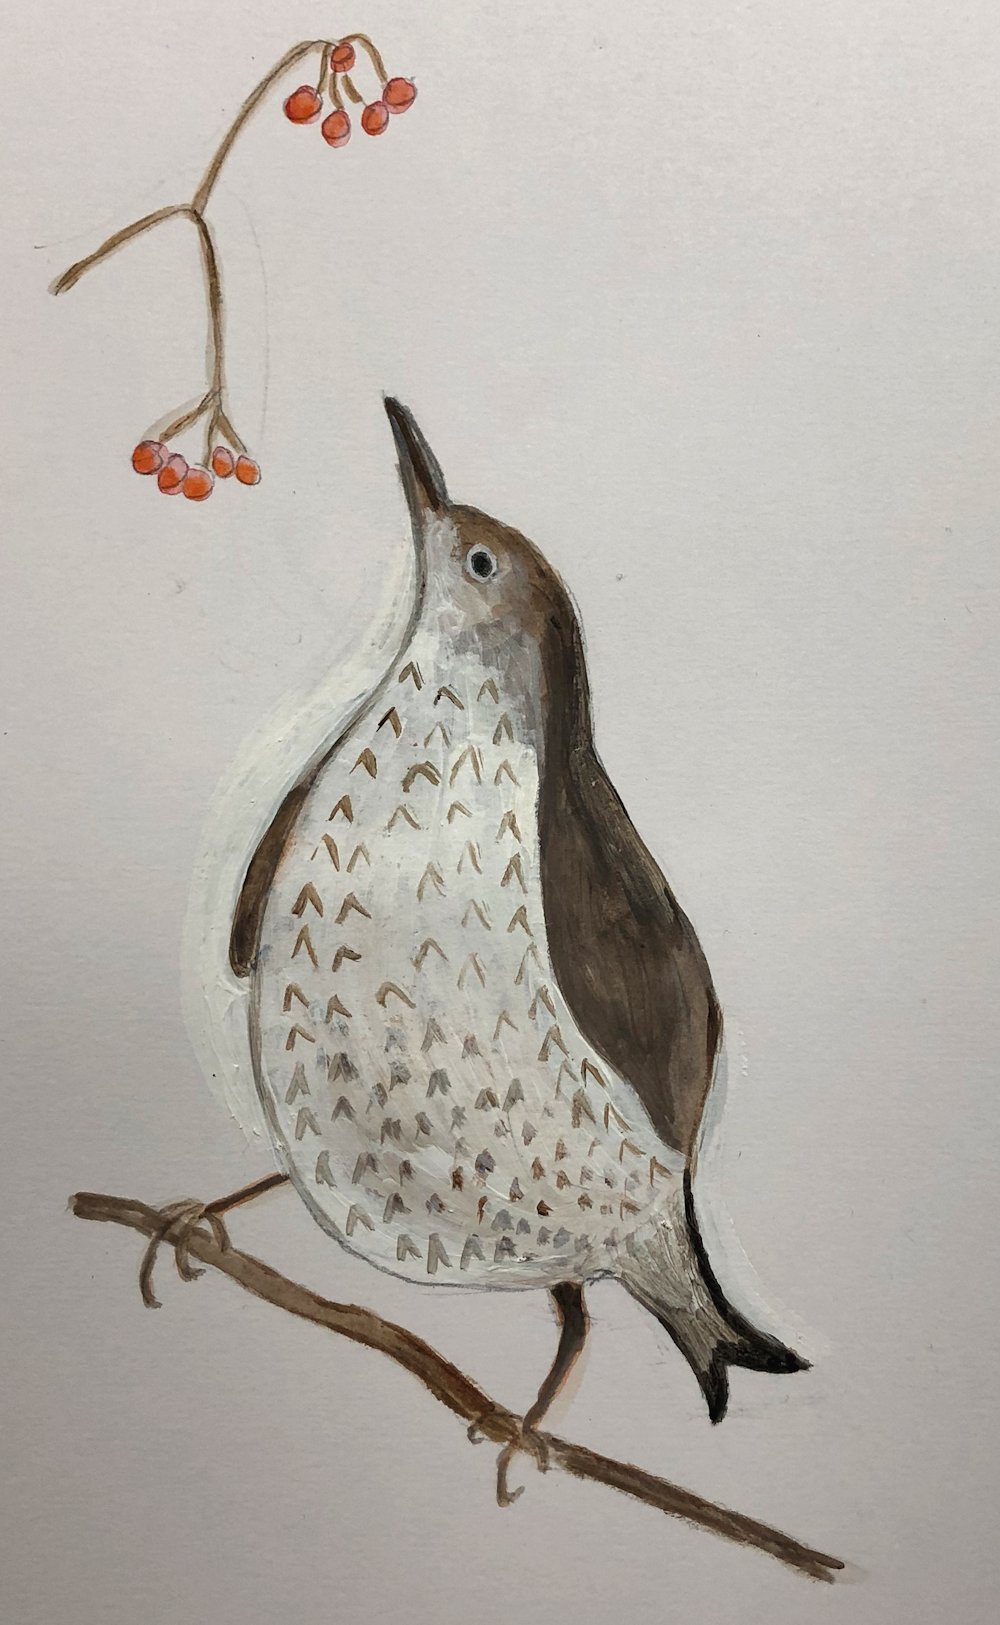
Watercolour by Ann
Watercolour by Kate
Birds in the Garden: Week2
November 10, 2022
Pencil and watercolour sketches by Jo
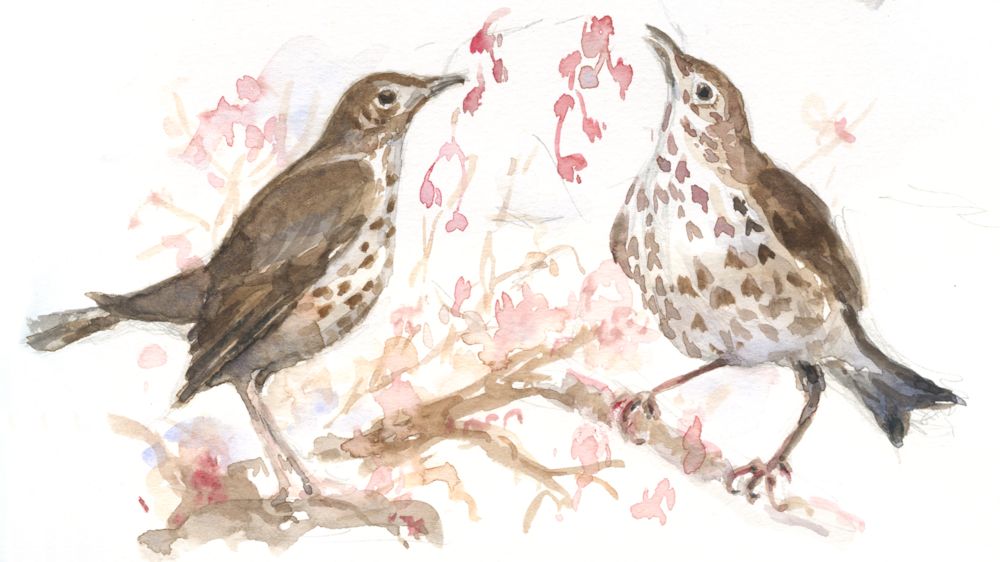
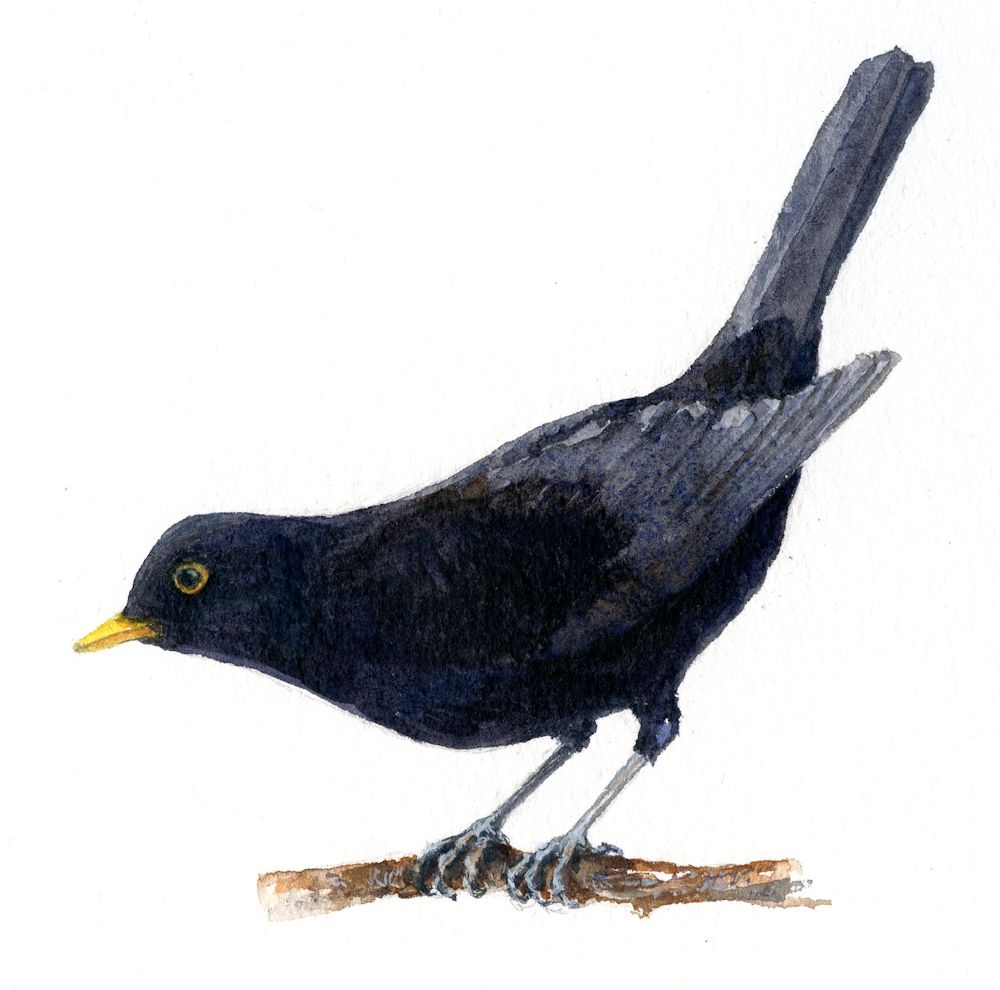
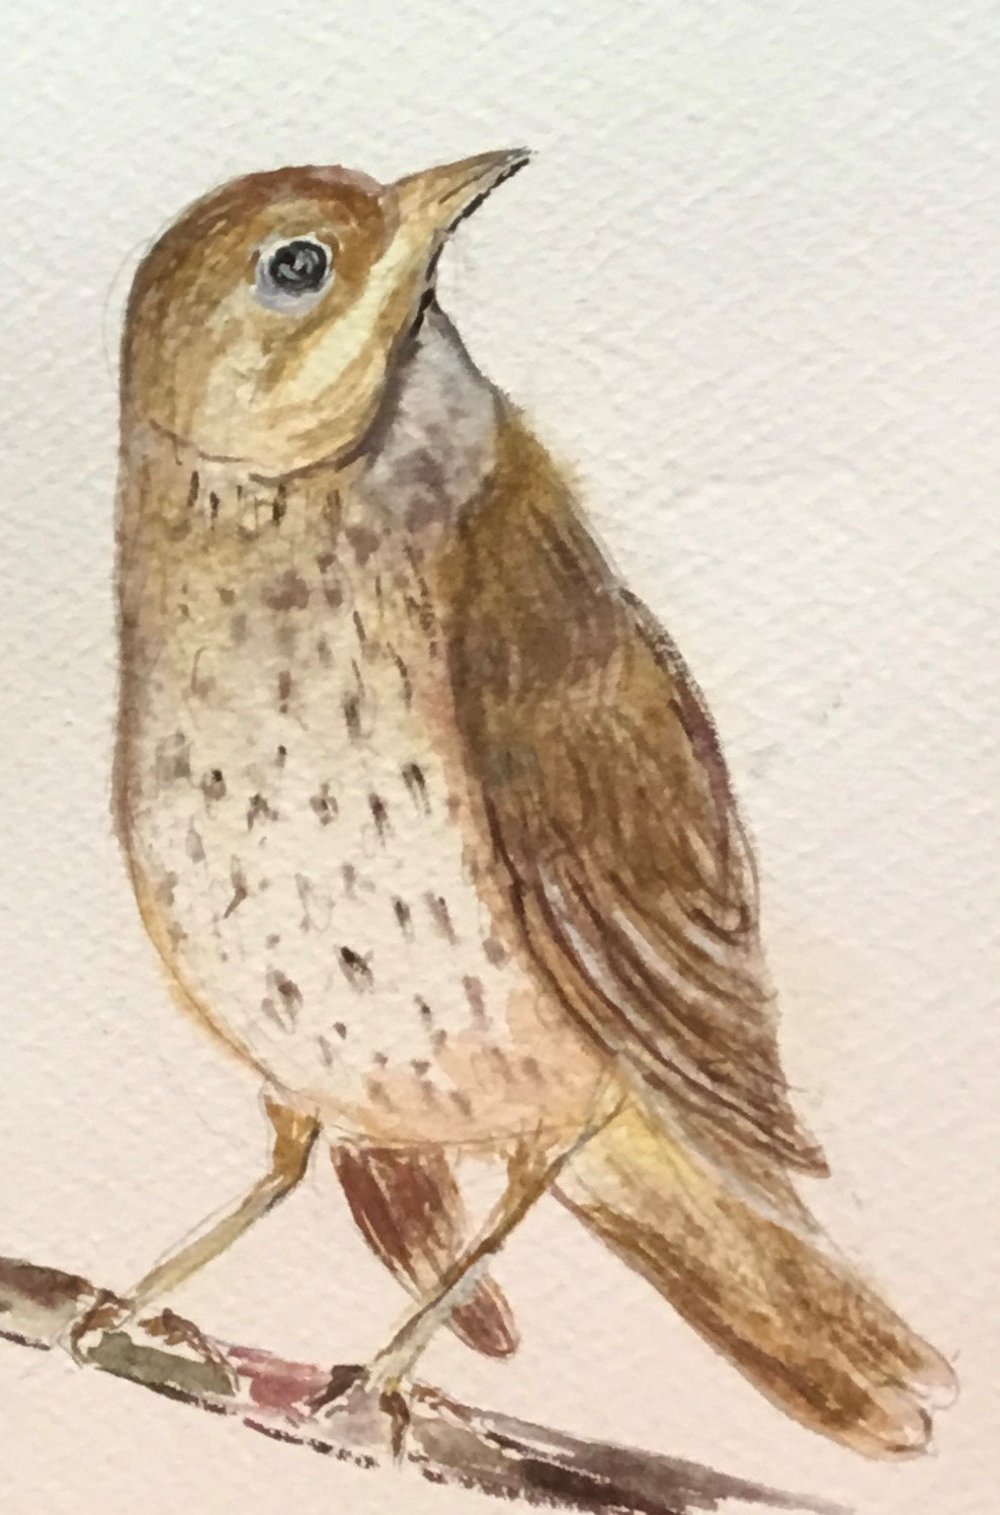
This week we will be looking at Blackbirds and the Song Thrush, just as familiar to us as the Robin and Wren. Biologically they belong to the same family and both have a similar and much longer body shape than the very compact wren and robin. I have drawn blackbirds from life but the ones above and below were hasty sketches in pencil from photos, livened up with some watercolour washes. Apart from drawing a more elongated form the main challenge in painting the blackbird is that it is completely black! This means more attention to tones and how the light is falling on the bird. Often they can look like a silhouette against a pale background.
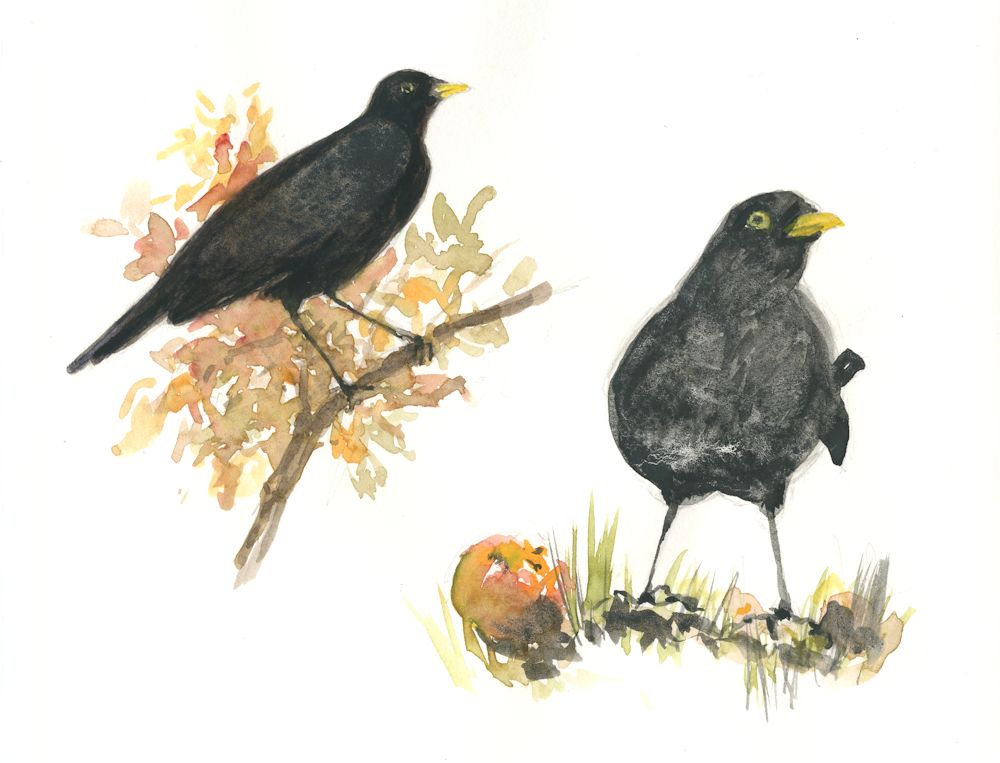
Pencil and watercolour sketches by Jo
In watercolour the paler areas will be more lightly washed. With acrylic or oil you will be mixing greys and should take care that they don’t look too chalky. You may like to experiment making black with mixes of blue and brown. I did that with the first image and then went in with some Payne’s Grey which resulted in a warmer feel. As these were on cartridge paper and some of the washes were quite wet they were not as controlable as on watercolour paper, but as in the rapid sketches we made last week the aim was to capture the body shape and some characteristic poses. Studies like these are perfectly adequate as a reference when for instance the artist wishes to include birds in a landscape painting or birds feasting on the last of the berries or apples before winter sets in. Even in these sketches I did include the yellow ring round the blackbird’s eye.
For a more detailed study of a blackbird where the artist wishes to illustrate the wing feathers and the shiny black eye surrounded by a narrow yellow rim with more definition, some different strategies are needed. There is no one right way but you may like to try the following;
1.Watercolour: This will be demonstrated at the next session by painting a wing and its feathers, using watercolour and either cold or hot pressed paper. The whole wing will be washed in with tones that reflect the overall tonal values observed. The colour mix can be made from blue plus brown and/or Payne’s Grey. For a female or juvenile bird you will need brown mixes, perhaps with a little blue or even a small amount of red in the mix.
When this is completely dry use a small(tiny) brush to apply an appropriate paler grey mix made with opaque white gouache to the edges of the feathers where they catch the light. This requires time and patience and there will be places where the feathers are better just suggested and others where more definite marks will be needed. Very often once dry a little blending may be needed to soften some lines. Another way would be to lift out the lines with a moist brush.
For paler and more colourful birds try applying a pale tonal wash over the shadow areas(usually a blueish grey mix). Then instead of adding the paler stripes you can paint the feathers one by one leaving dry paler or untouched paper below. Will try to demonstrate this for the thrush or wren drawn last week. This method also works well for birds like tits and finches where it is only needed for limited areas. For a detailed account of this look at
https://www.youtube.com/watch?v=-YCuDNFcFz8
Watercolour Birds Part 1: U-tube video by John Muir Laws; a bit long but excellent
2.Acrylic: You will need similar colours to paint the main areas of the wing first except that you will be varying the tone by adding white. Also look closely at the wing feathers, sometimes the wing coverts are a slightly different tone or hue to the flight feathers. The wing of a female bird is browner and may show more variation n colour. Again think about where it is essential to show feather edges and where a suggested texture is desirable, then mix up a suitable colour and apply lines for the individual feathers with a small brush.
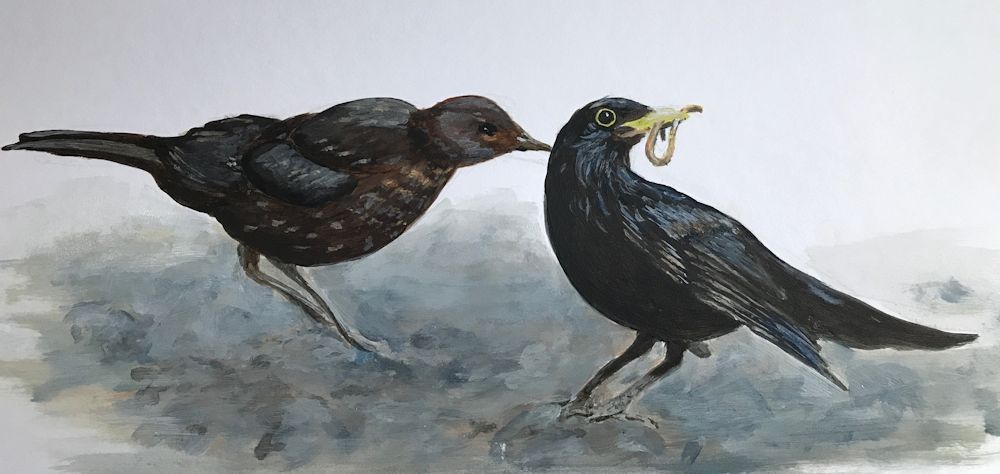
During the session we will make rapid sketches of the blackbird and the song thrush. Strategies for painting feathers will be discussed and demonstrated and we’ll talk about the markings on the front of the thrush. Note that the thrush is a slightly smaller and slimmer bird and although it doesn’t have the yellow rim the blackbird has around around its eye, the thrush eyes appear a little larger and have a surround that is very pale.
Blackbird pictures can be found at
https://www.pinterest.co.uk/jhall1282/birds-in-art-and-photos/blackbird-photos/
Thrush pictures can be found at
https://www.pinterest.co.uk/jhall1282/birds-in-art-and-photos/thrush-photos/
At any stage after the warm up sketches feel free to start your own study of a wing, or a picture that includes blackbirds or a song thrush. You may like to paint a few blackbirds at the base of a tree picking up worms or pecking at apples.
Your paintings:
Acrylic by Mali

by Ann
by Ann
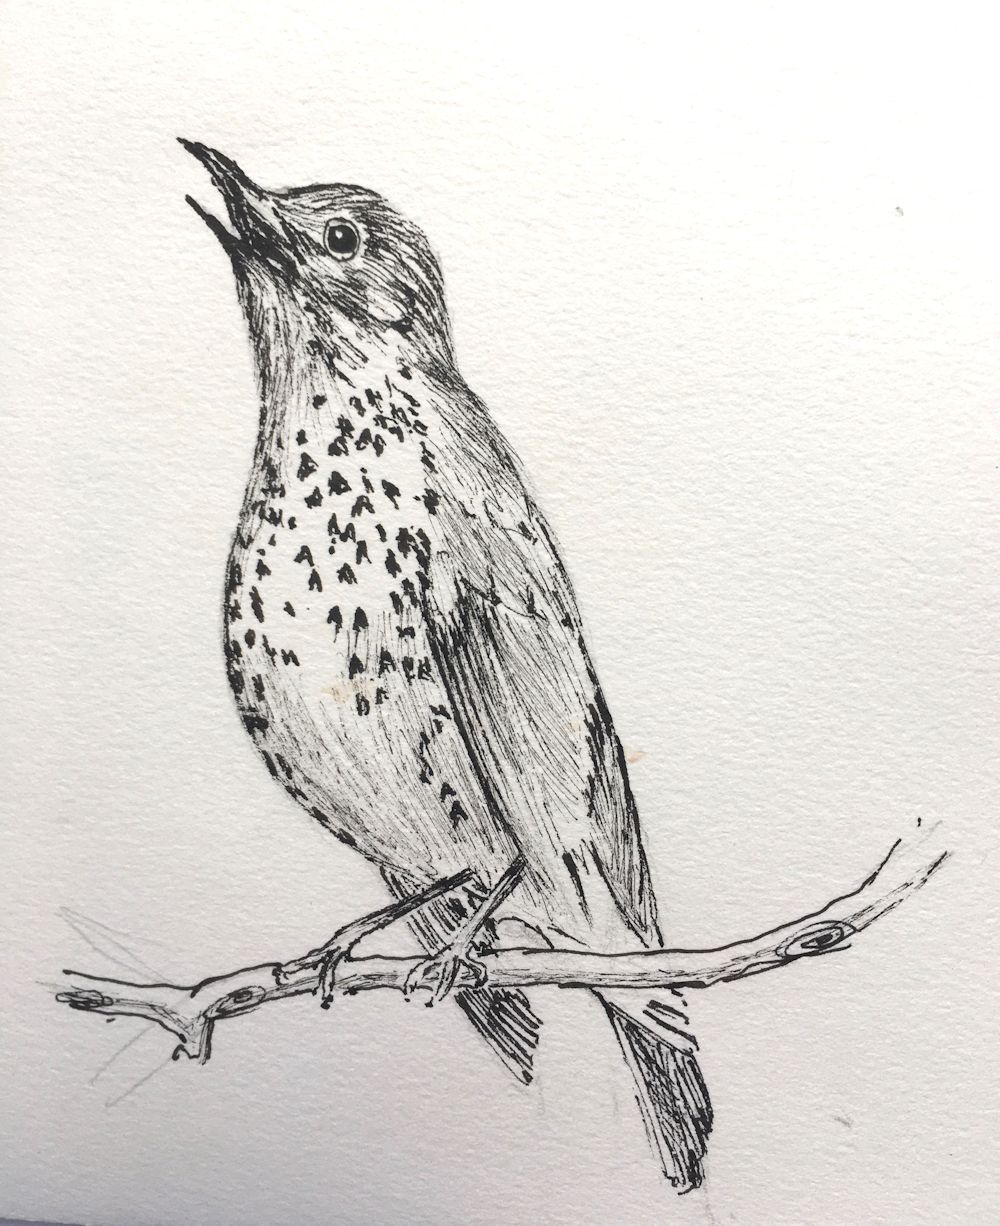
Drawing by Kate
Drawing by Kate
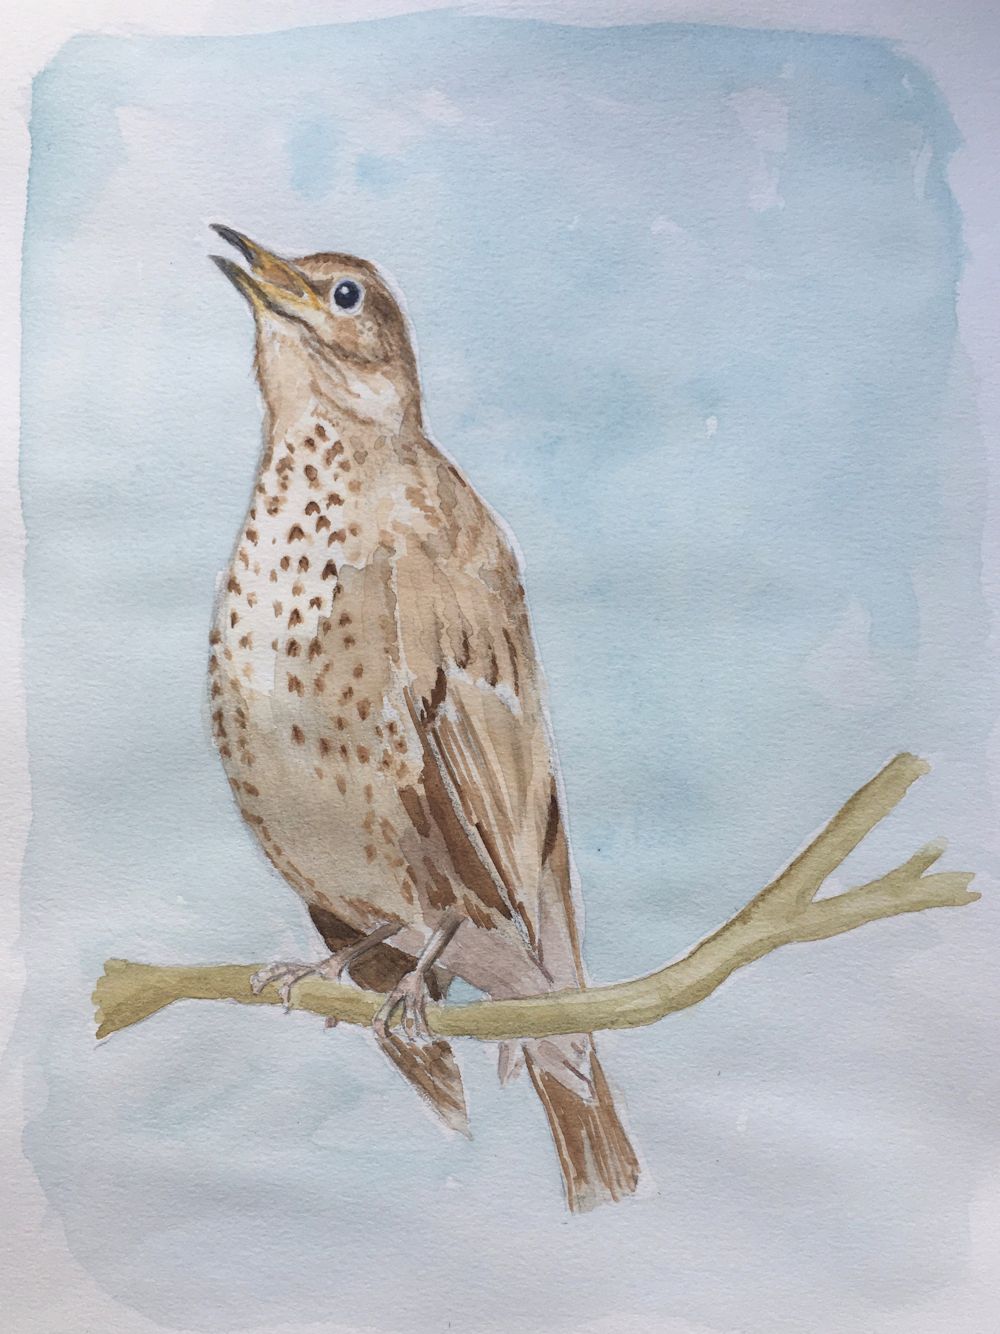
Watercolour by Kate
Watercolour by Pam
Acrylic by Pam
Pen and Ink by Heather
Watercolour by Heather
Birds in the Garden: Week 1
November 2, 2022
This first week we’ll start by sketching a few bird shapes. Some like the Wren and Blue Tit are rather round and compact whereas the Song Thrush and Blackbird have a rather longer more elegant shape. I love the way a blackbird can turn its head. If you can, take time to watch the birds in your garden. With the cooler weather we often have several Blackbirds pecking away at the last of the apples on the ground. If you are quick enough you can doodle a gestural line or two in a sketchbook while you watch them. With practice you will soon be able to draw their body shapes turning and twisting among the fruit.
It’s easier of course to draw from photos, but if you work fast from birds in very different poses by direct observation or from photos you will learn how to make your drawing appear lively and not laboured. With fast sketches we can record the direction of movement rather than detail, the body shape as the bird moves, and the balance it achieves whether perching on a branch or hopping around on the ground. This is the skill required to include birds in paintings of gardens where several birds may make a huge presence but only occupy a tiny area of the composition.
At the other end of the scale, and this is where photo-reference can be invaluable, the artist may wish to make a detailed portrait of an individual bird or a field sketch noting all the characteristic markings and colour of a particular species. Some examples of these can be seen on the Pinterest Board, link below:
https://www.pinterest.co.uk/jhall1282/birds-in-art-and-photos/small-garden-birds-representational/
In either case observing birds in your garden and how they move will feed into and inform more detailed studies. Garden birds also feature in art in a more narrative and fictional way and some of these paintings and illustrations are shown on the following Pinterest Board, link below
https://www.pinterest.co.uk/jhall1282/birds-in-art-and-photos/birds-with-a-strong-narrative-element/
Observation points; you may not be able to observe all of these in any one view.
First look at the following Wren and Robin boards:
https://www.pinterest.co.uk/jhall1282/birds-in-art-and-photos/wren-photos/
https://www.pinterest.co.uk/jhall1282/birds-in-art-and-photos/robin-photos/
Pay attention to; overall body shape; head and beak; relation of head to body; how upright they stand; see what happens when they turn their head, sing or put their head down; wings and tail shapes and relation to the rest of the body; leg length and how they join the body; feet and their appearance when perching on a branch or on a flat surface; feathers; markings and colour.
Practical
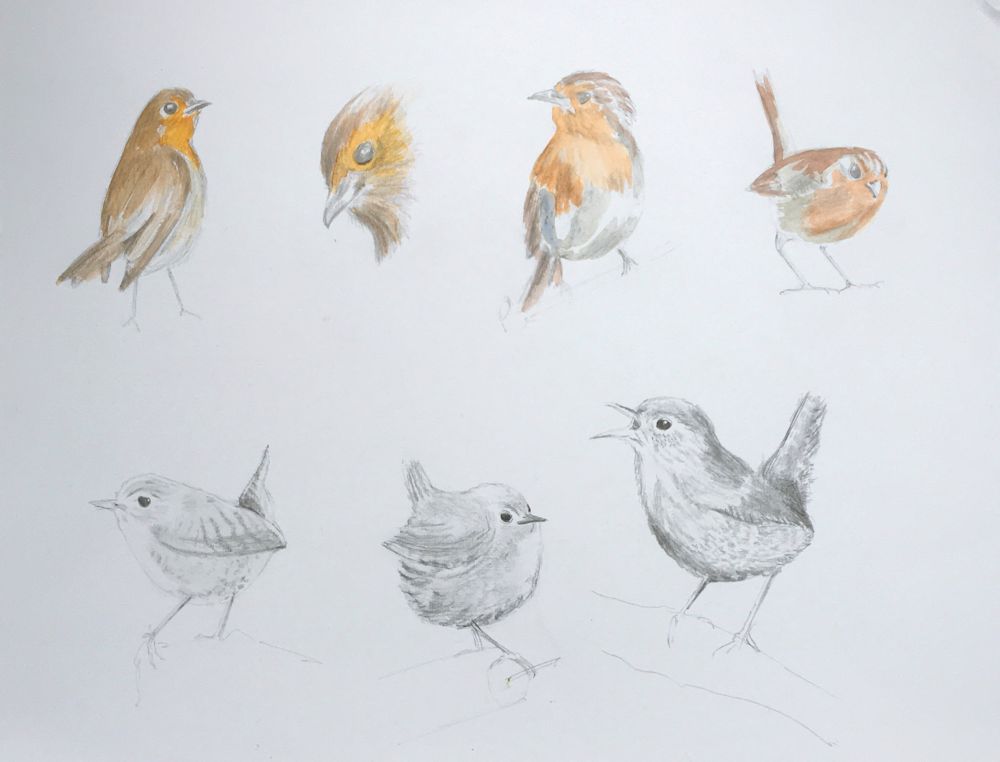
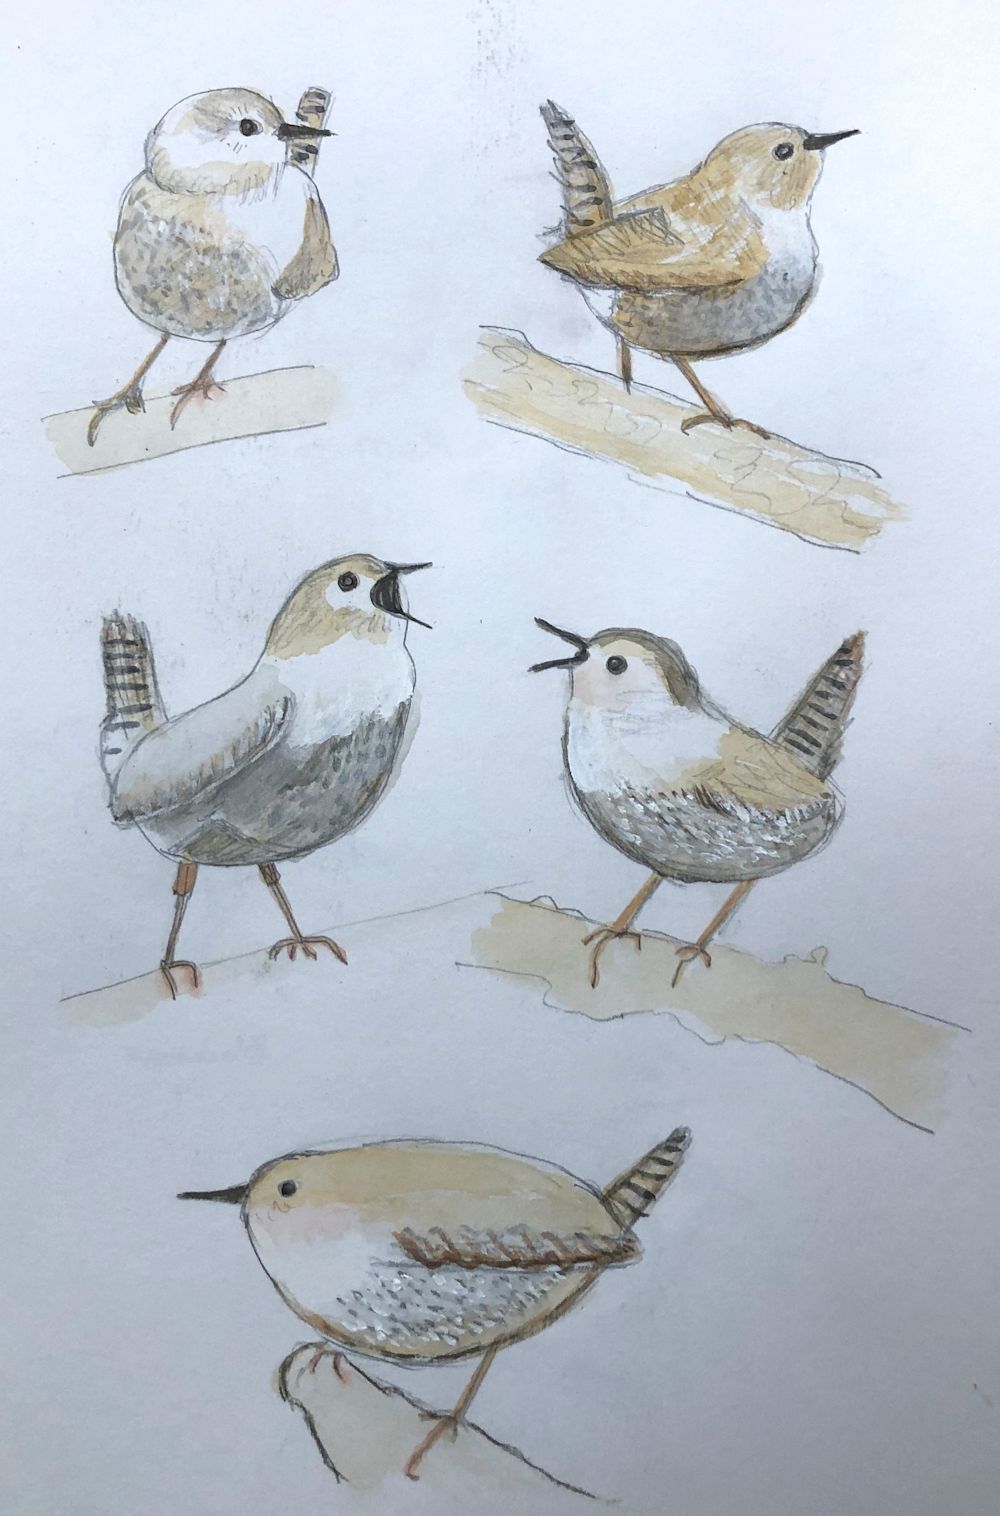
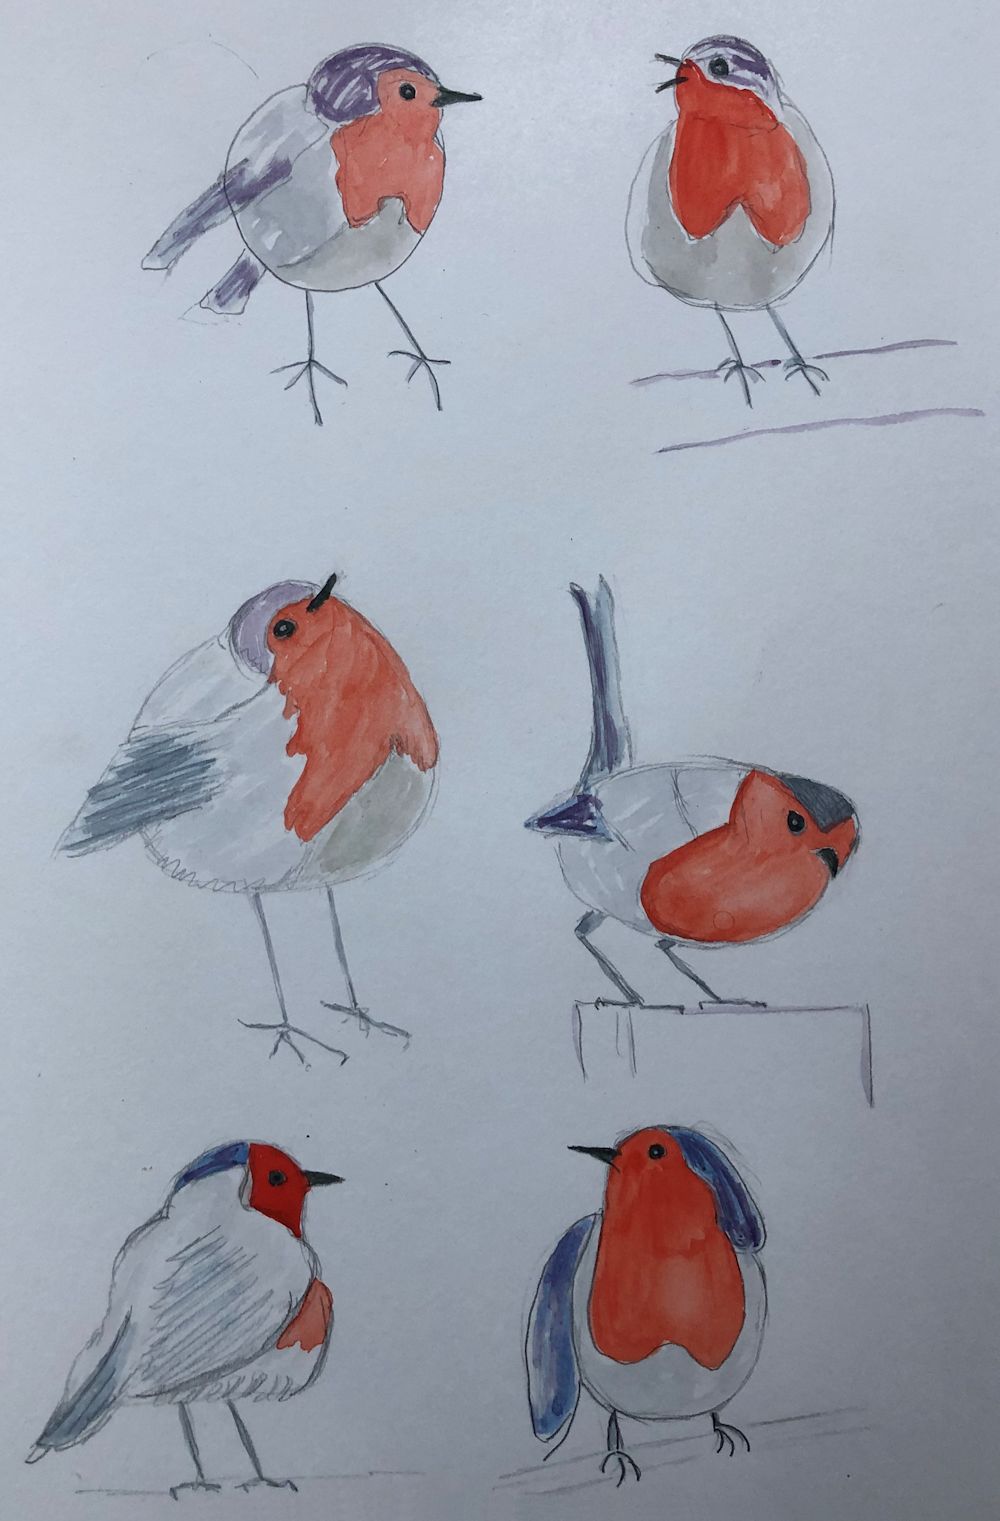
1. Fast Sketches
This week we’ll choose to work from a couple of very small birds, the Robin and the Wren. First of all I’ll share the screen for some rapid sketches of each bird so have a sketchbook and pencil at the ready to draw several birds on the same page.
2. More detailed Studies
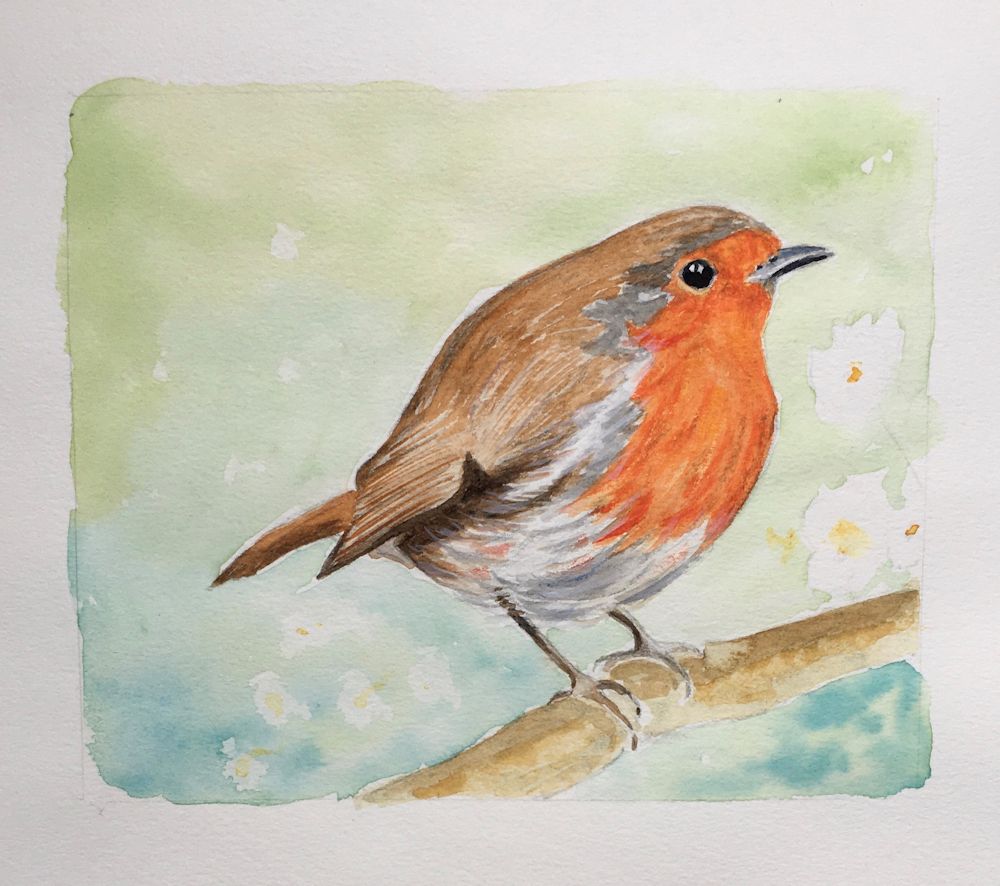
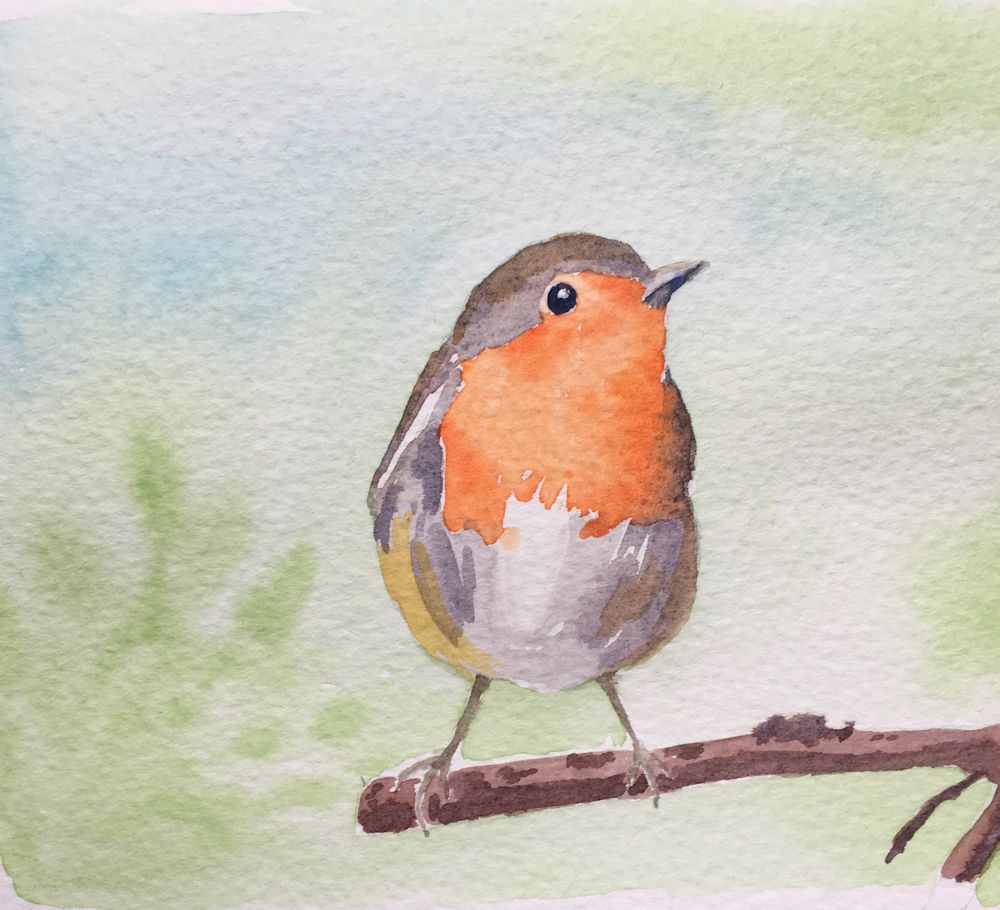
Before the session, find a reference to paint a more detailed study of a Robin or Wren. If you can, start two small paintings during the session and complete them afterwards sending images to me before the following week. In the first painting draw/paint exactly what you see in your reference. In the second study try painting the bird in a different position and change the background using the experience gained from the rapid sketches made earlier.
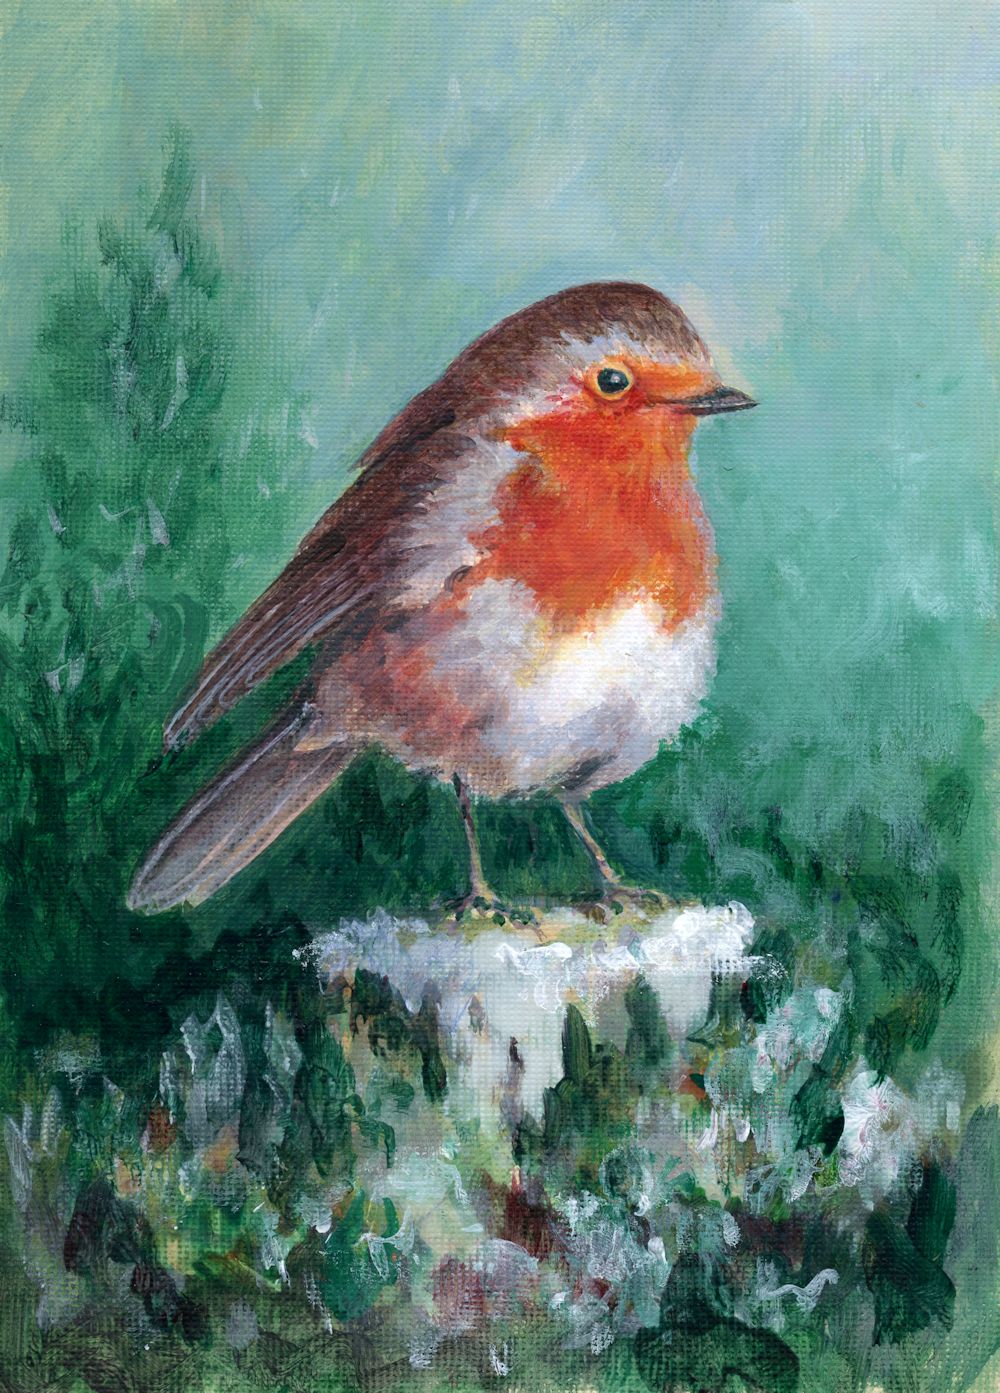
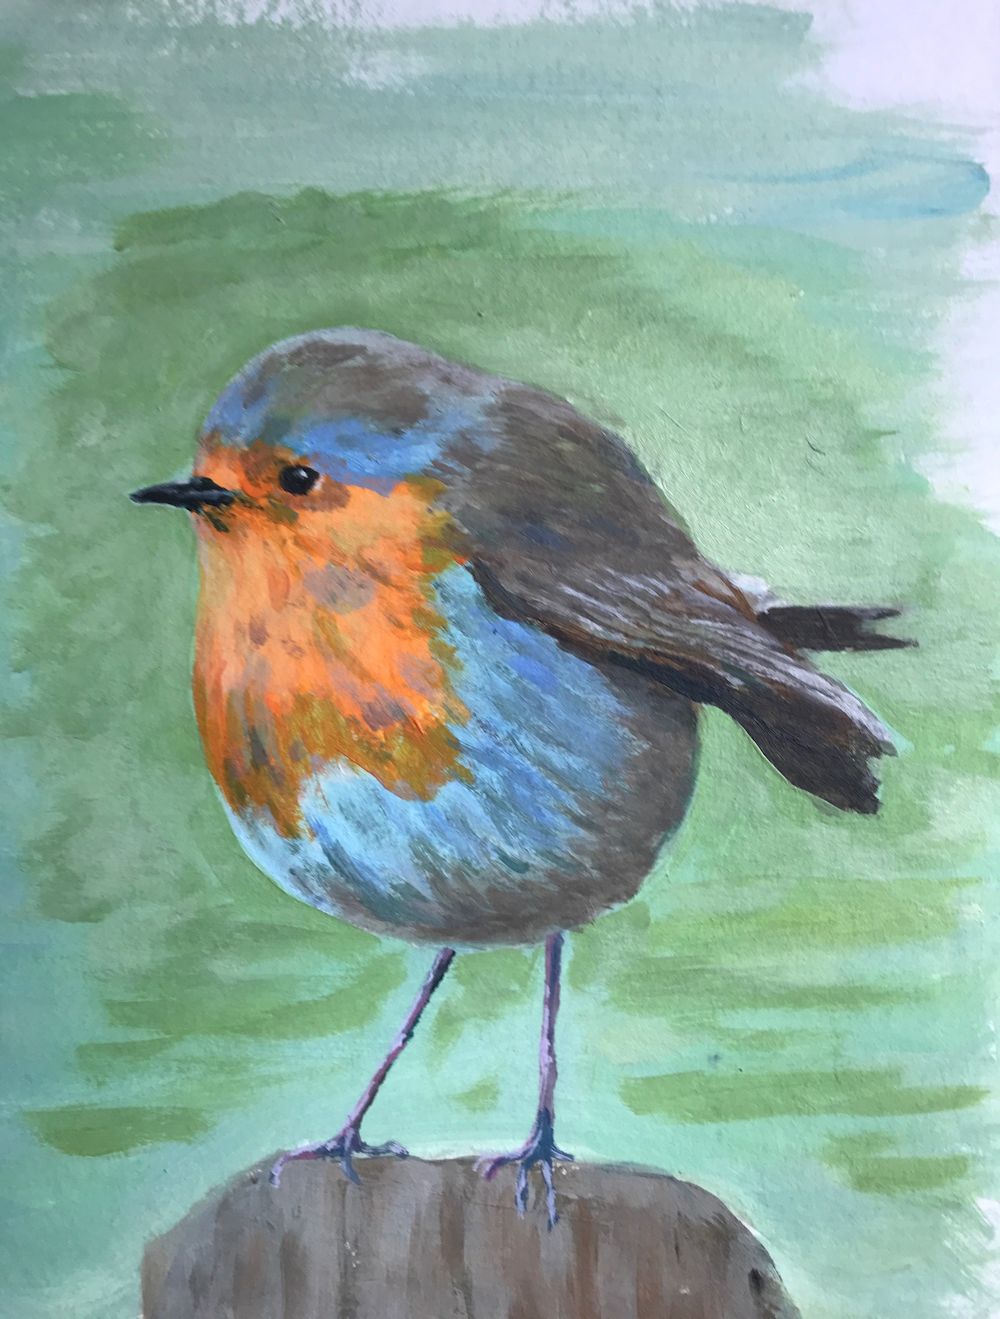
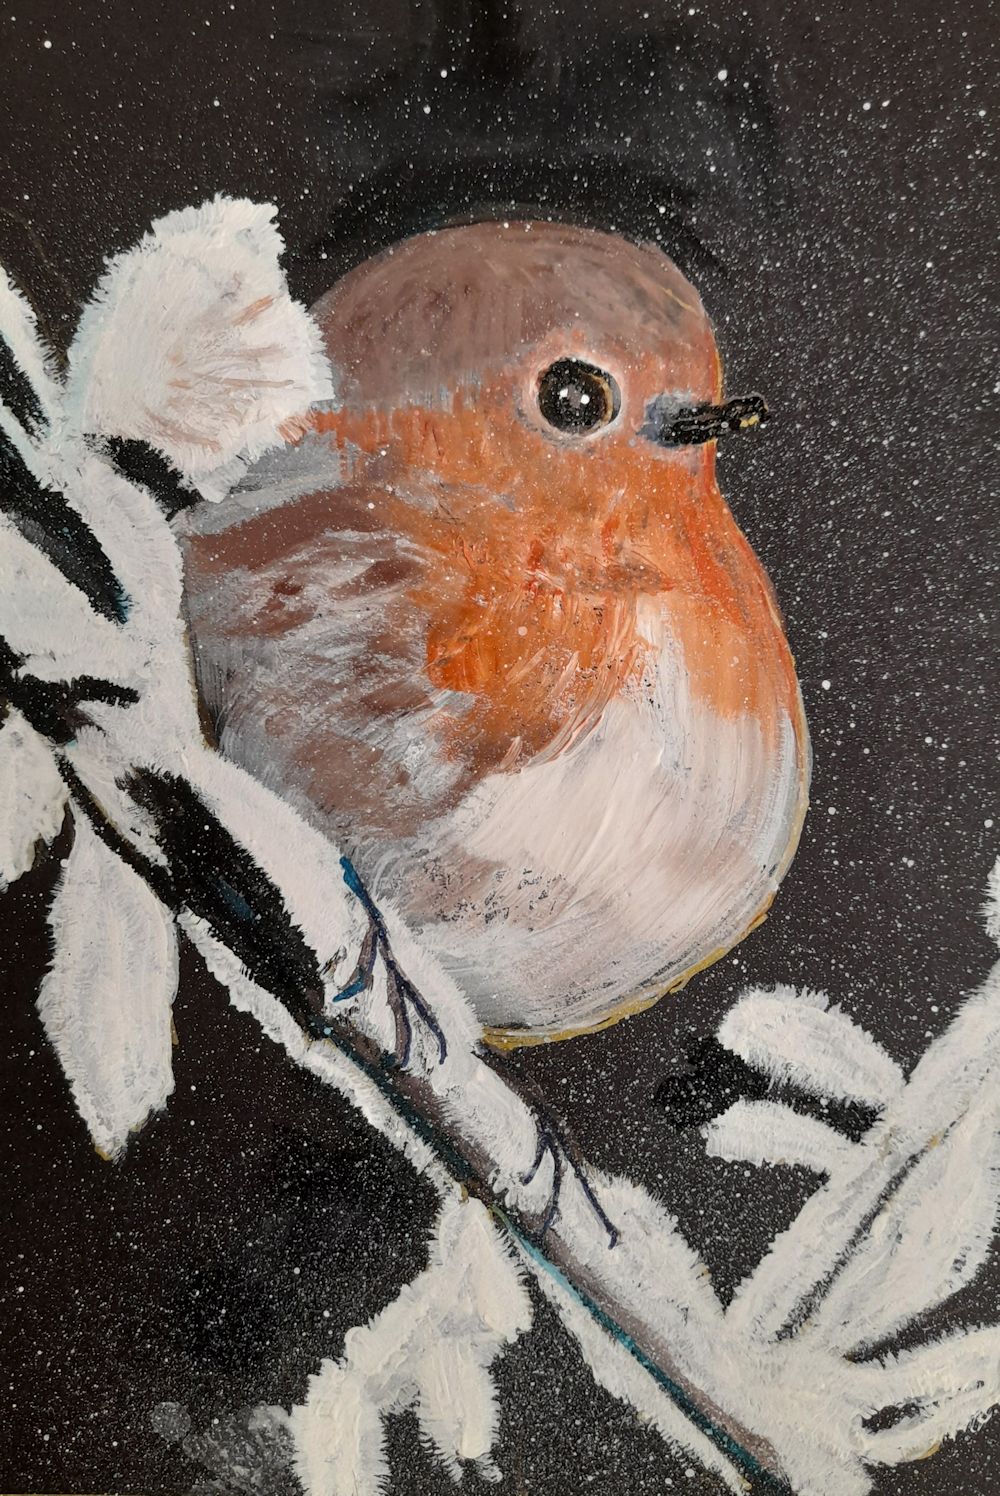
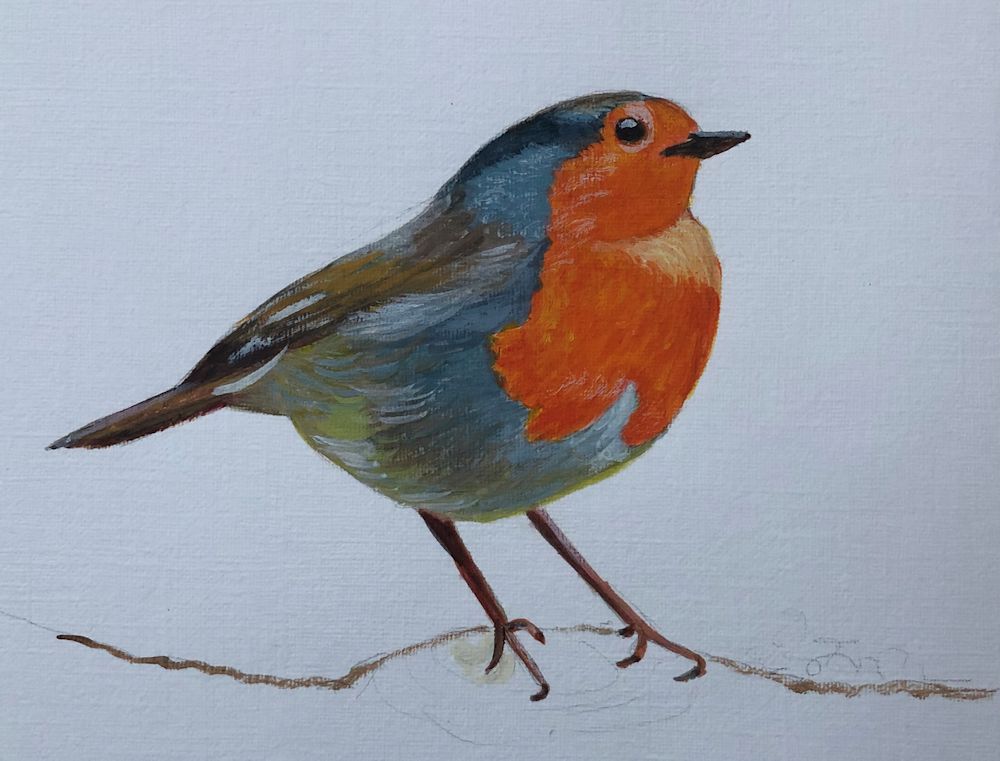
For sketches use any drawing medium with which you can work swiftly; for me at a small scale that would be rather conventionally a pencil! For more detailed studies in colour you may choose any coloured pencil including pastel pencil, which works well with coloured papers, or any painting medium. The Robin heading this post was painted in acrylic but watercolour or gouache would be a favourite for field studies.
Your Paintings:
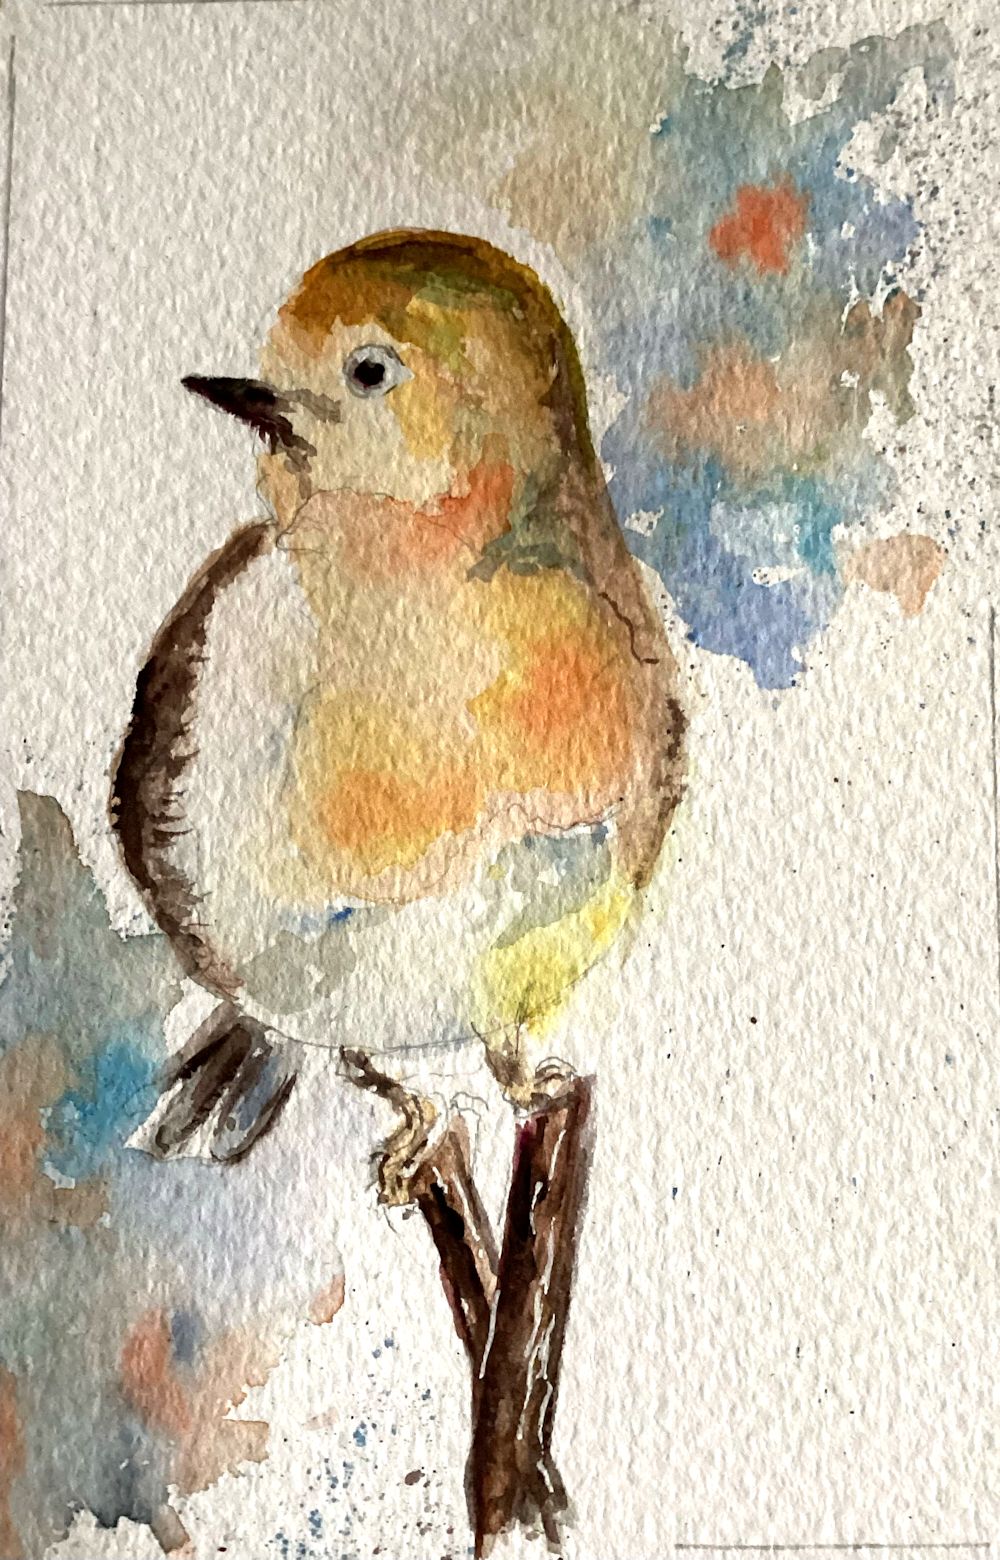
Pencil and Watercolour sketches by Heather
by Heather
by Heather
This time with minimal drawing
Acrylic by Mali
Acrylic by Mali
Sketch by Ann
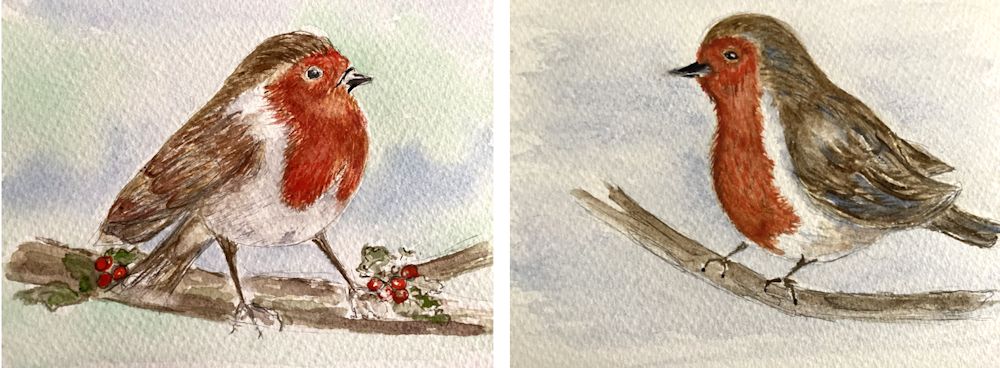
by Ann
Acrylic by Kate
by Pam
by Pam
by Pam